Back
Route Planner
Map Creation
Exping's initial design uses the map as a canvas for unique creativity.
In Route 2.0, we have streamlined the route creation process, offering two options: "Auto Plan" or "Freeform.
Auto Plan: Connect marked places to form a new route or sequentially add locations to create one.
Freeform: Place your finger on the screen, tap, or drag to freely draw your desired route on the map.
How to Create Routes on Map for Easy Route Planning?
How to Use the "Auto Plan" Feature to Plan Your Route?
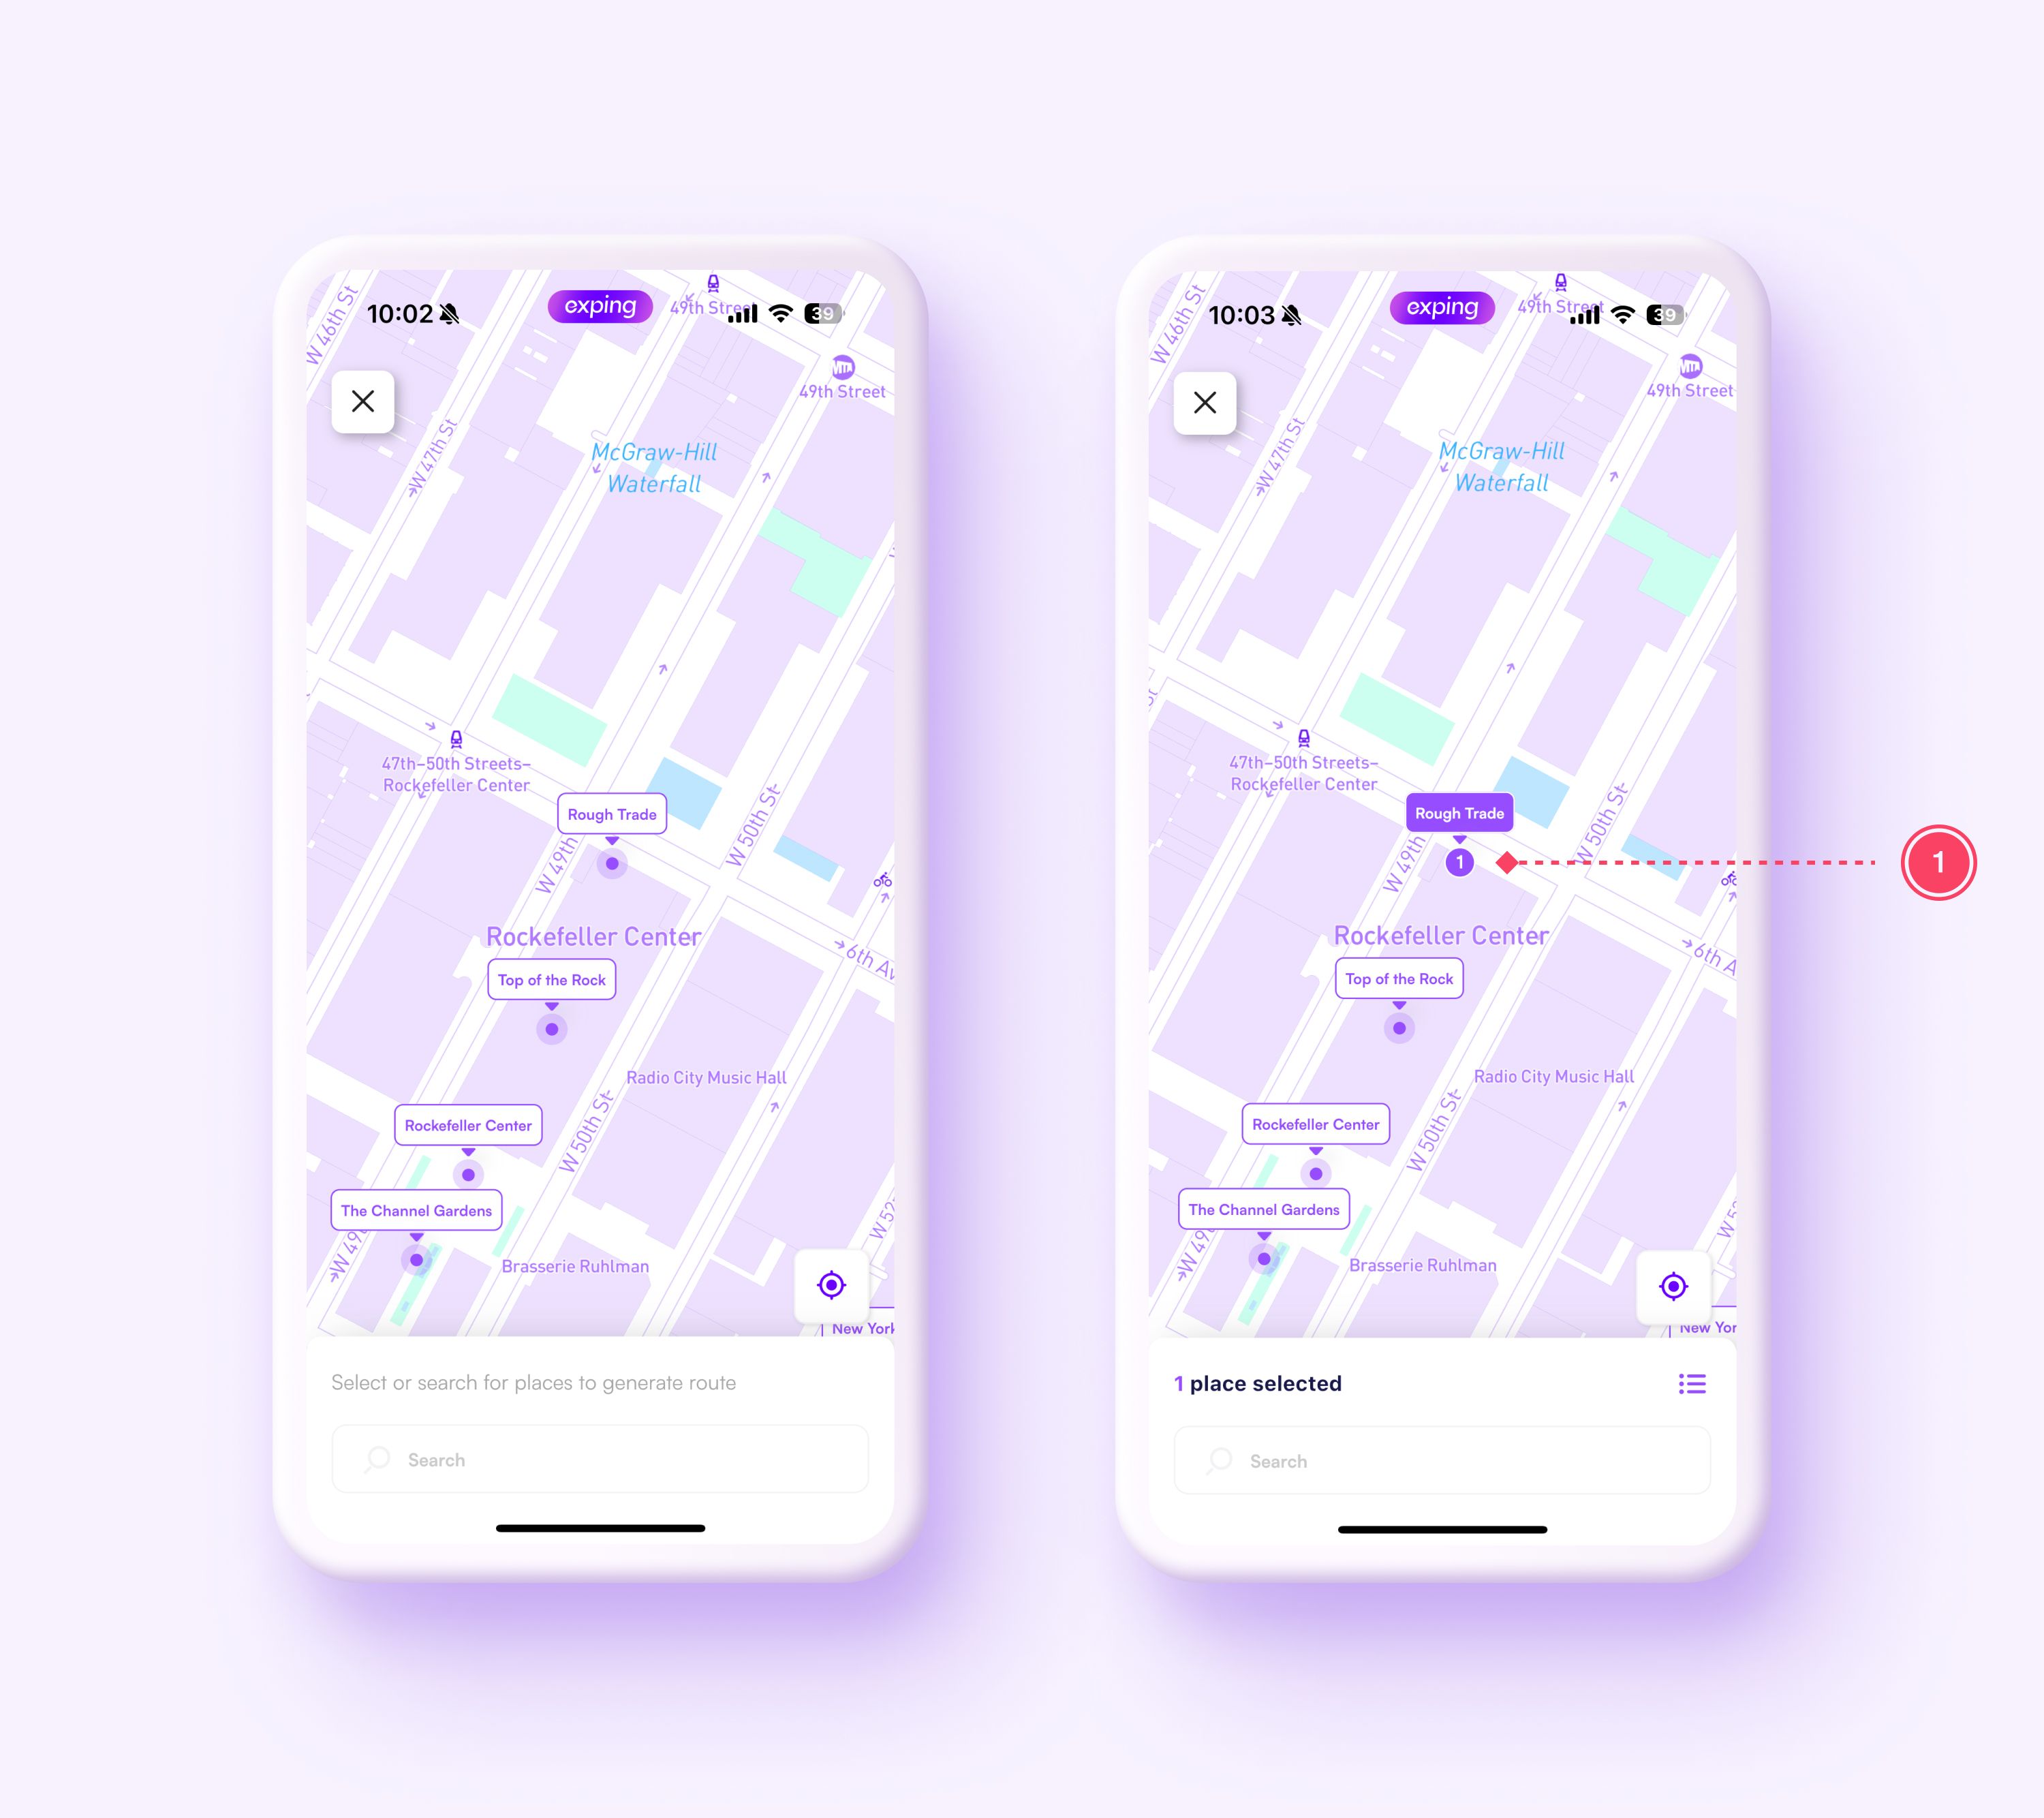
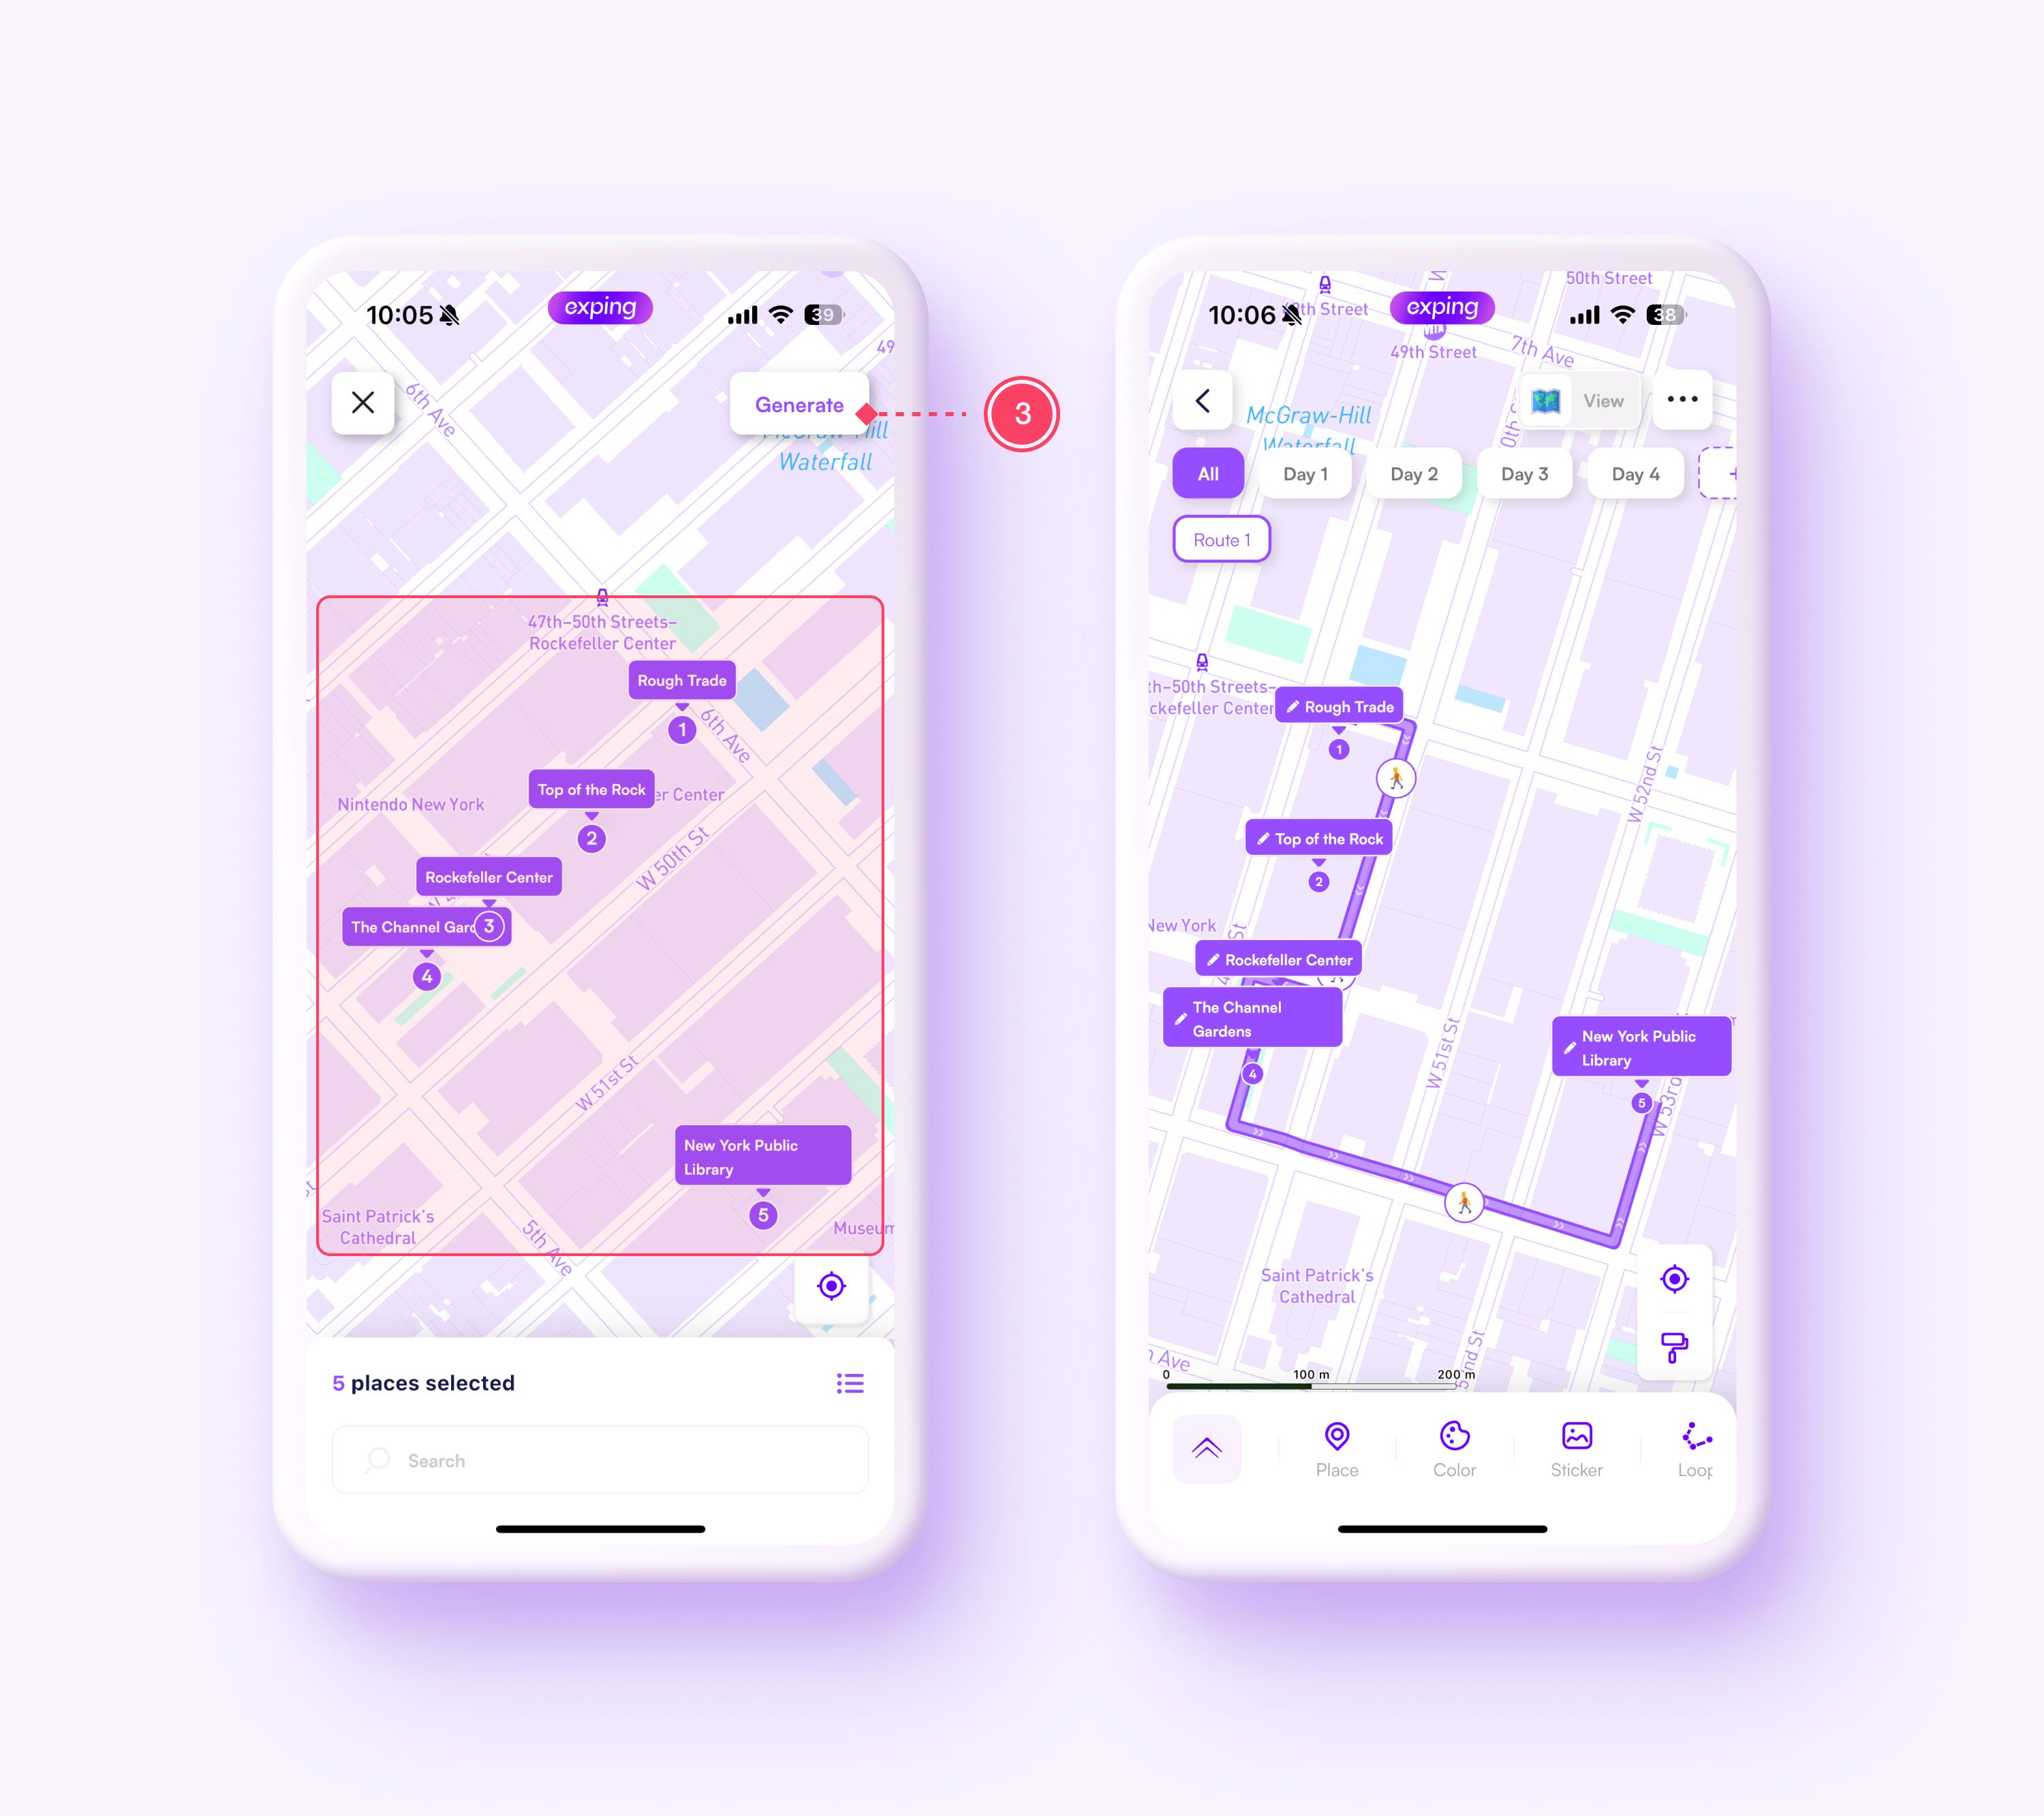
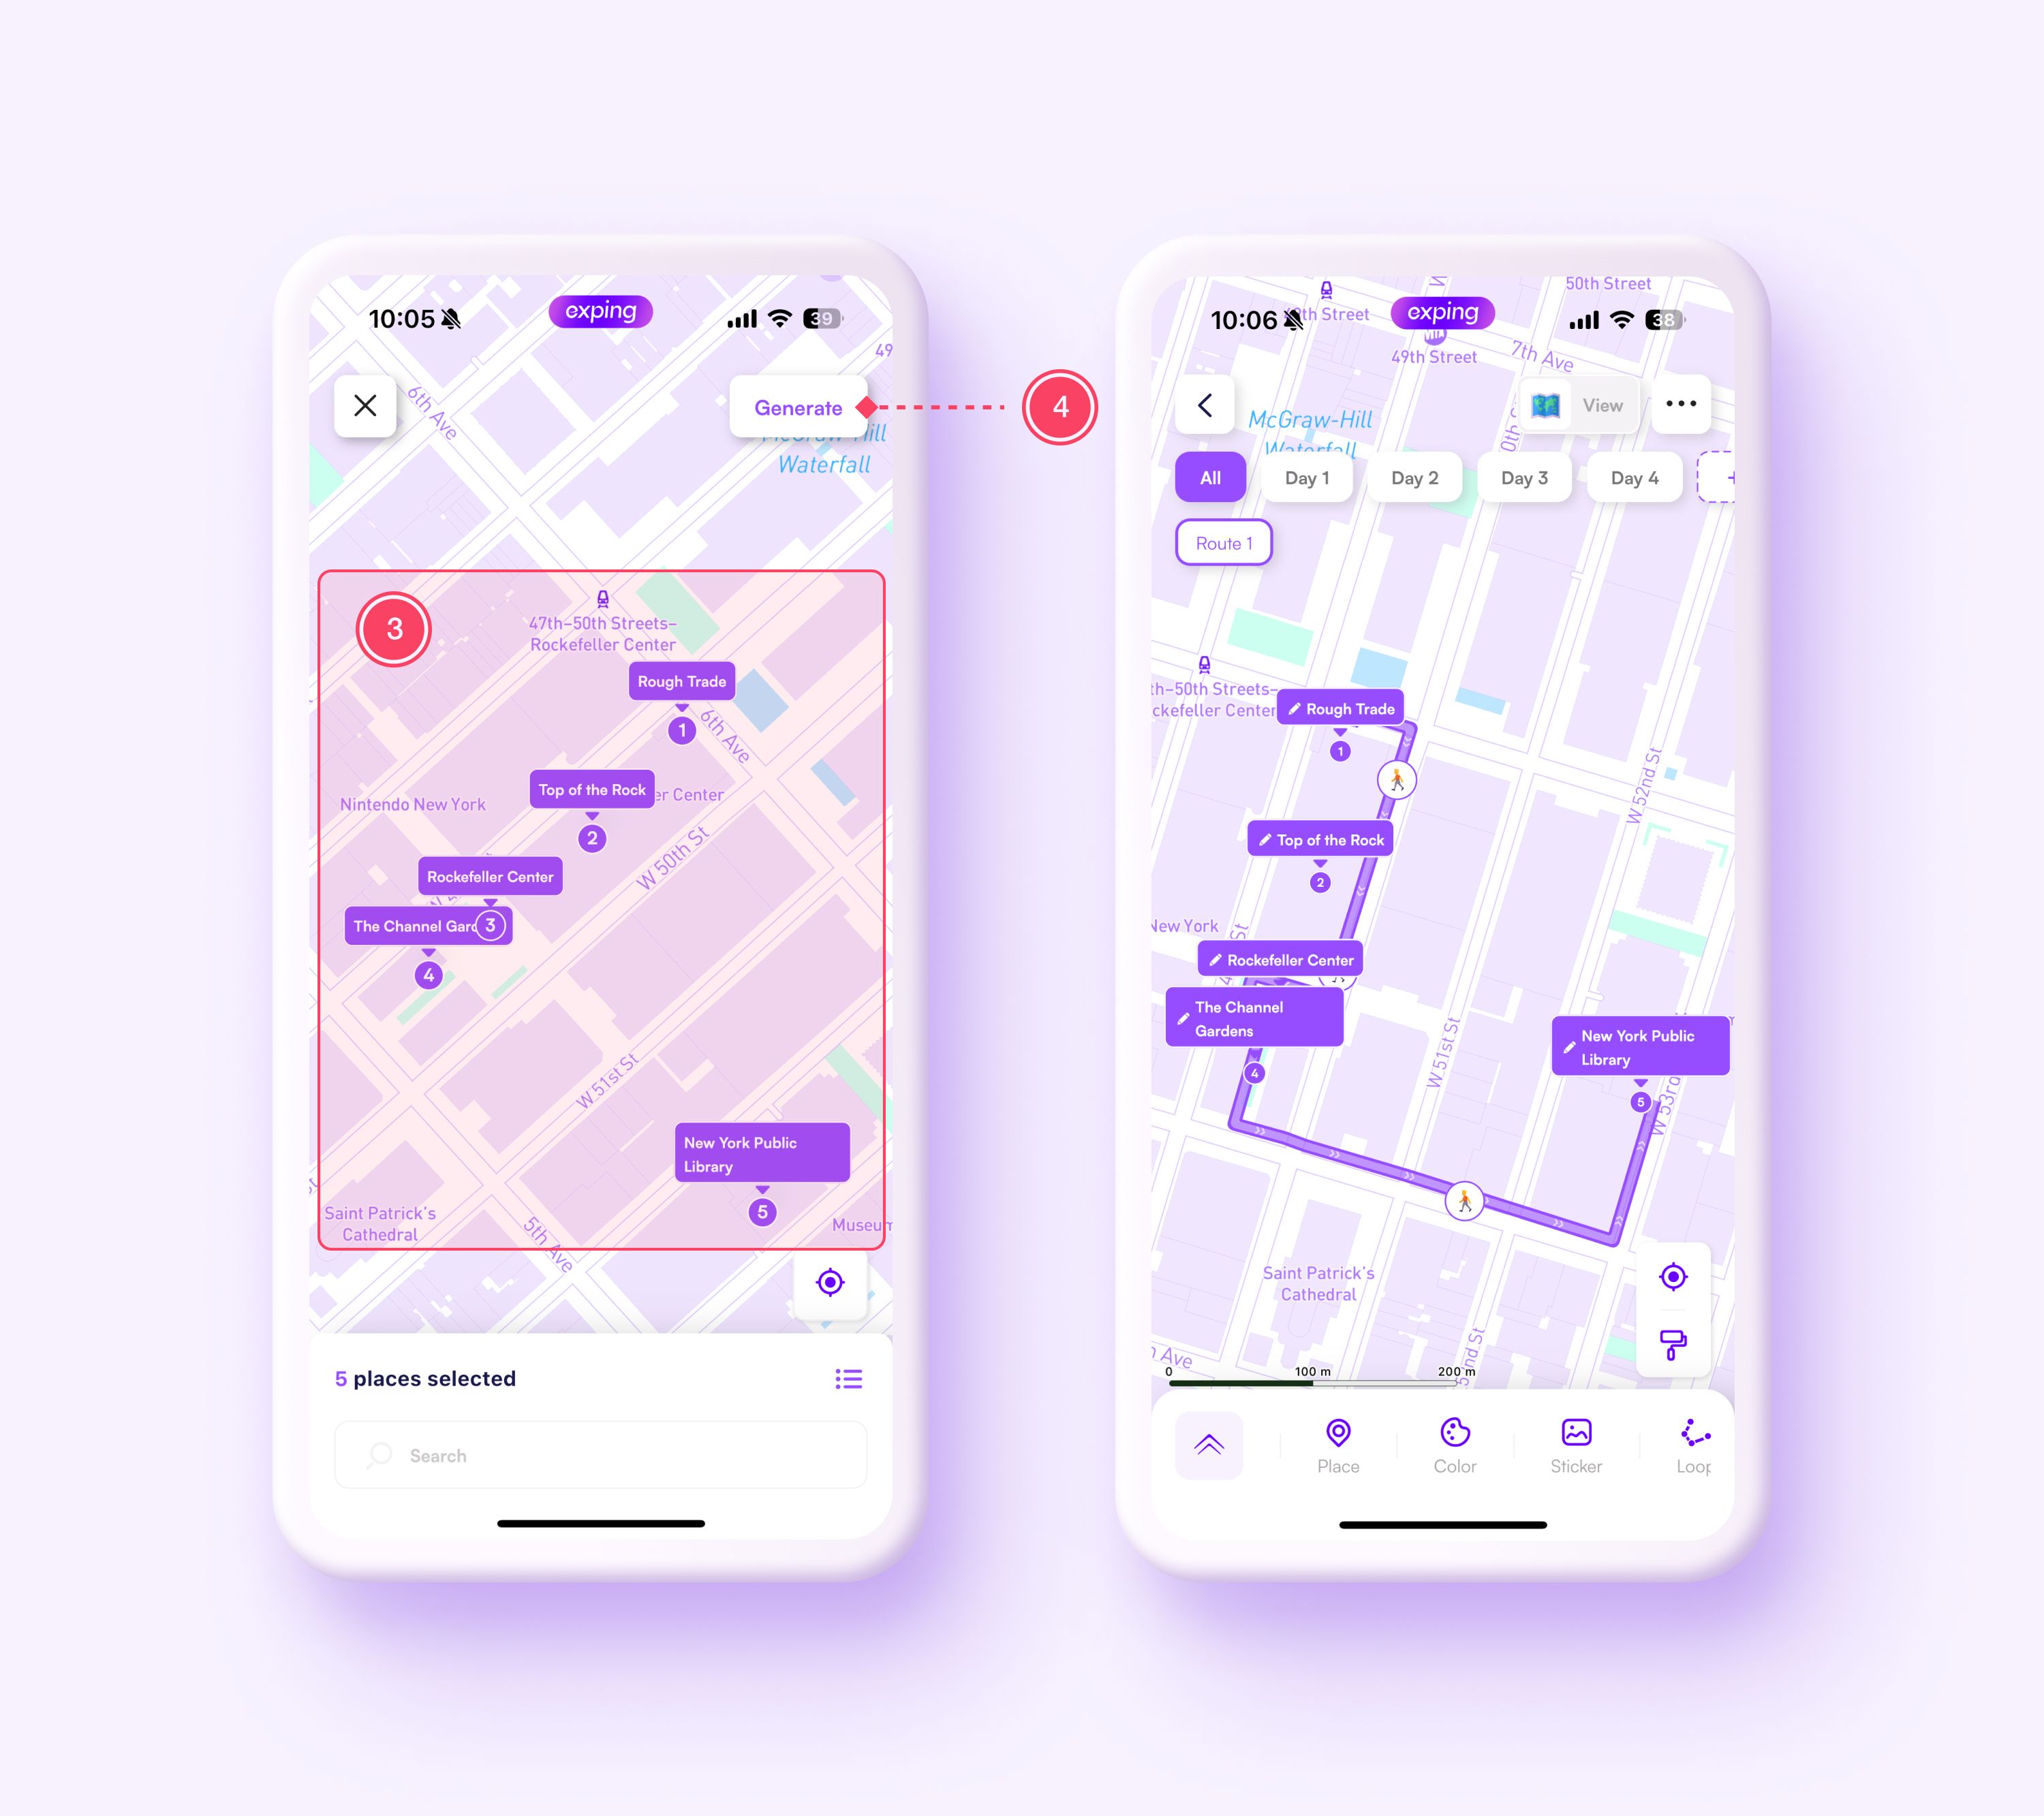
Go to the map editing page, tap "Route” and choose “Auto Plan” to enter the route planning interface.
01 Auto-Connect Marked Locations into a Route
If you've marked places on your map and want to connect some of them into a route, follow these steps:
- Enter the "Auto Plan" interface, tap on one of the marked locations until a number appears below (the number represents the order of the location in that route)
-
Tap on other locations sequentially
-
Tap "Generate" in the upper right corner to proceed
02 Search for Locations and Connect into a Route
- Enter the "Auto Plan" interface, tap “Search”
- Search for the desired locations, then tap “Done” to confirm
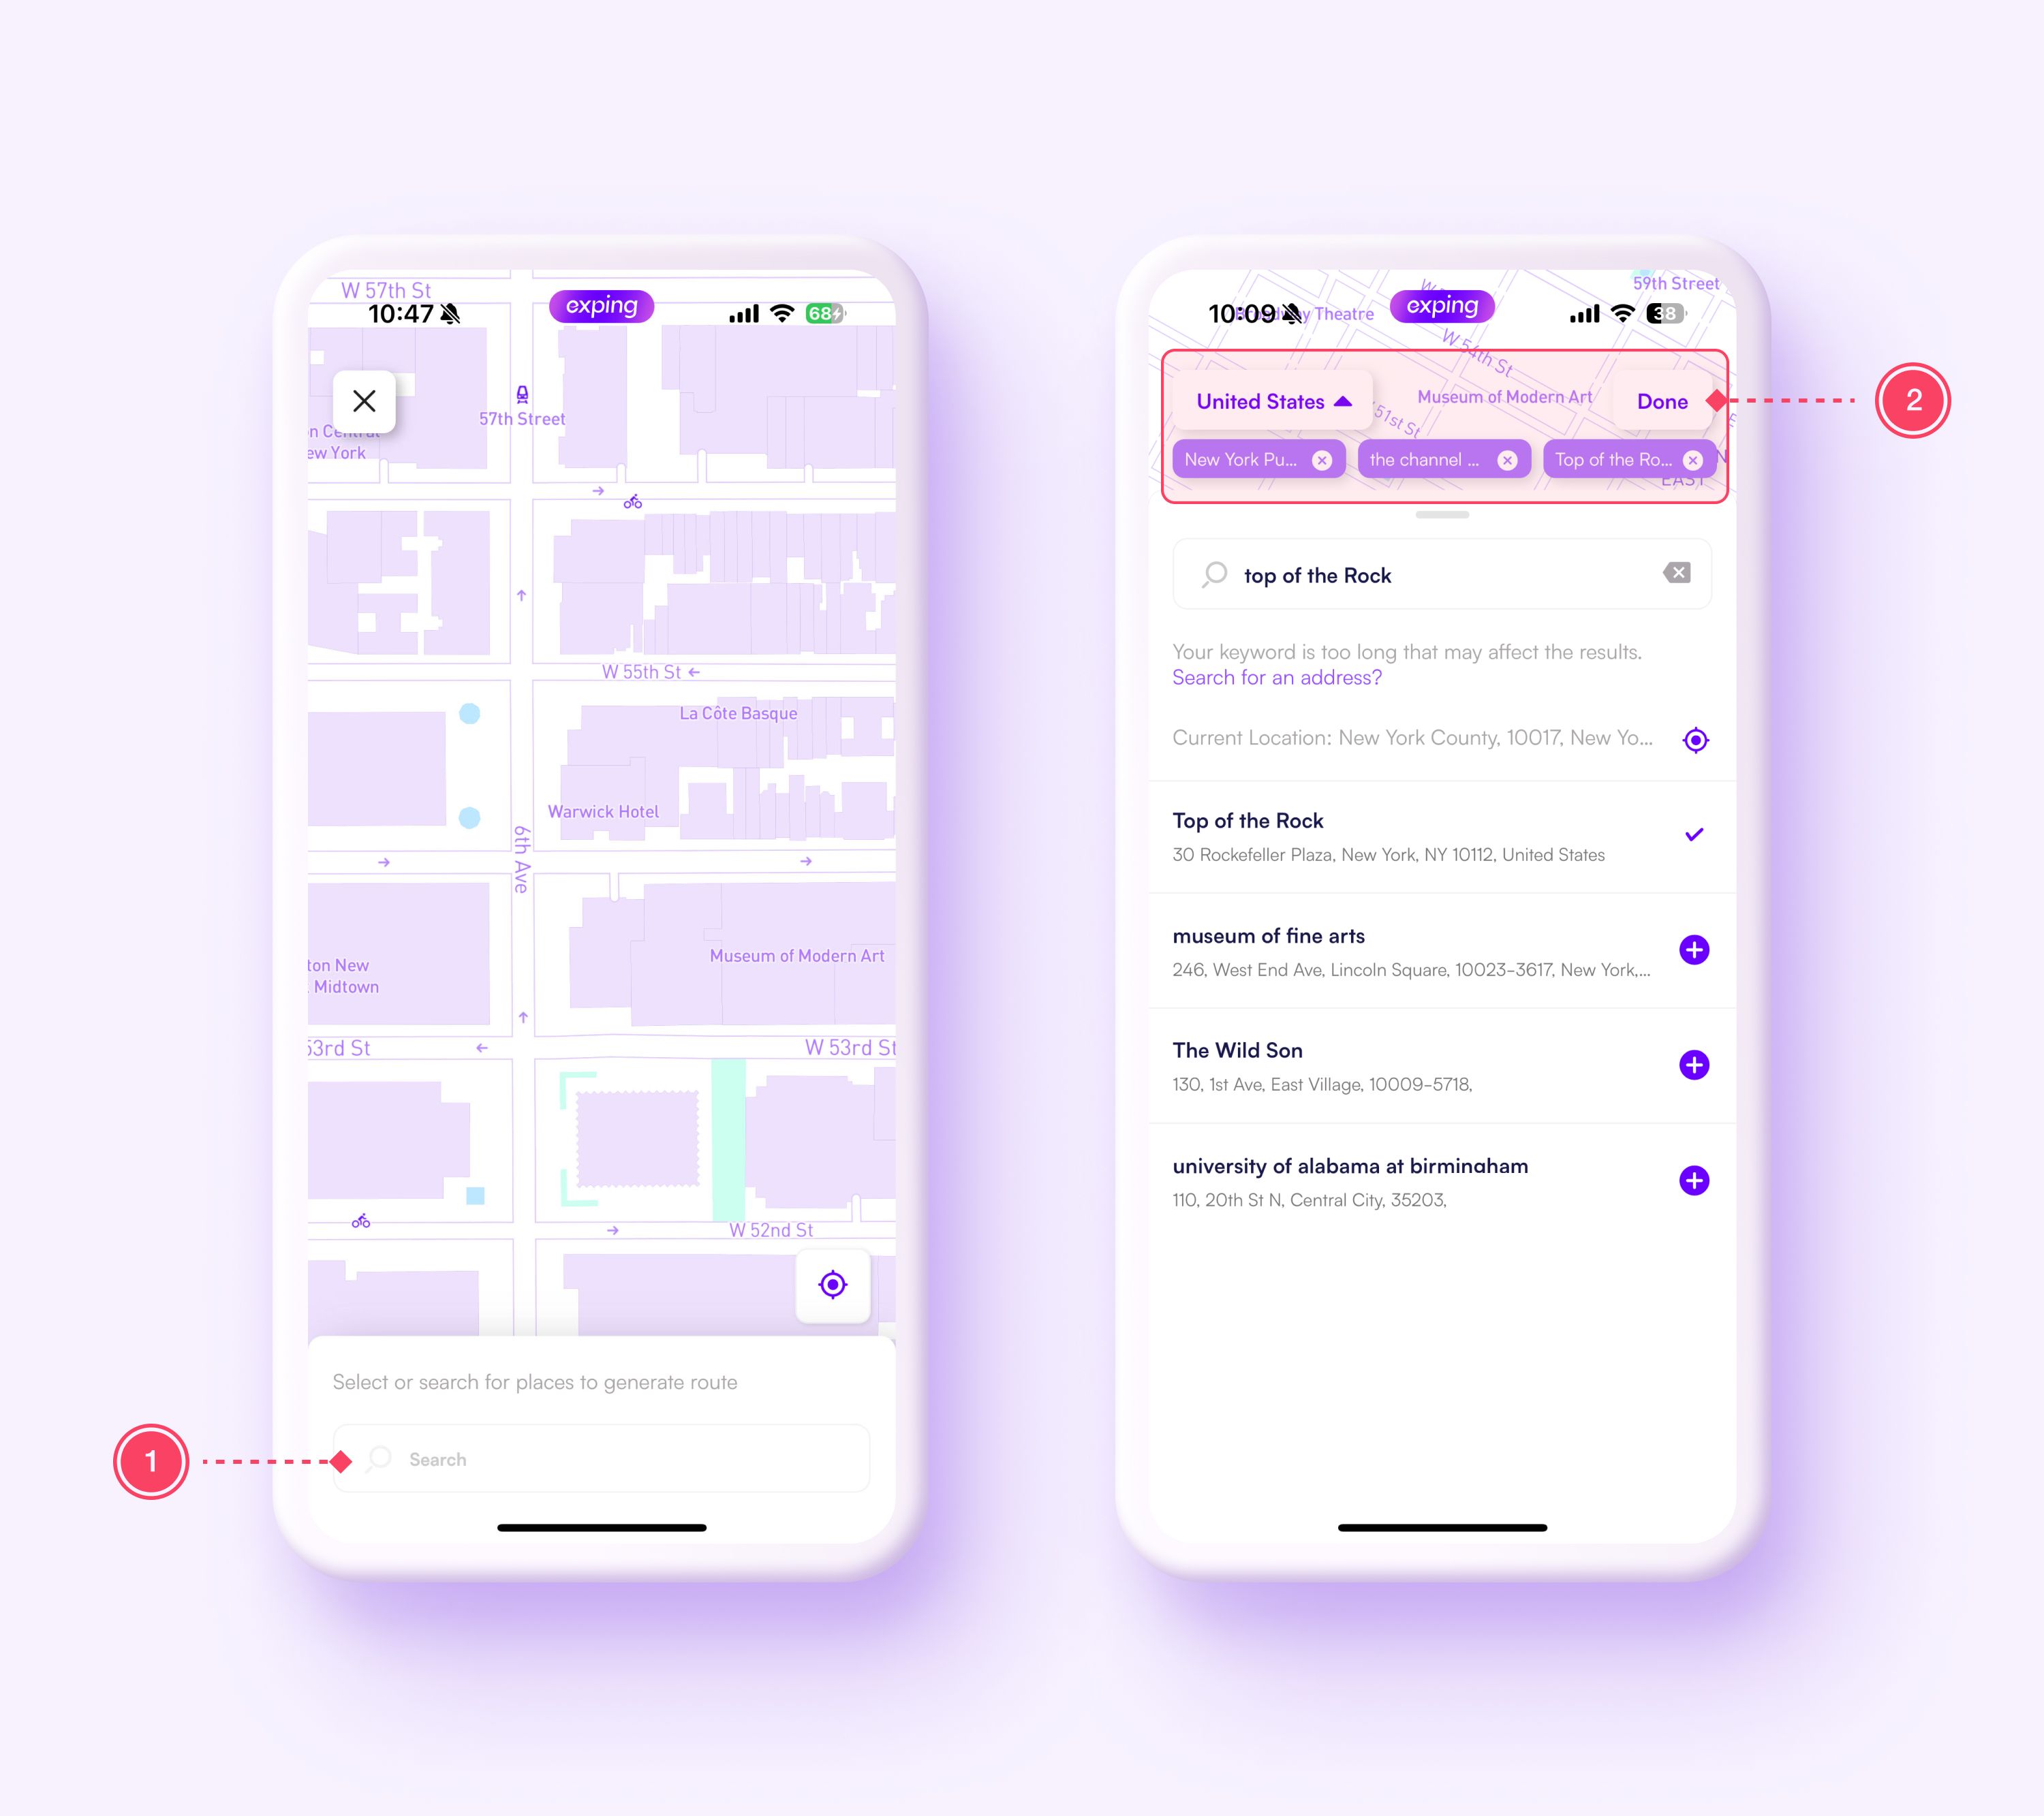
- Return to the map and check the order of places
- Tap “Generate” in the upper right corner to procee
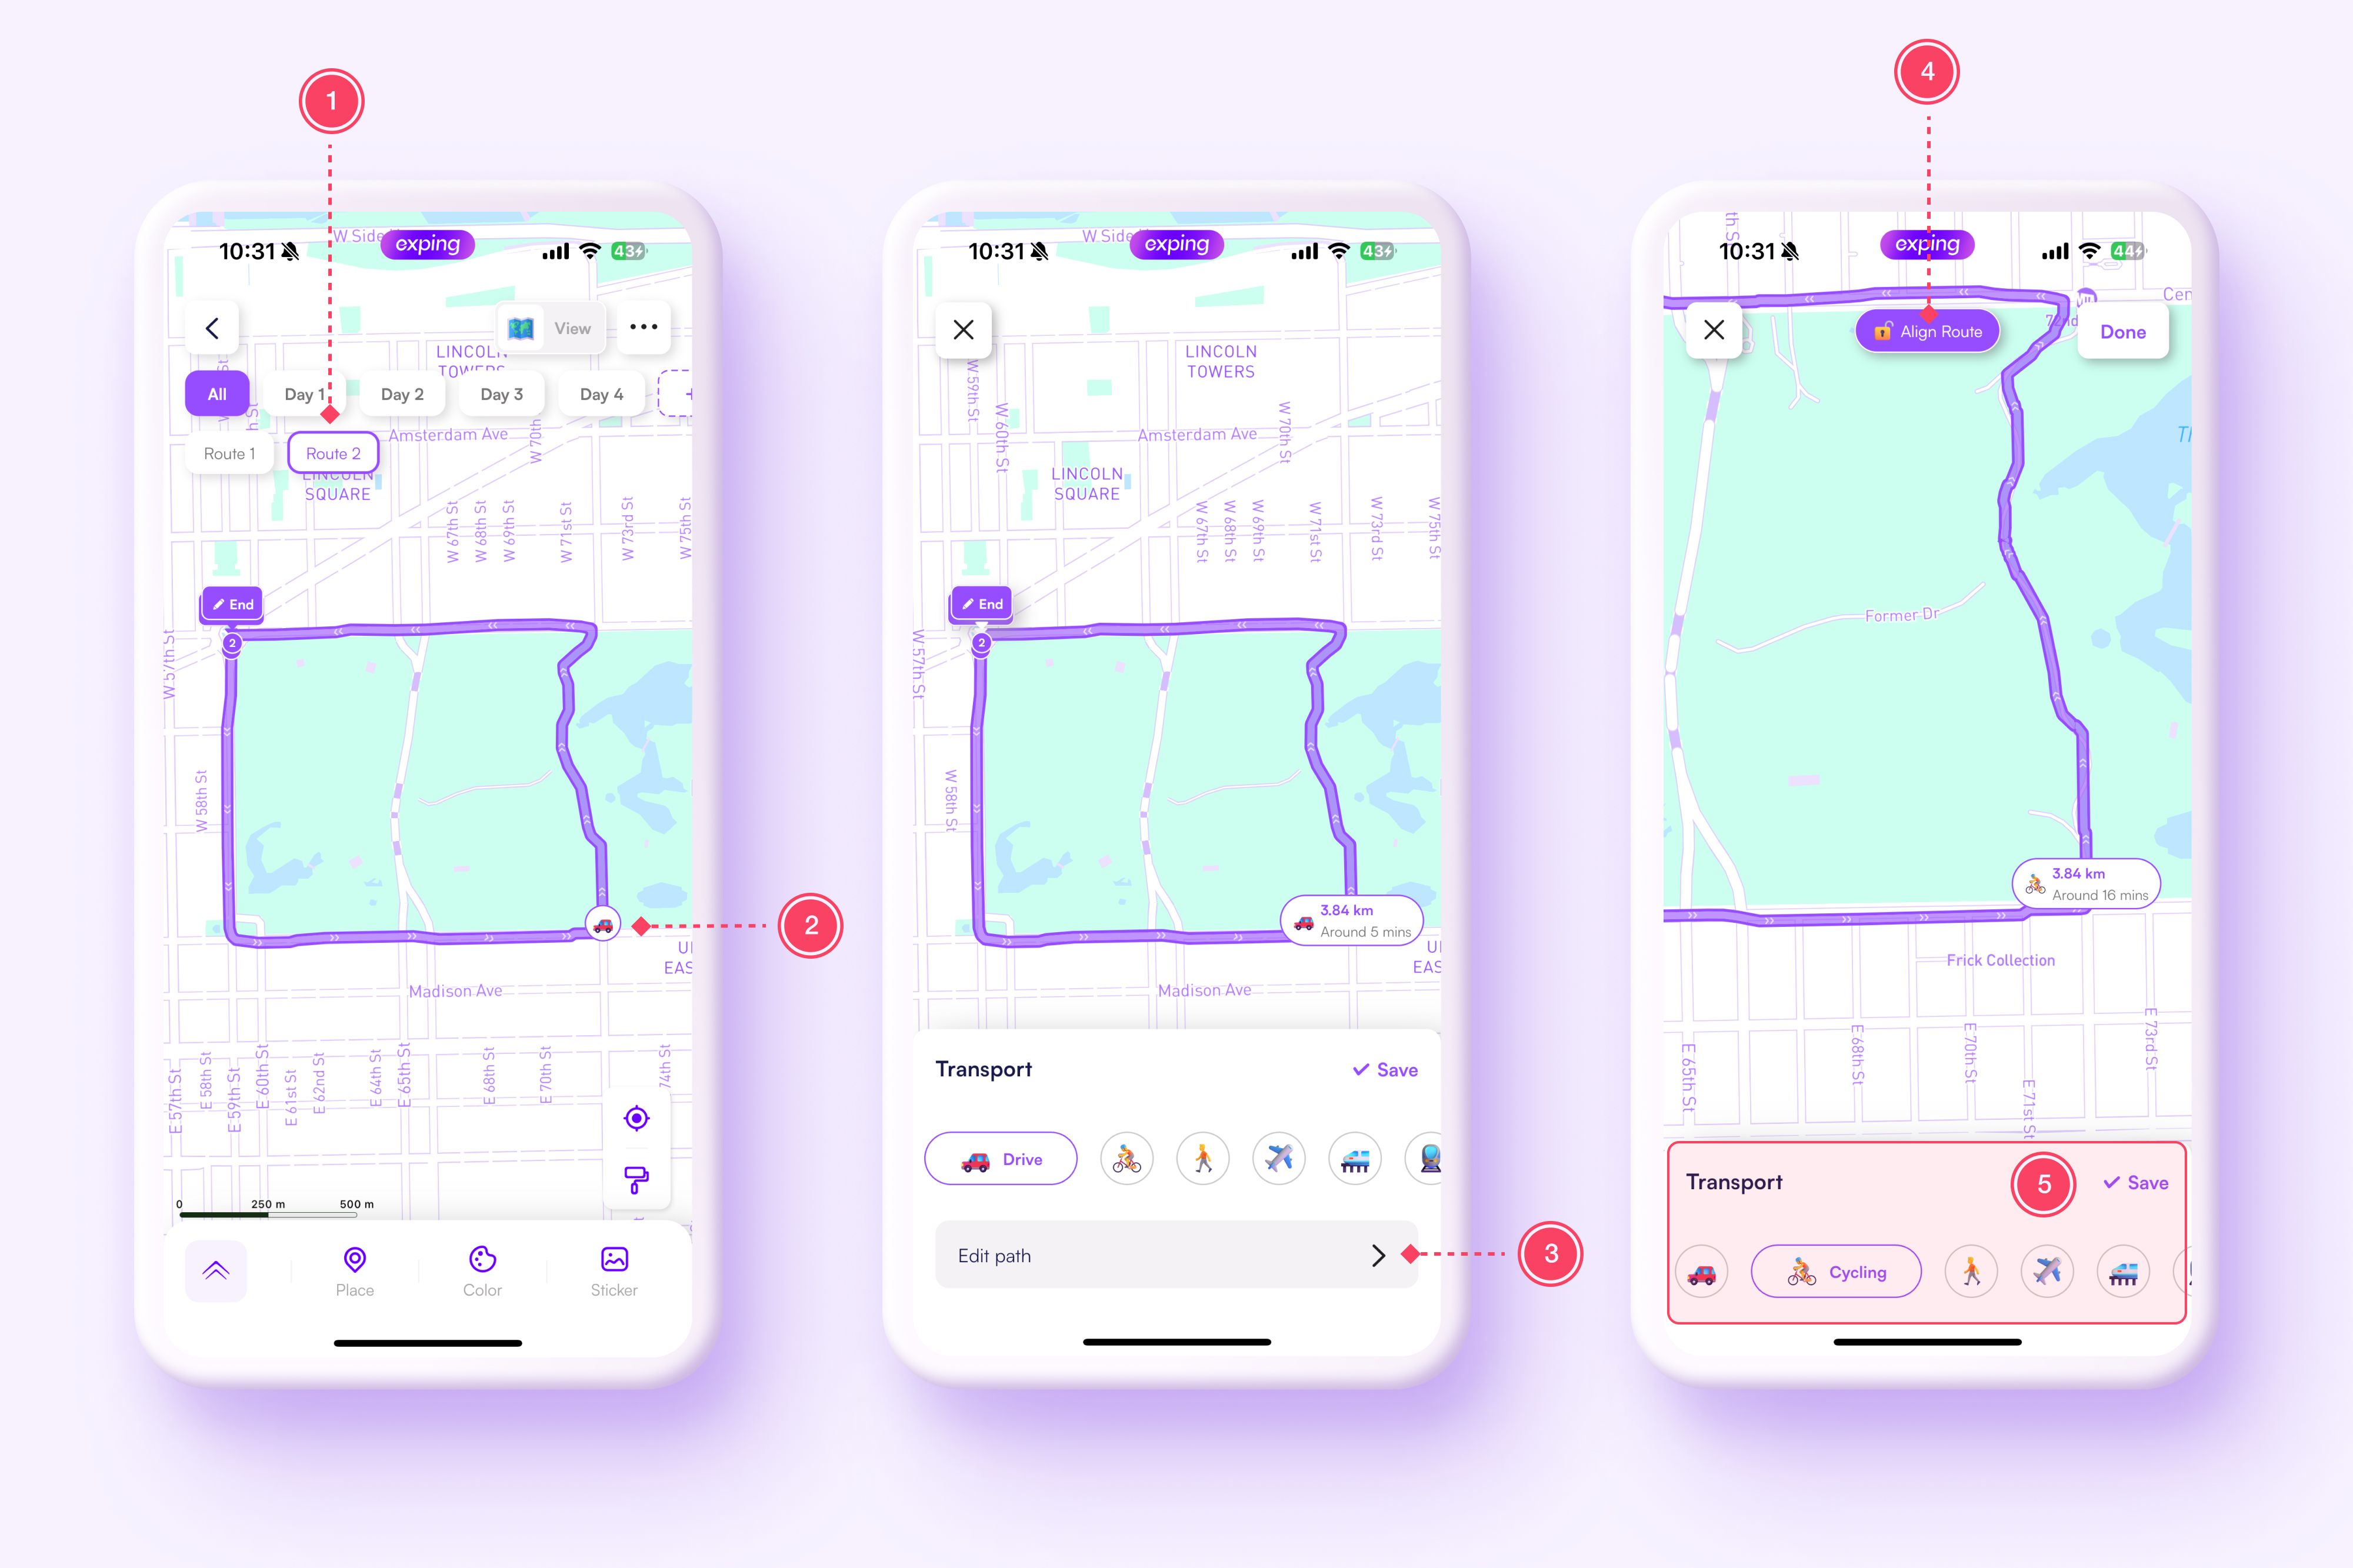
How to Use the "Freeform" Feature to Plan Your Route?
Go to the map editing page, tap "Route” and choose “Freeform” to enter the route planning interface.
For flexibility, we have provided an "Align Route" toggle button at the top. Turn it "On" to align your route with the map's route or "Off" for manual shaping.
There are two drawing methods: point and freehand.
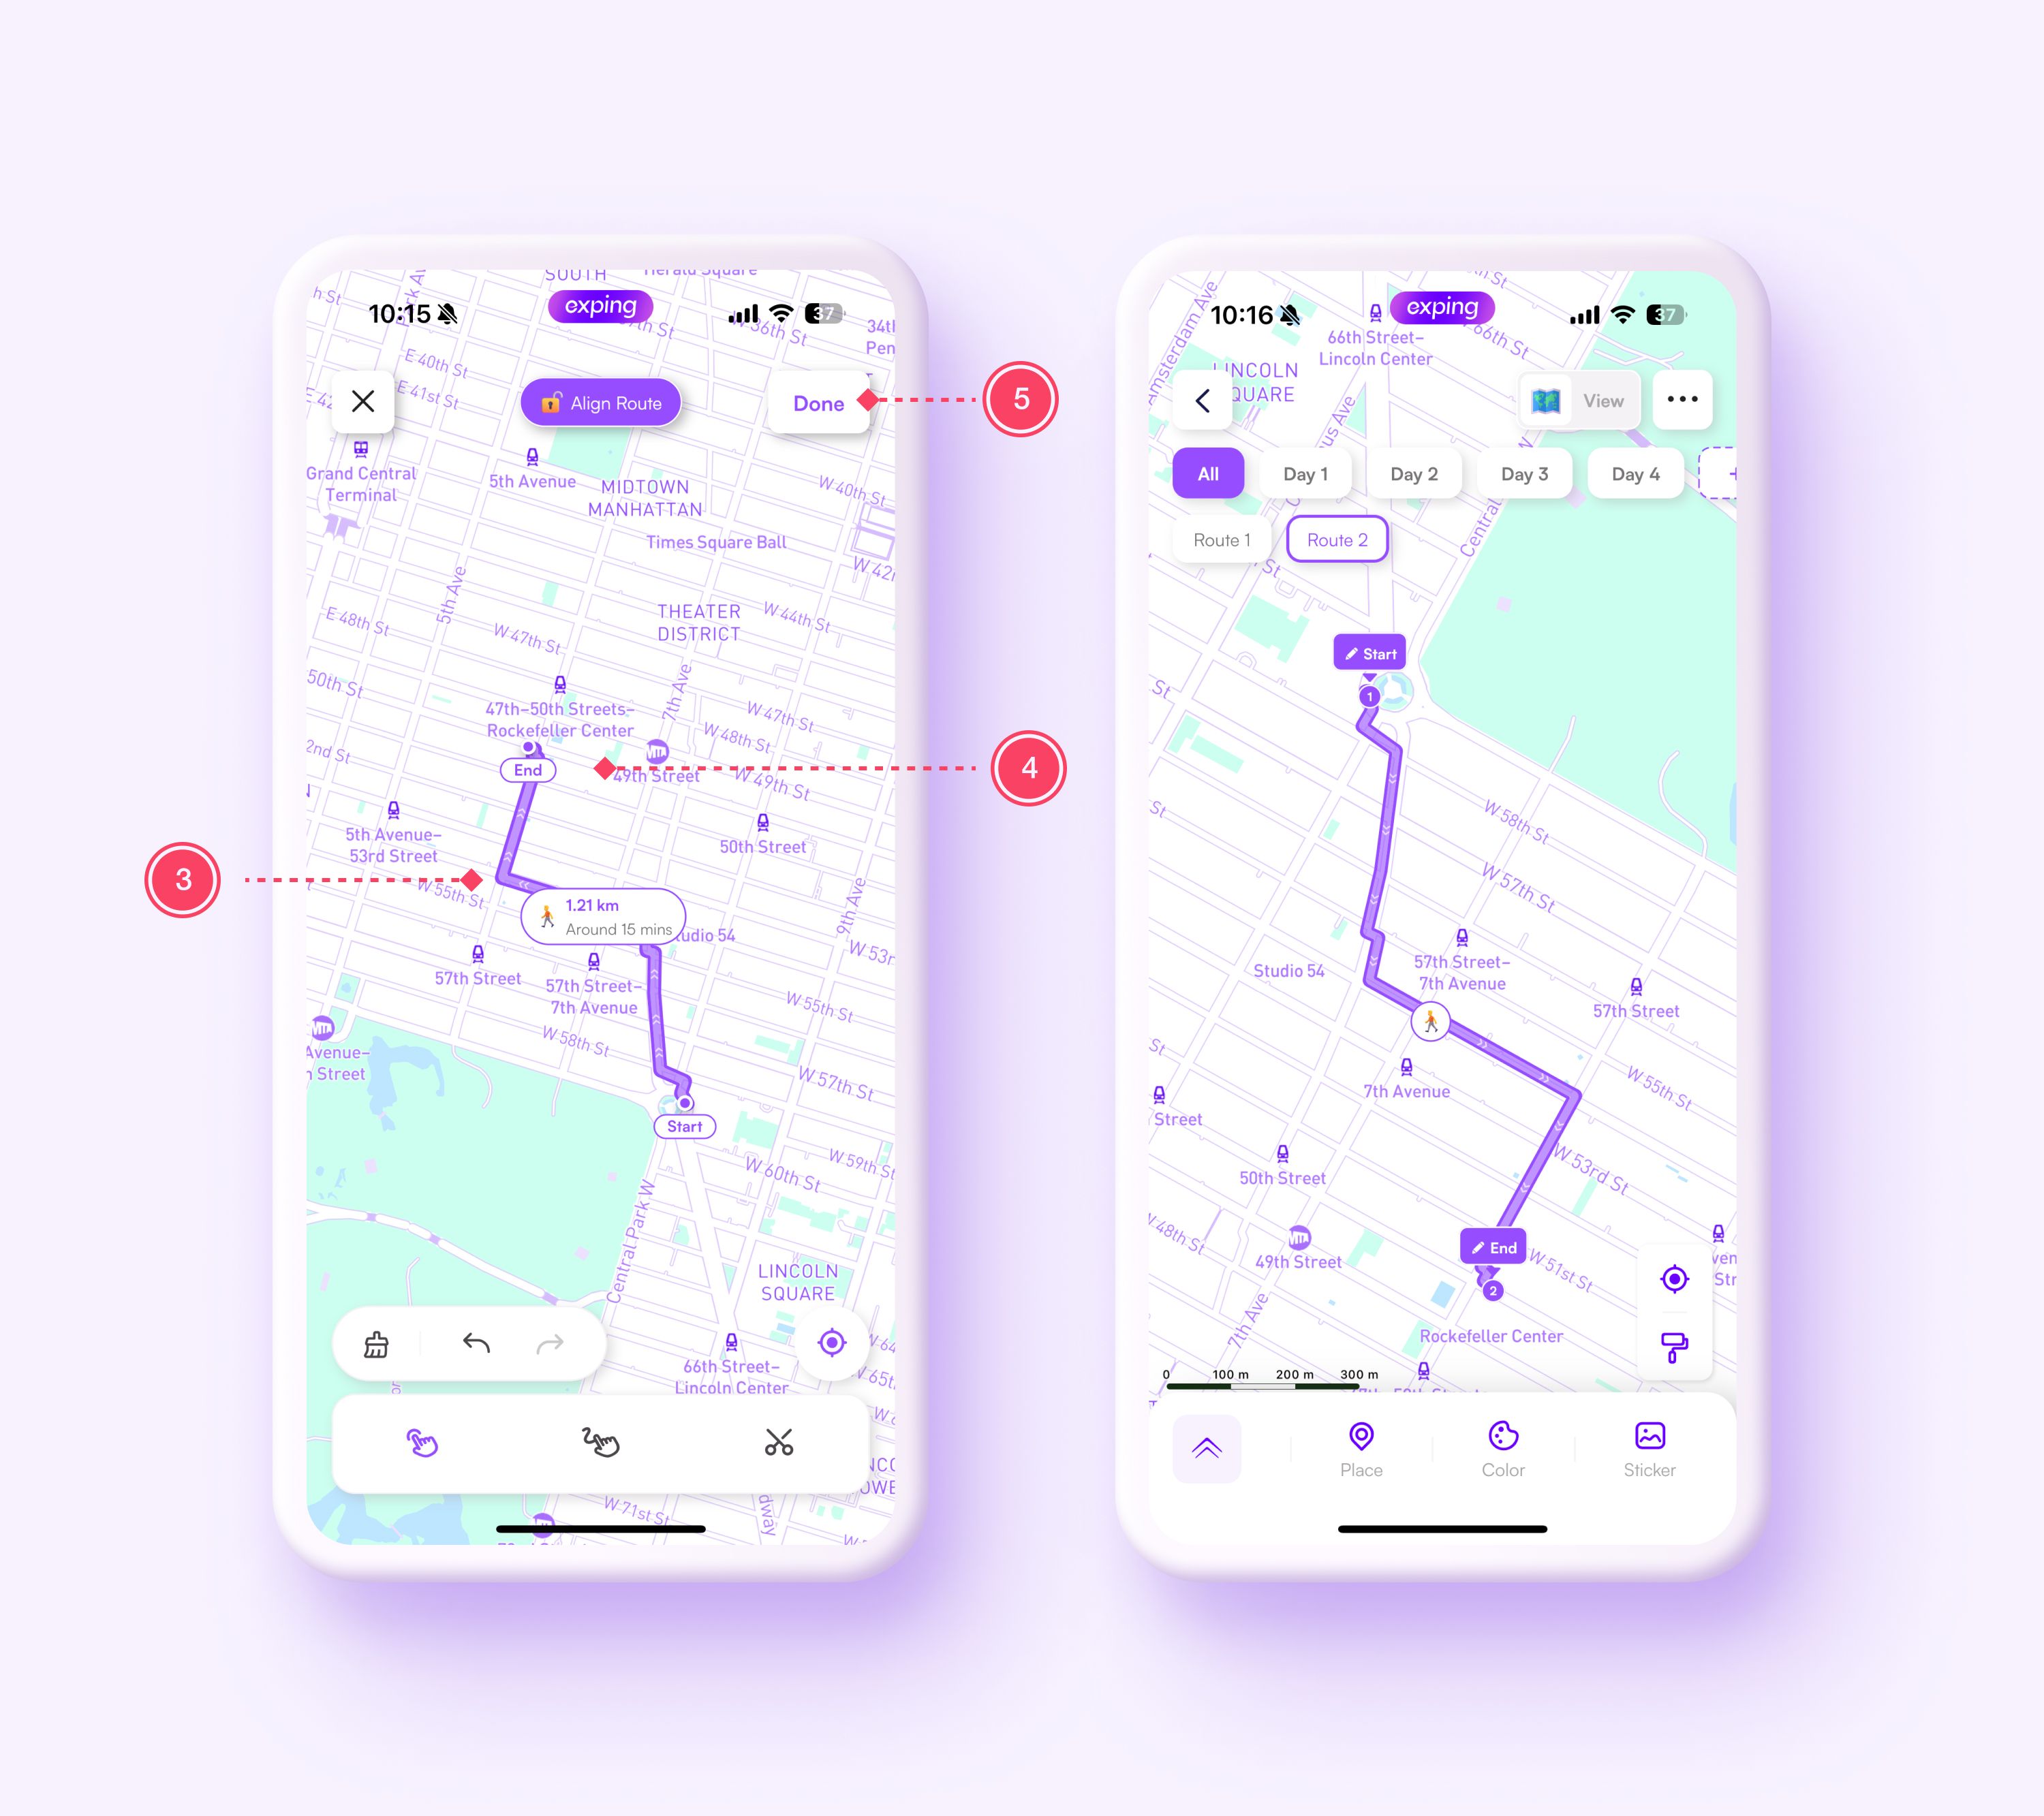
01 Point Drawing
When "Align Route" is enabled, the route will align with the roads on the map. When "Align Roads" is disabled, straight lines will connect between every two consecutive taps.
- Tap "Point Drawing" icon
- Tap anywhere on the map to mark locations; the first tap sets as "Starting Point"
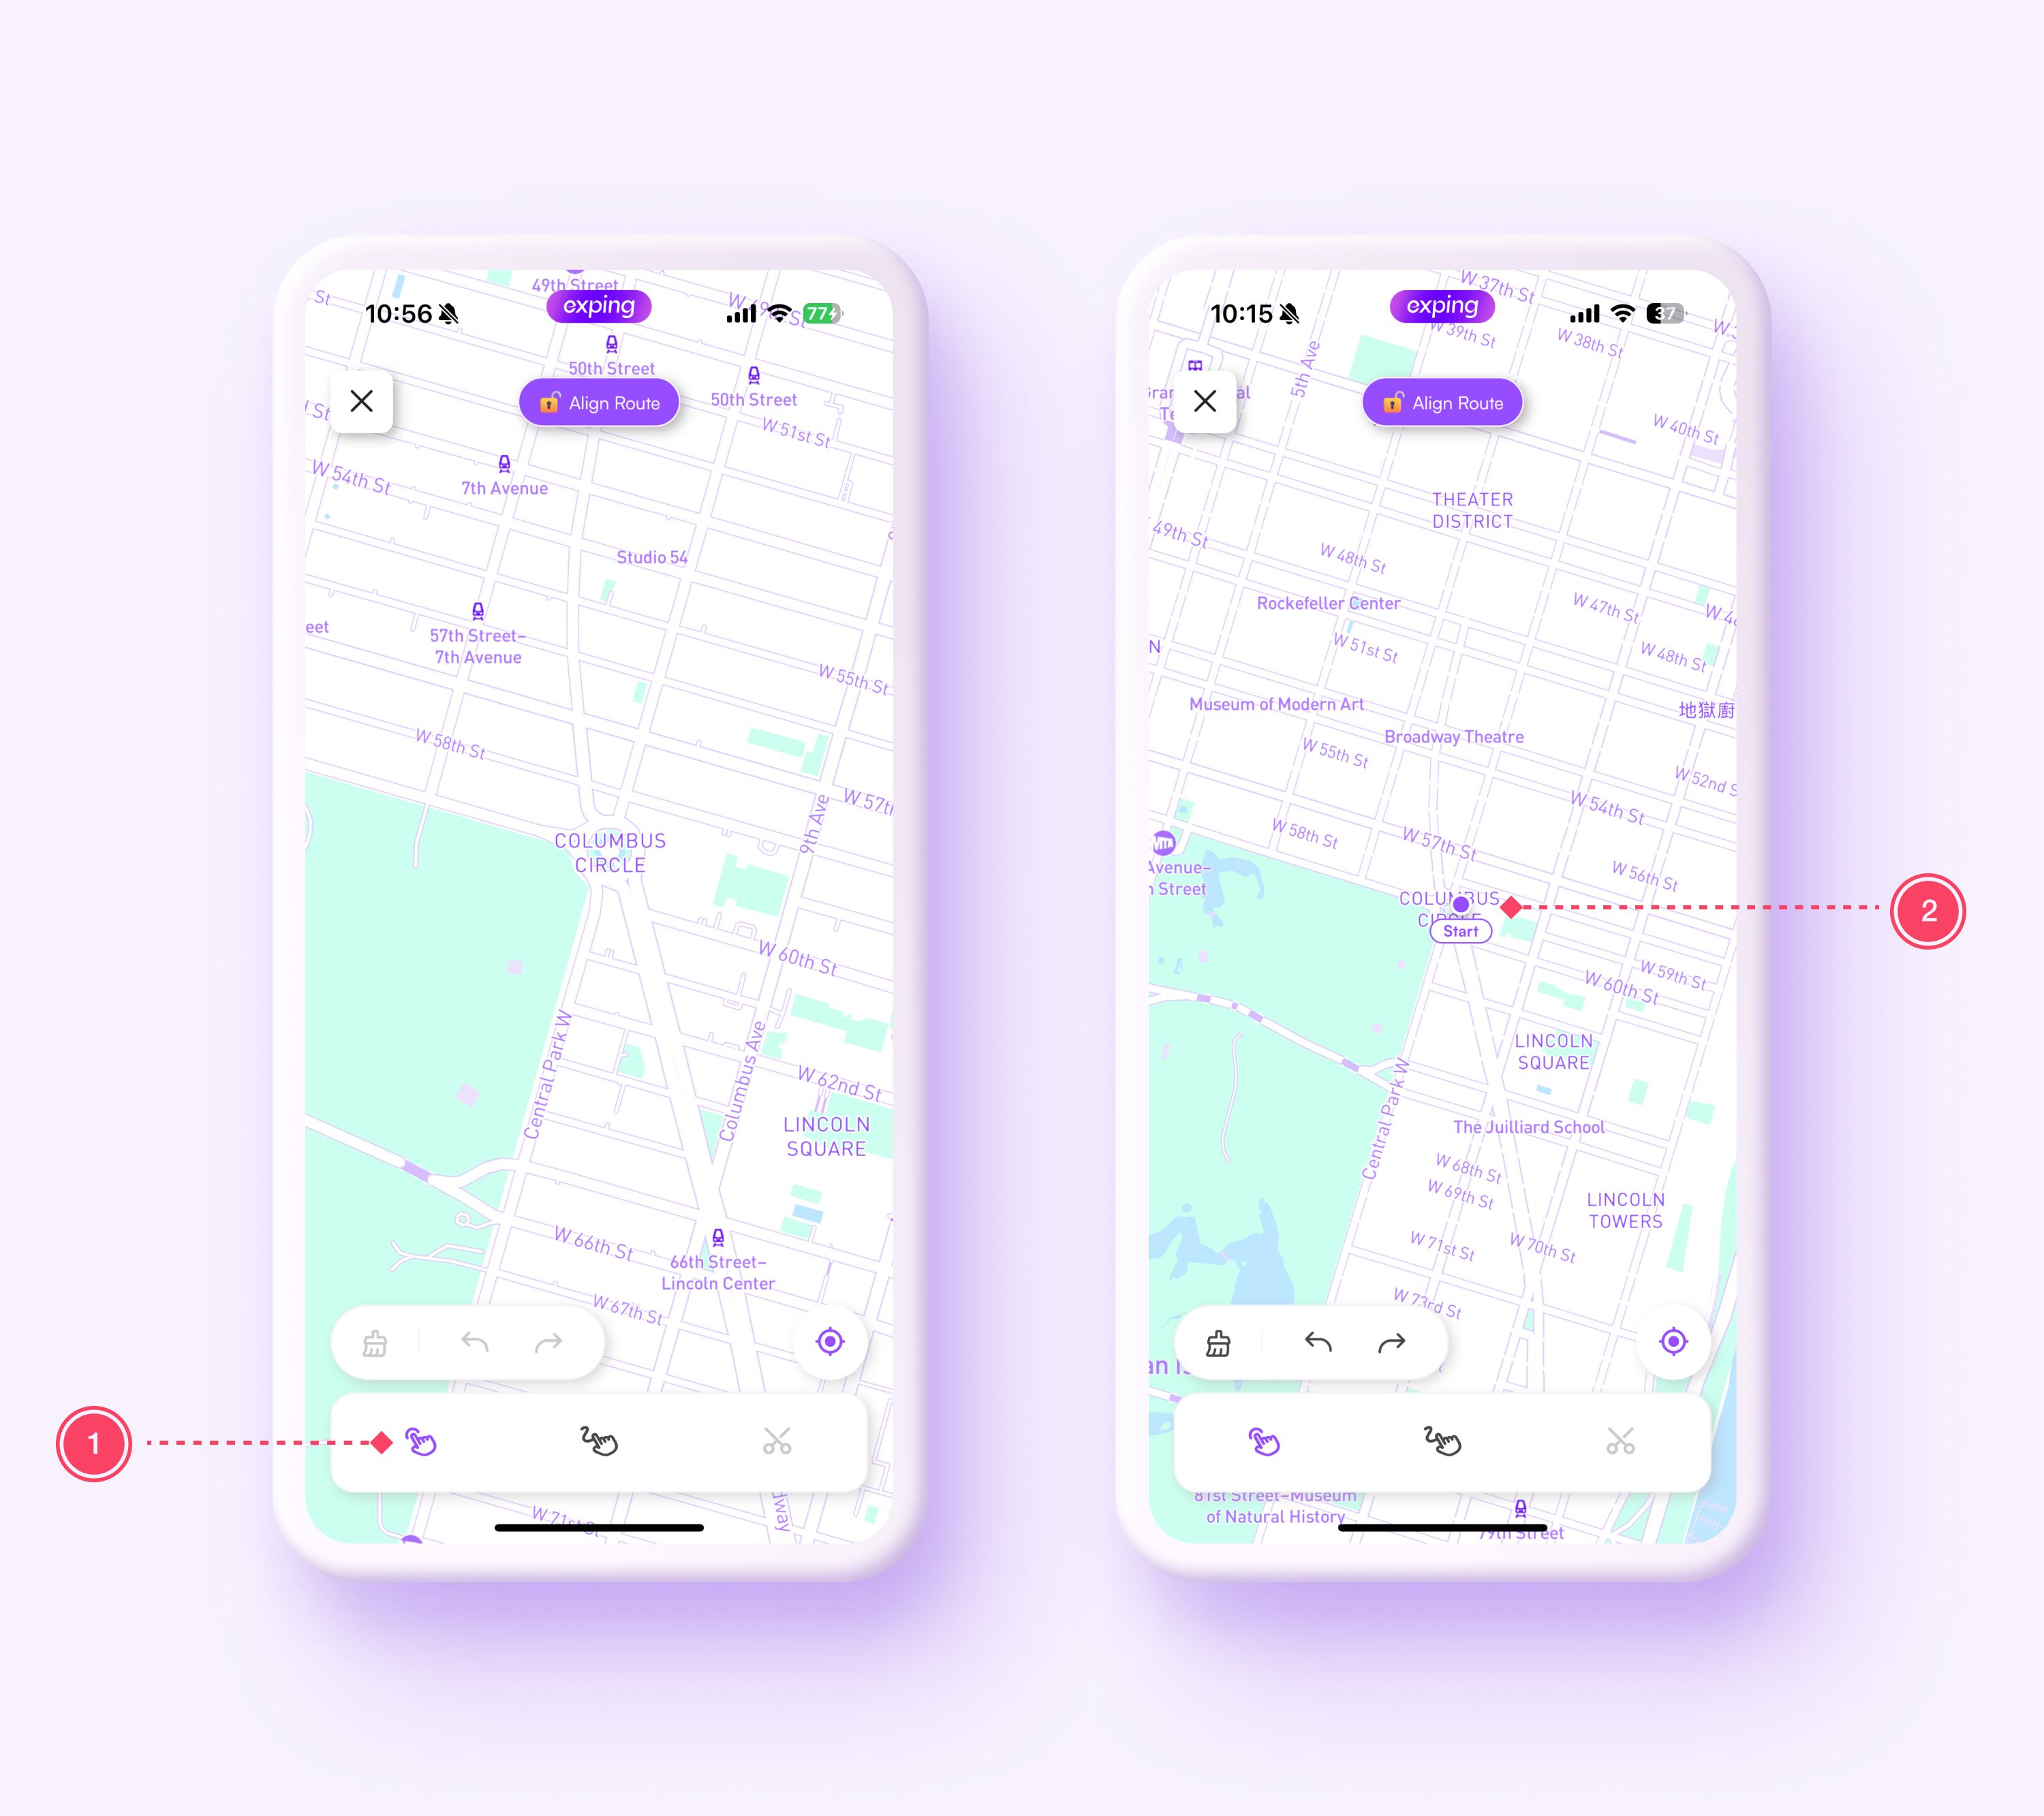
- Multiple taps can serve as pivotal turning points in the route
- The last tap sets as "Endpoint"
- Tap "Done" to successfully mark the route
02 Hand Drawing
When "Align Route" is enabled, the route will align with the roads on the map. When "Align Roads" is disabled, the route is generated based on the shape drawn.
- Tap “Hand Drawing” icon
- Touch the screen r to start drawing. During the drawing process, a preview window will appear in the top left corner, allowing you to zoom in to fine-tune the drawing position.
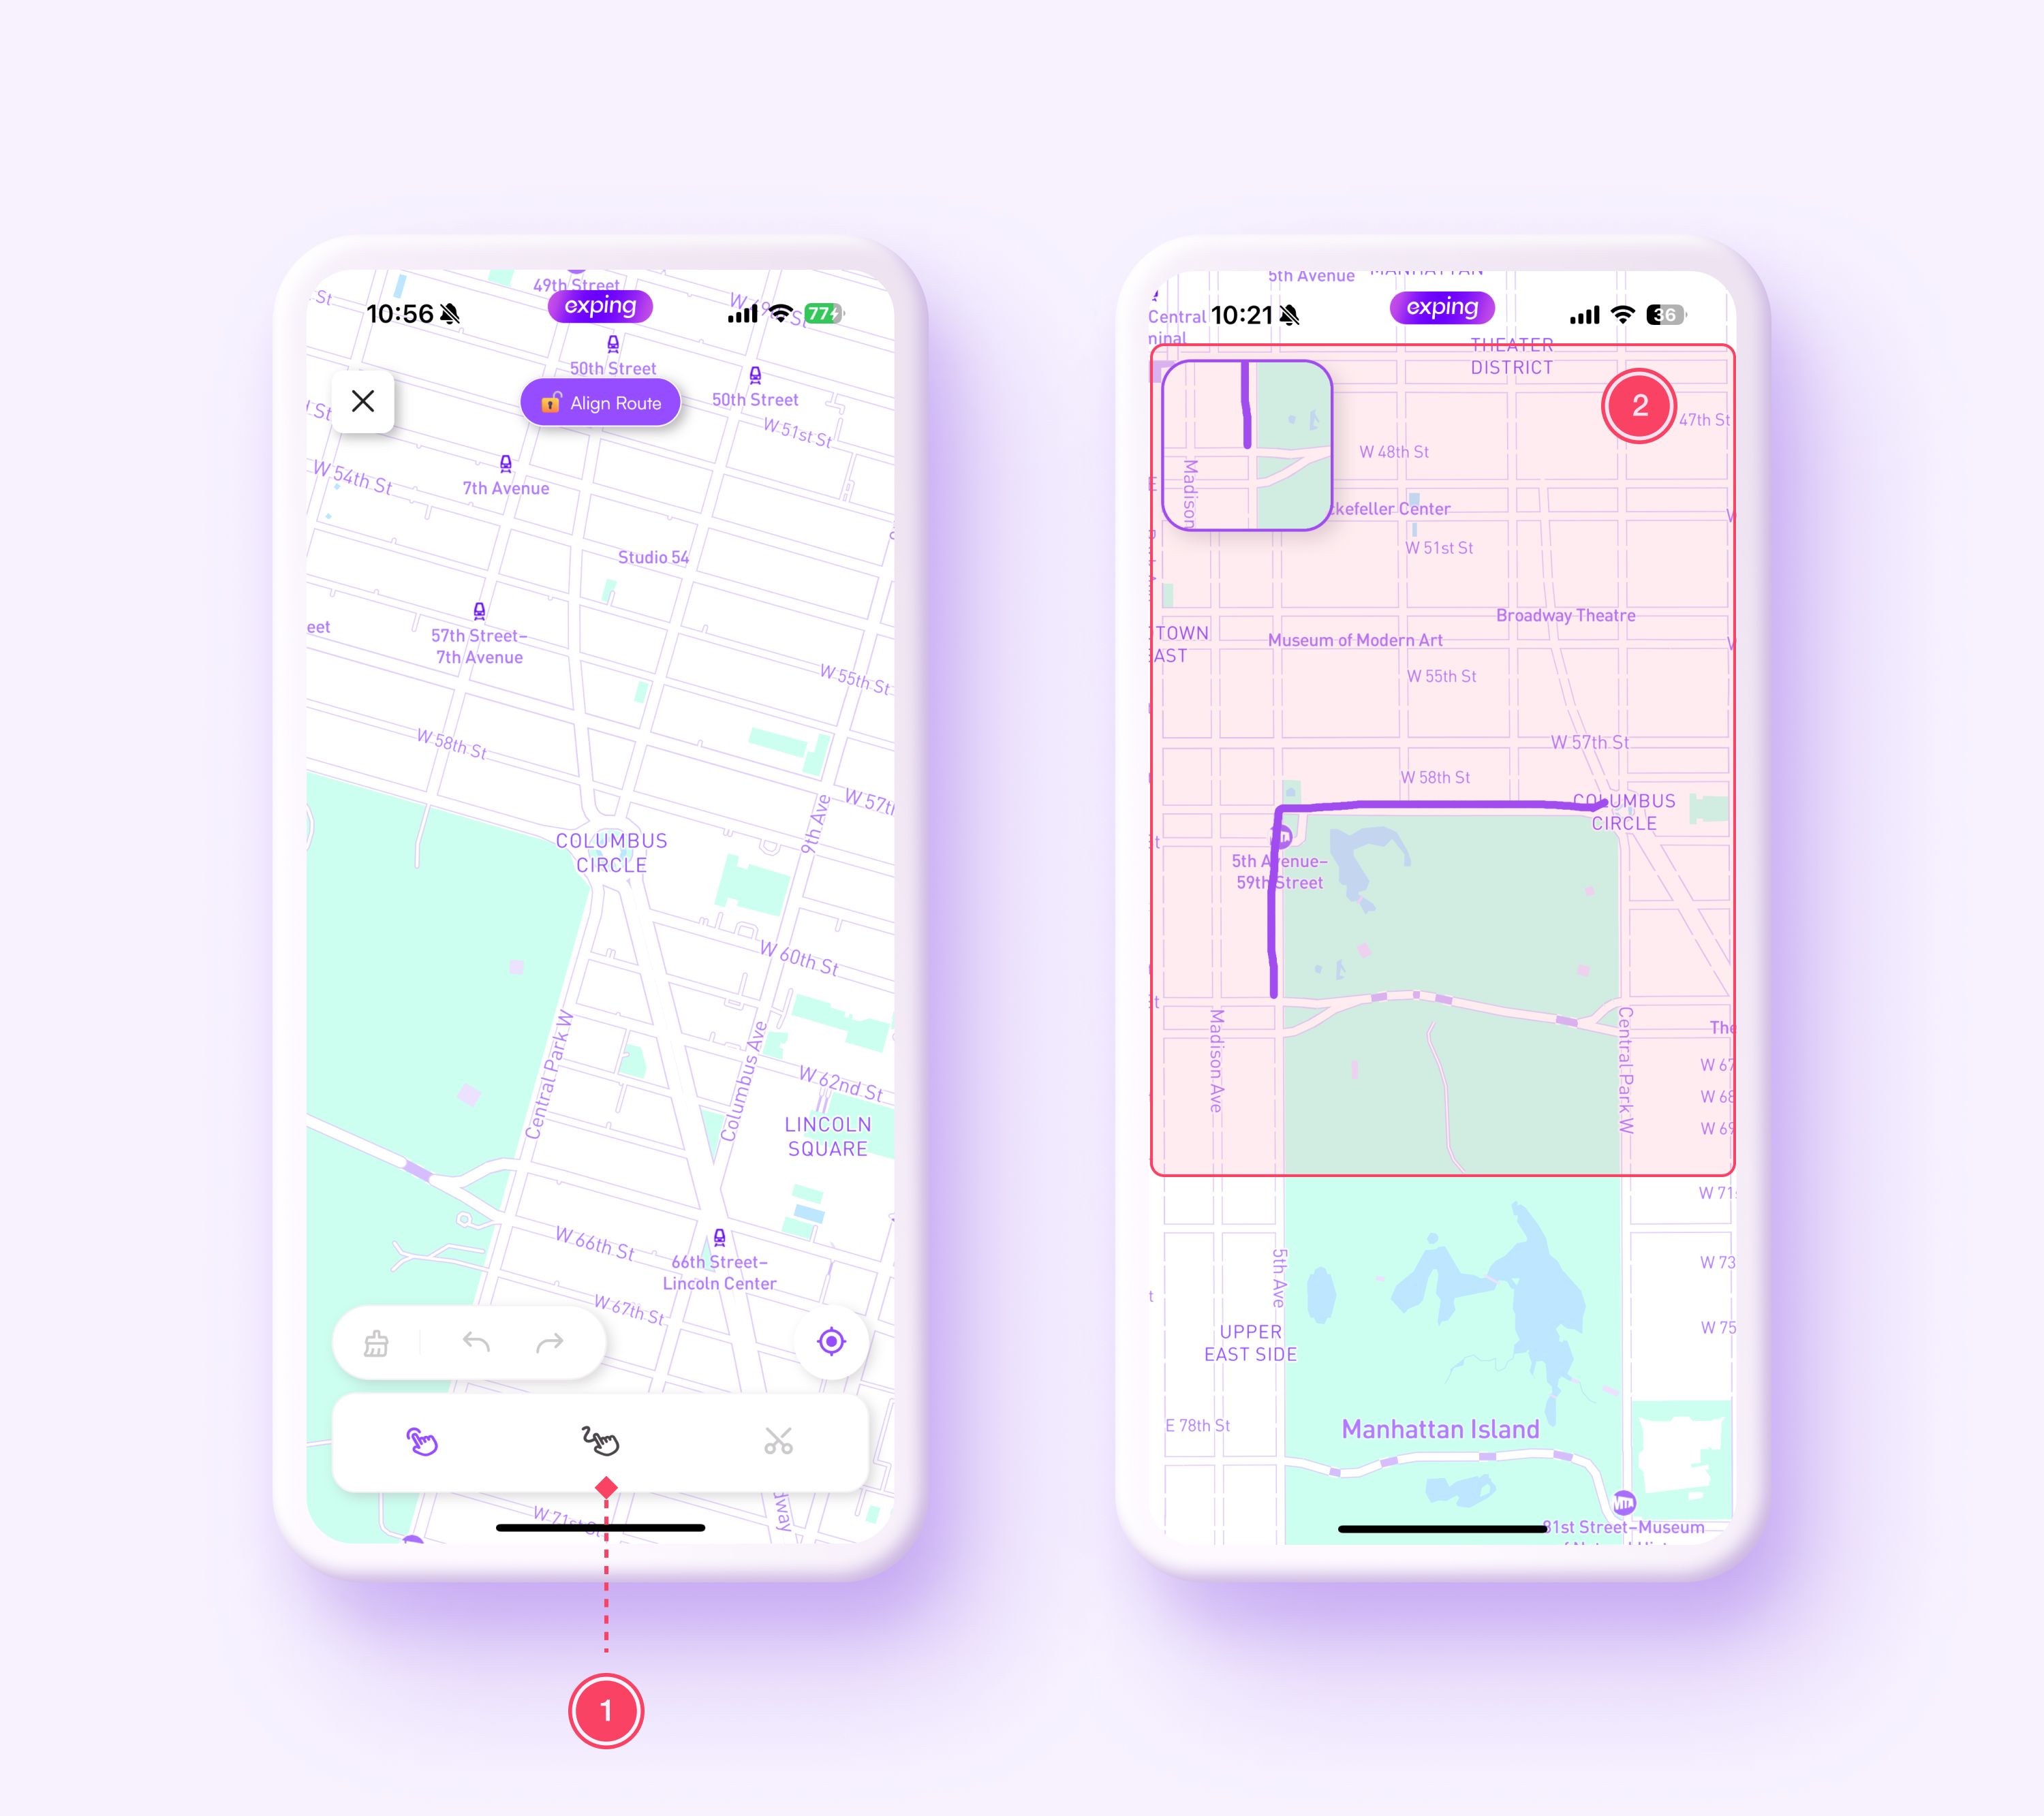
- Route can be overlaid multiple time
- Tap “Done” to successfully mark the route
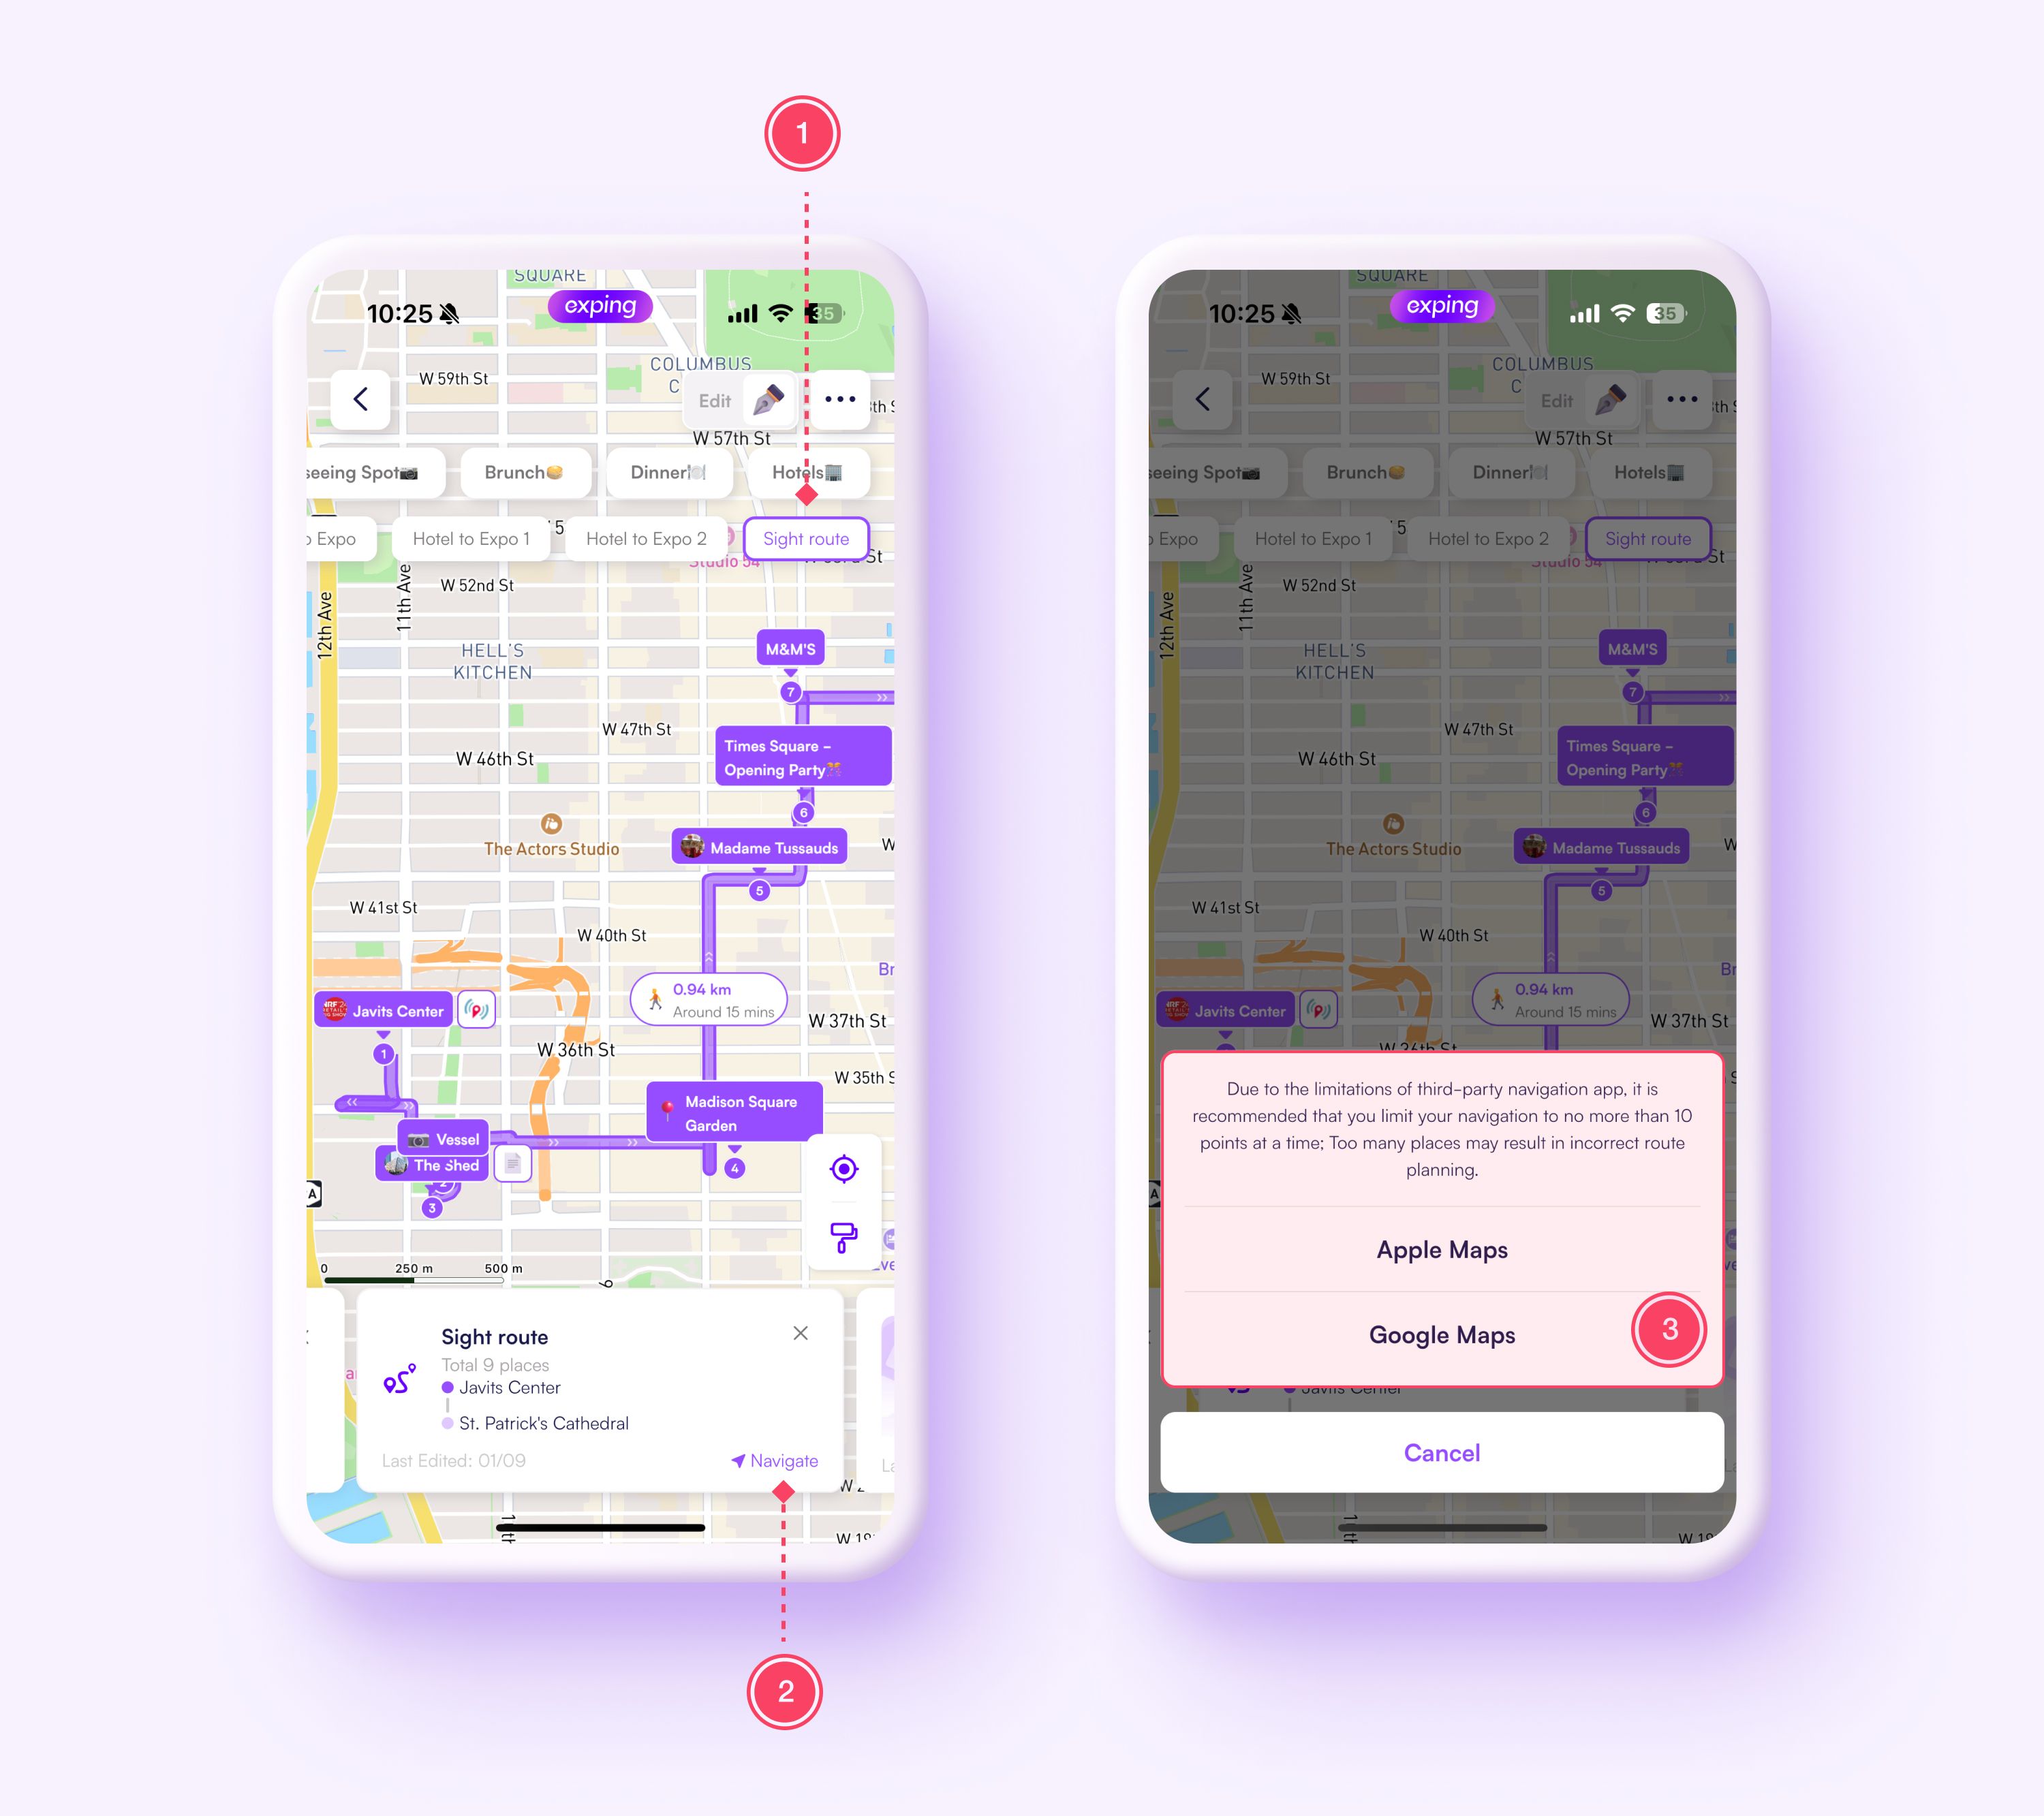
How to Navigate a Route?
- Preview the map and select the desired route
- Tap "Navigate"
- Choose a third-party navigation app to start
How to Change the Route Color?
- On the map editing page, select the corresponding route label
- Tap the "Color" button at the bottom
- Choose the desired color, then tap "Save" to apply

How to Change Transportation Mode?
The methods for modifying the transportation mode for “Auto Plan” and “Freeform” routes are different, as outlined below:
How to Modifying the Transportation Mode for Auto Plan Routes?
- On the map editing page, select the desired route
- Tap the transport icon between locations to switch modes
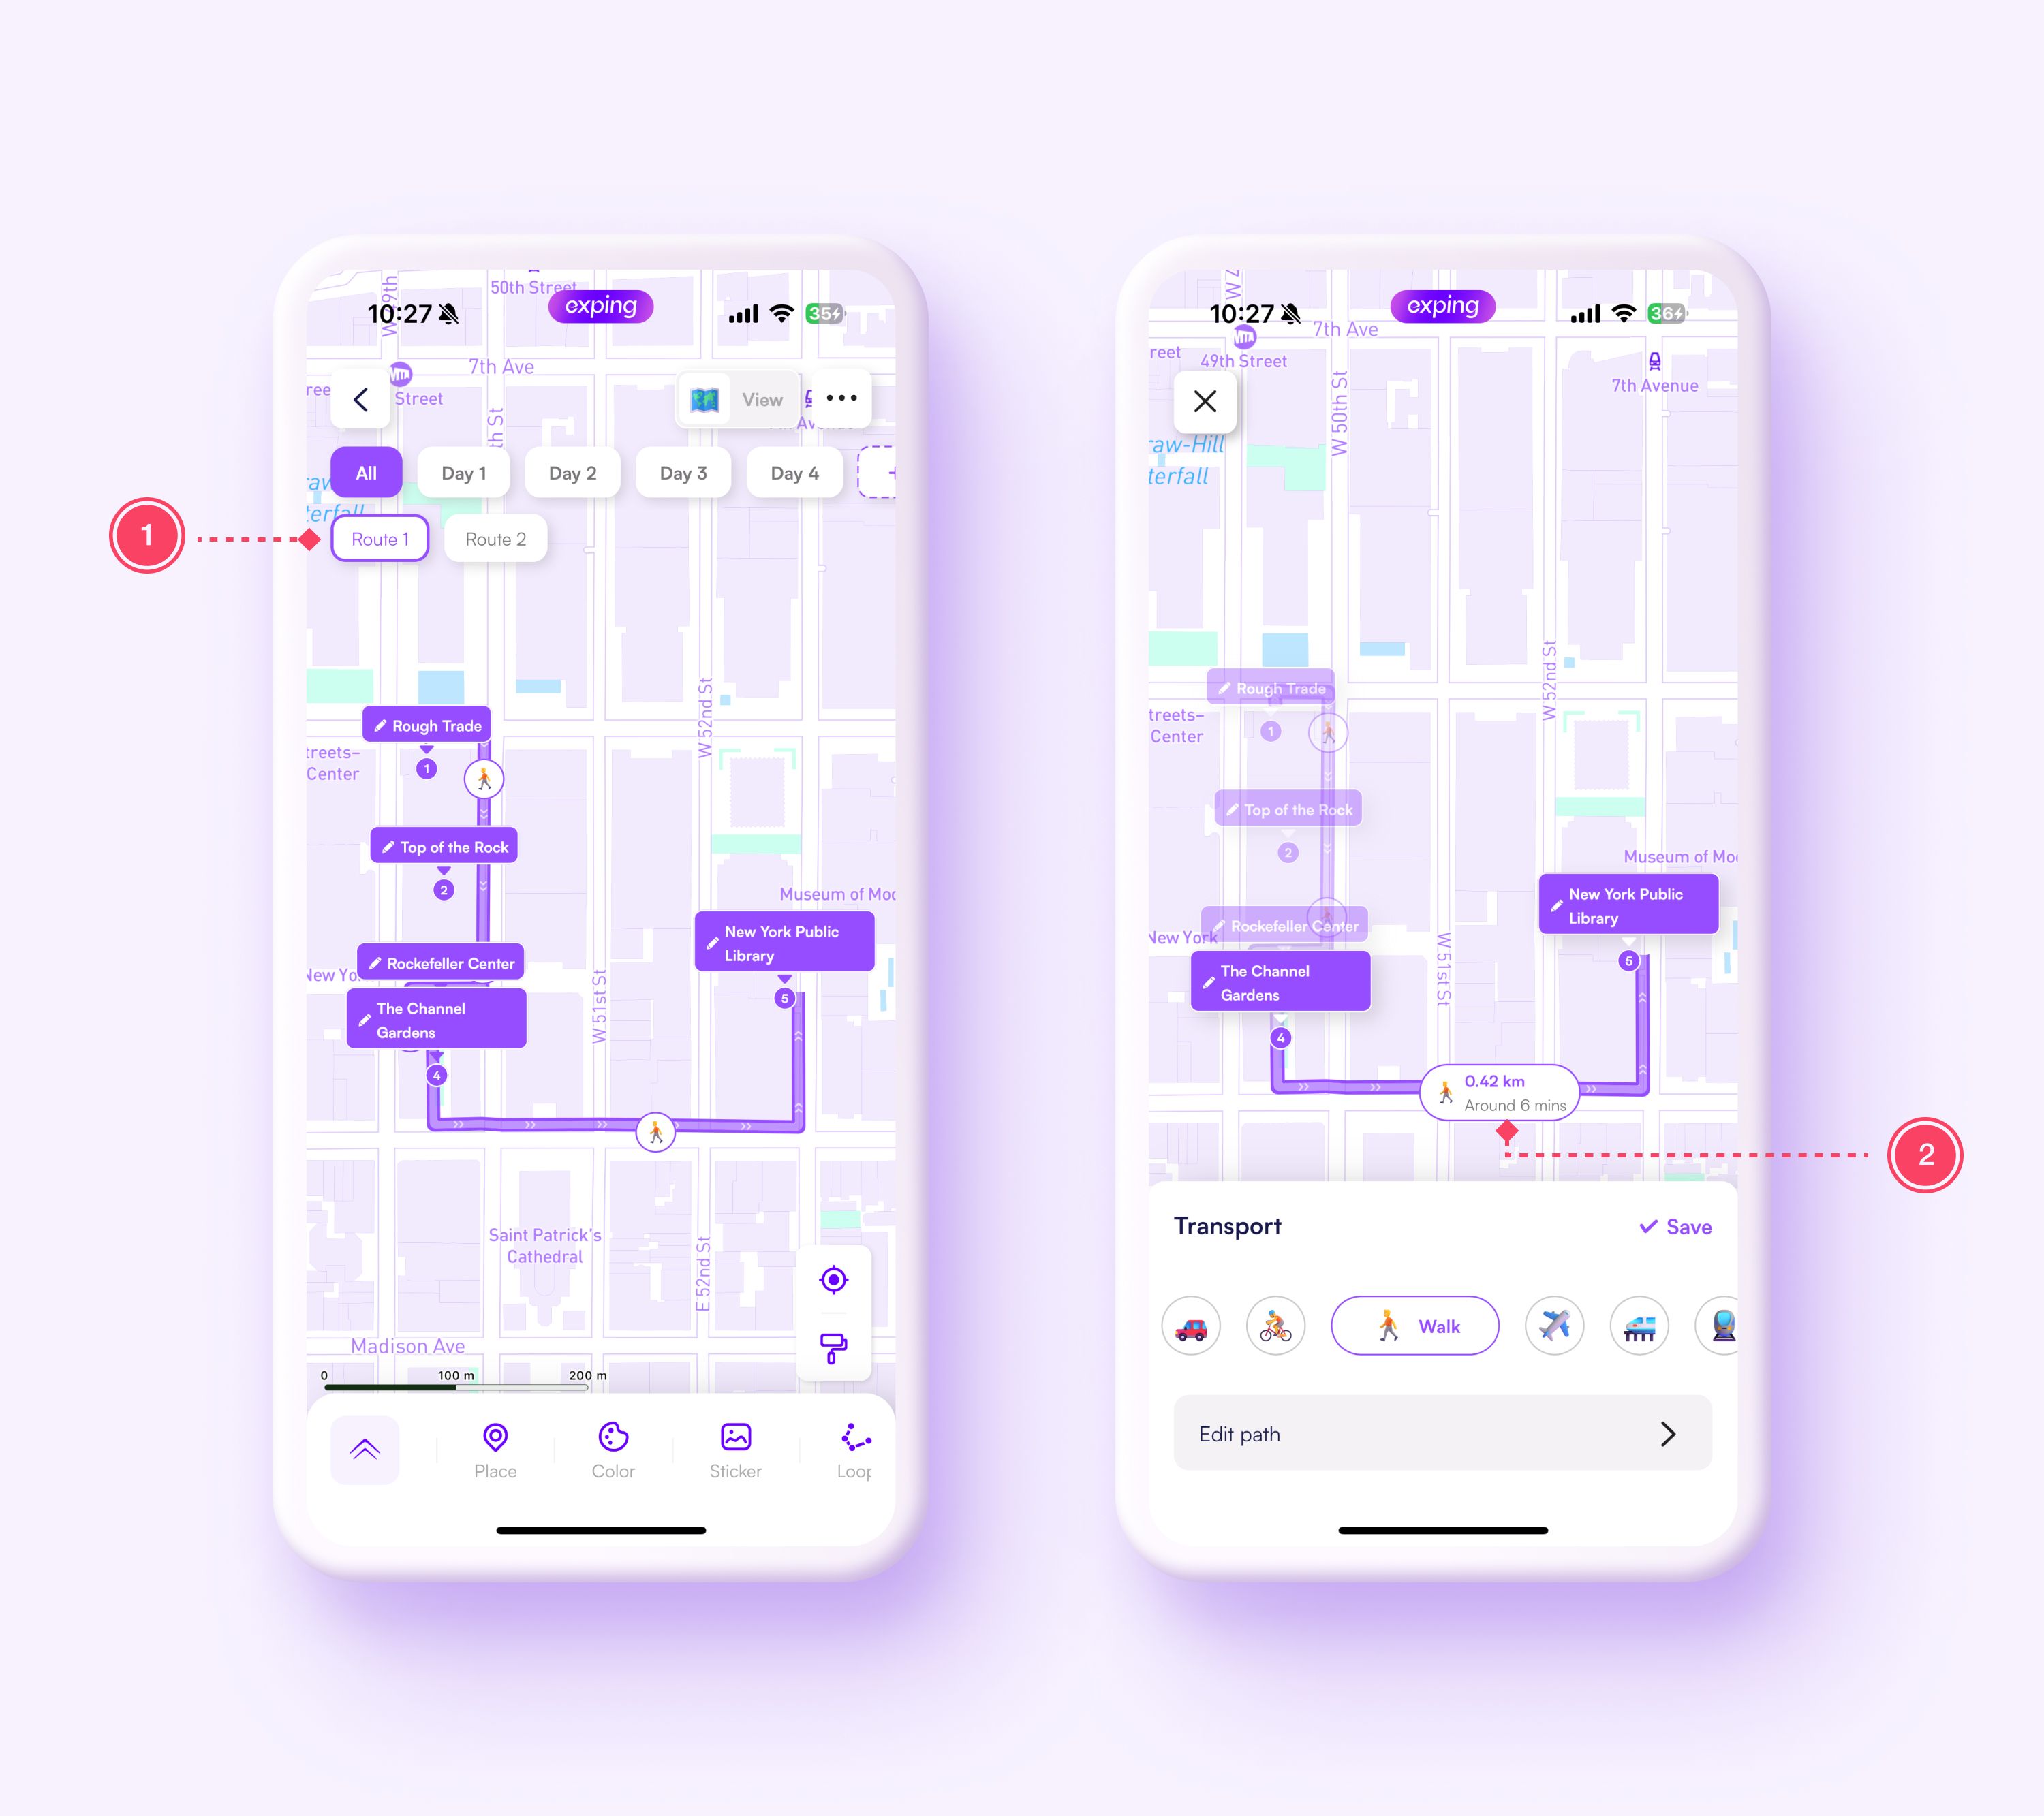
How to Modifying the Transportation Mode for Freeform Routes?
- On the map editing page, select the desired route
- Tap the transportation icon on the route
- Choose "Edit Path" to enter the route adjustment page
- Turn off "Align Route”
- Choose a different transportation mode, tap "Save”
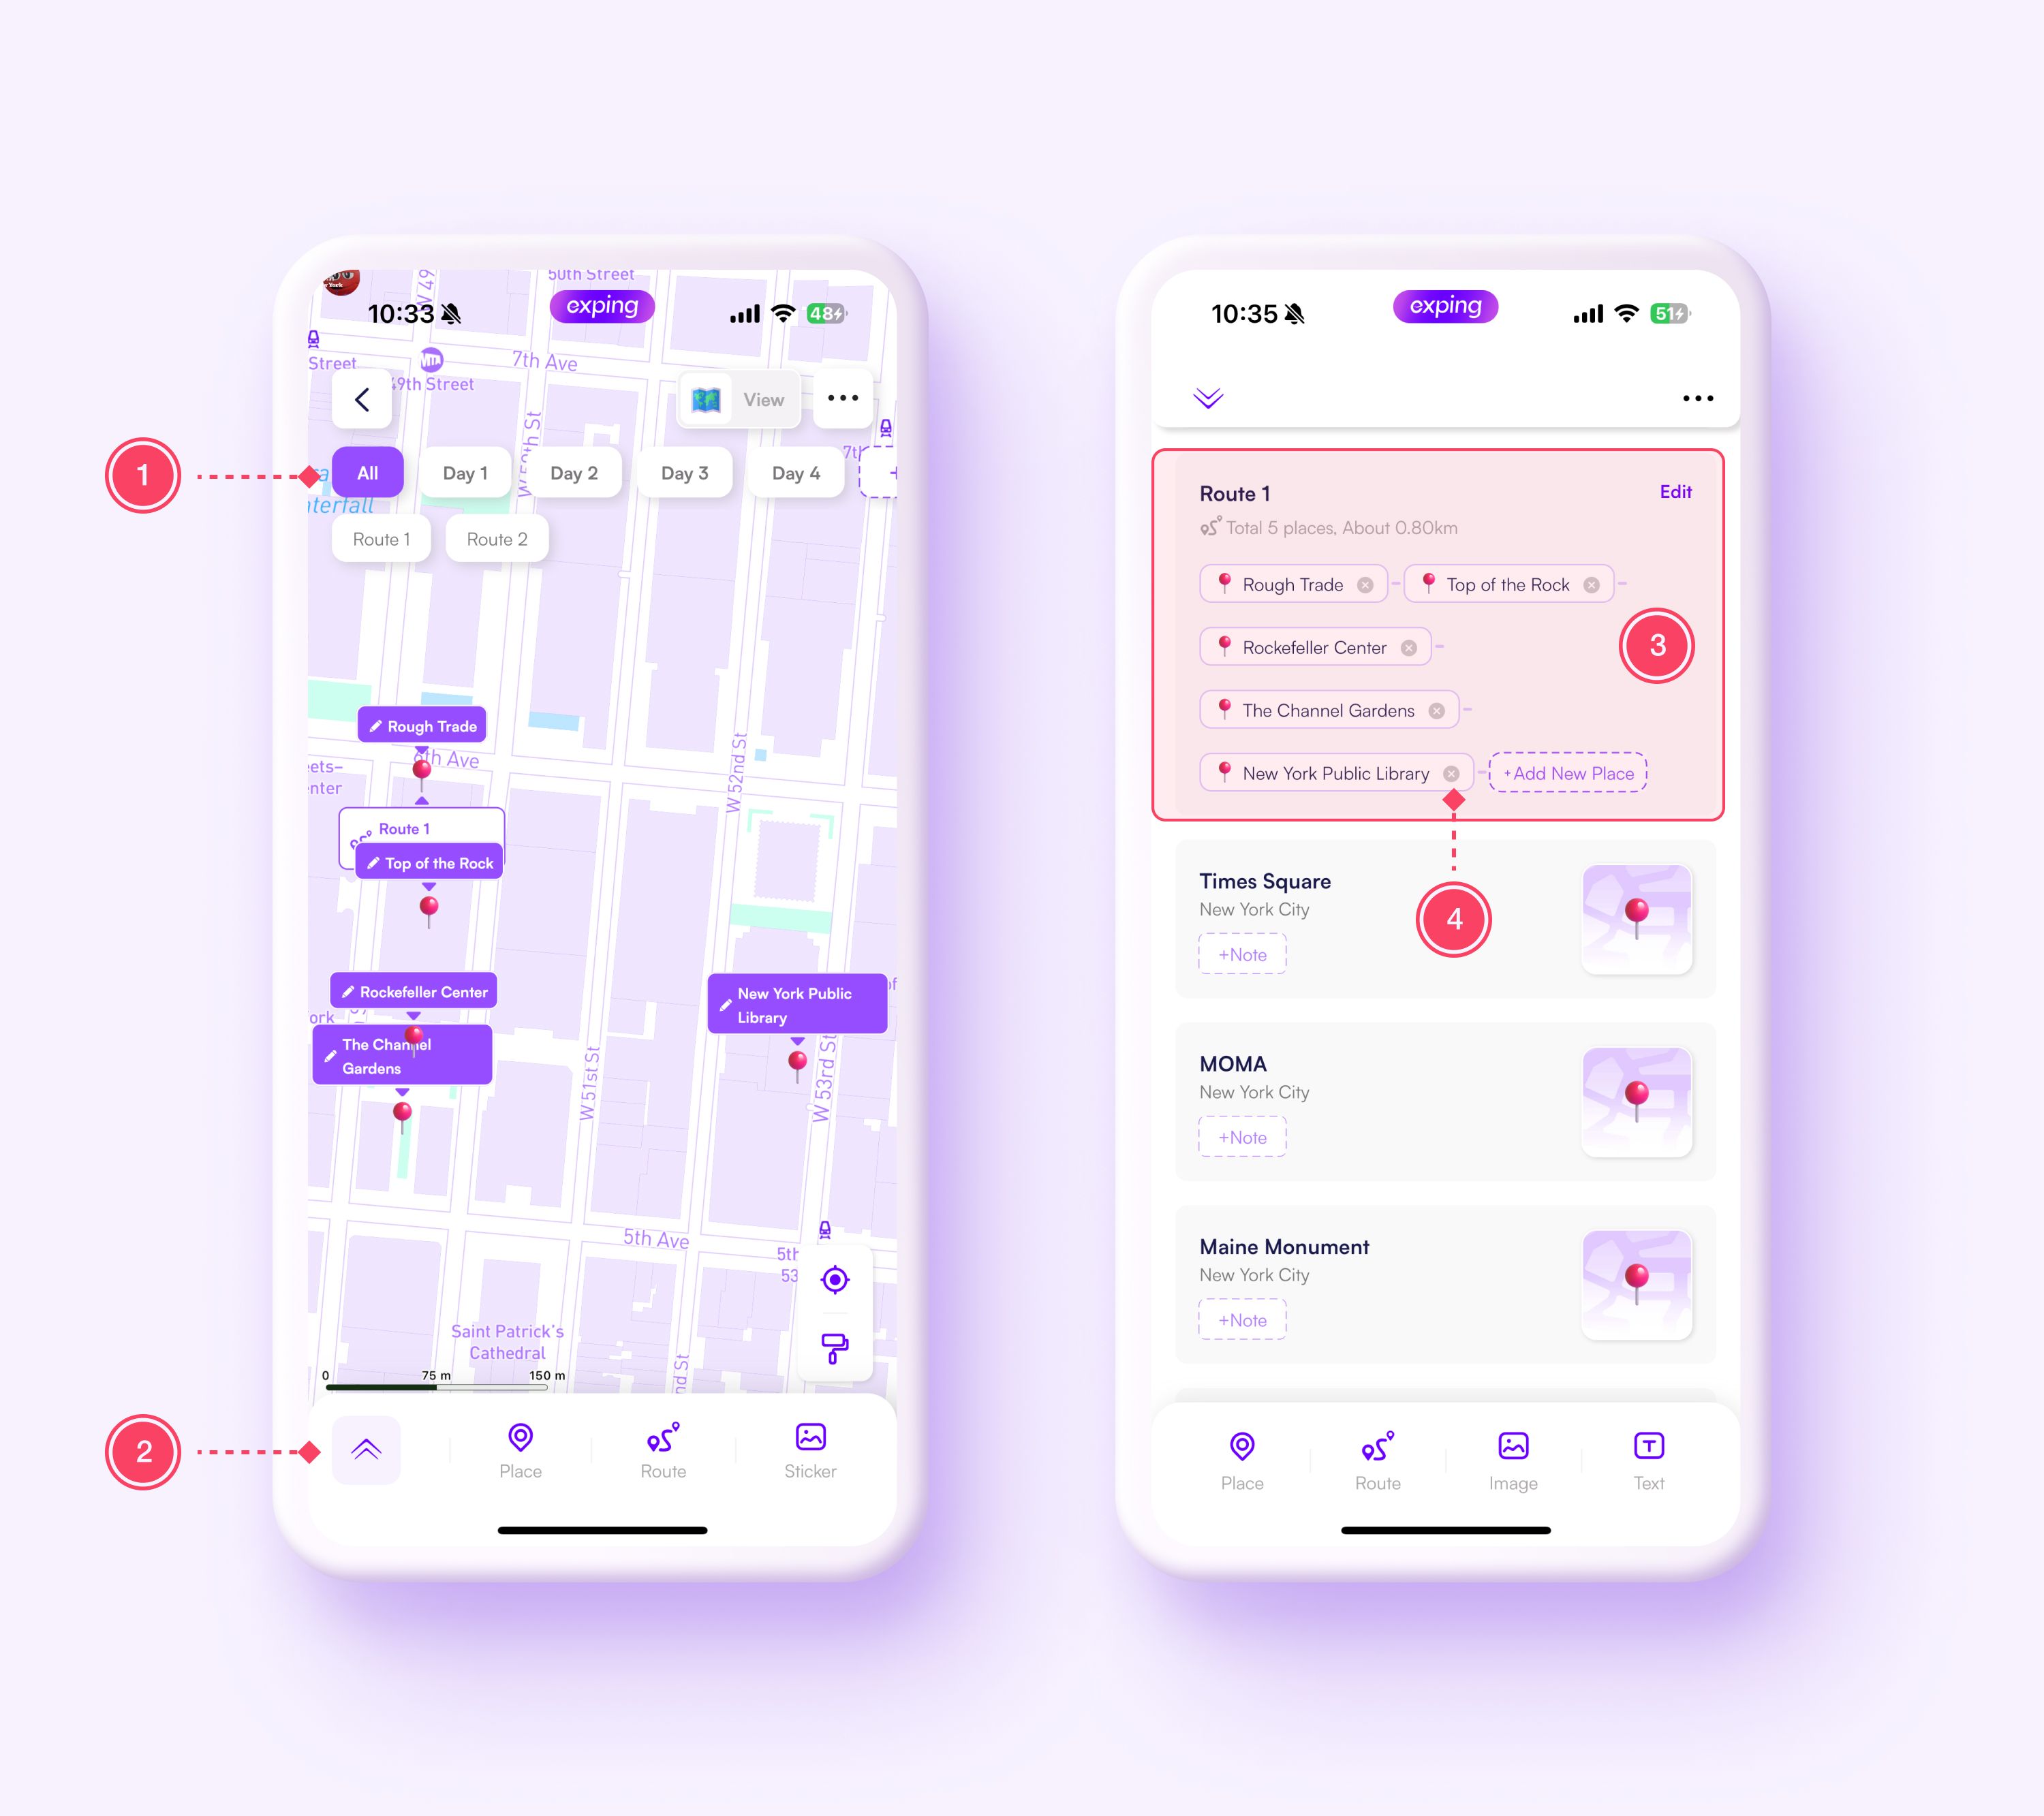
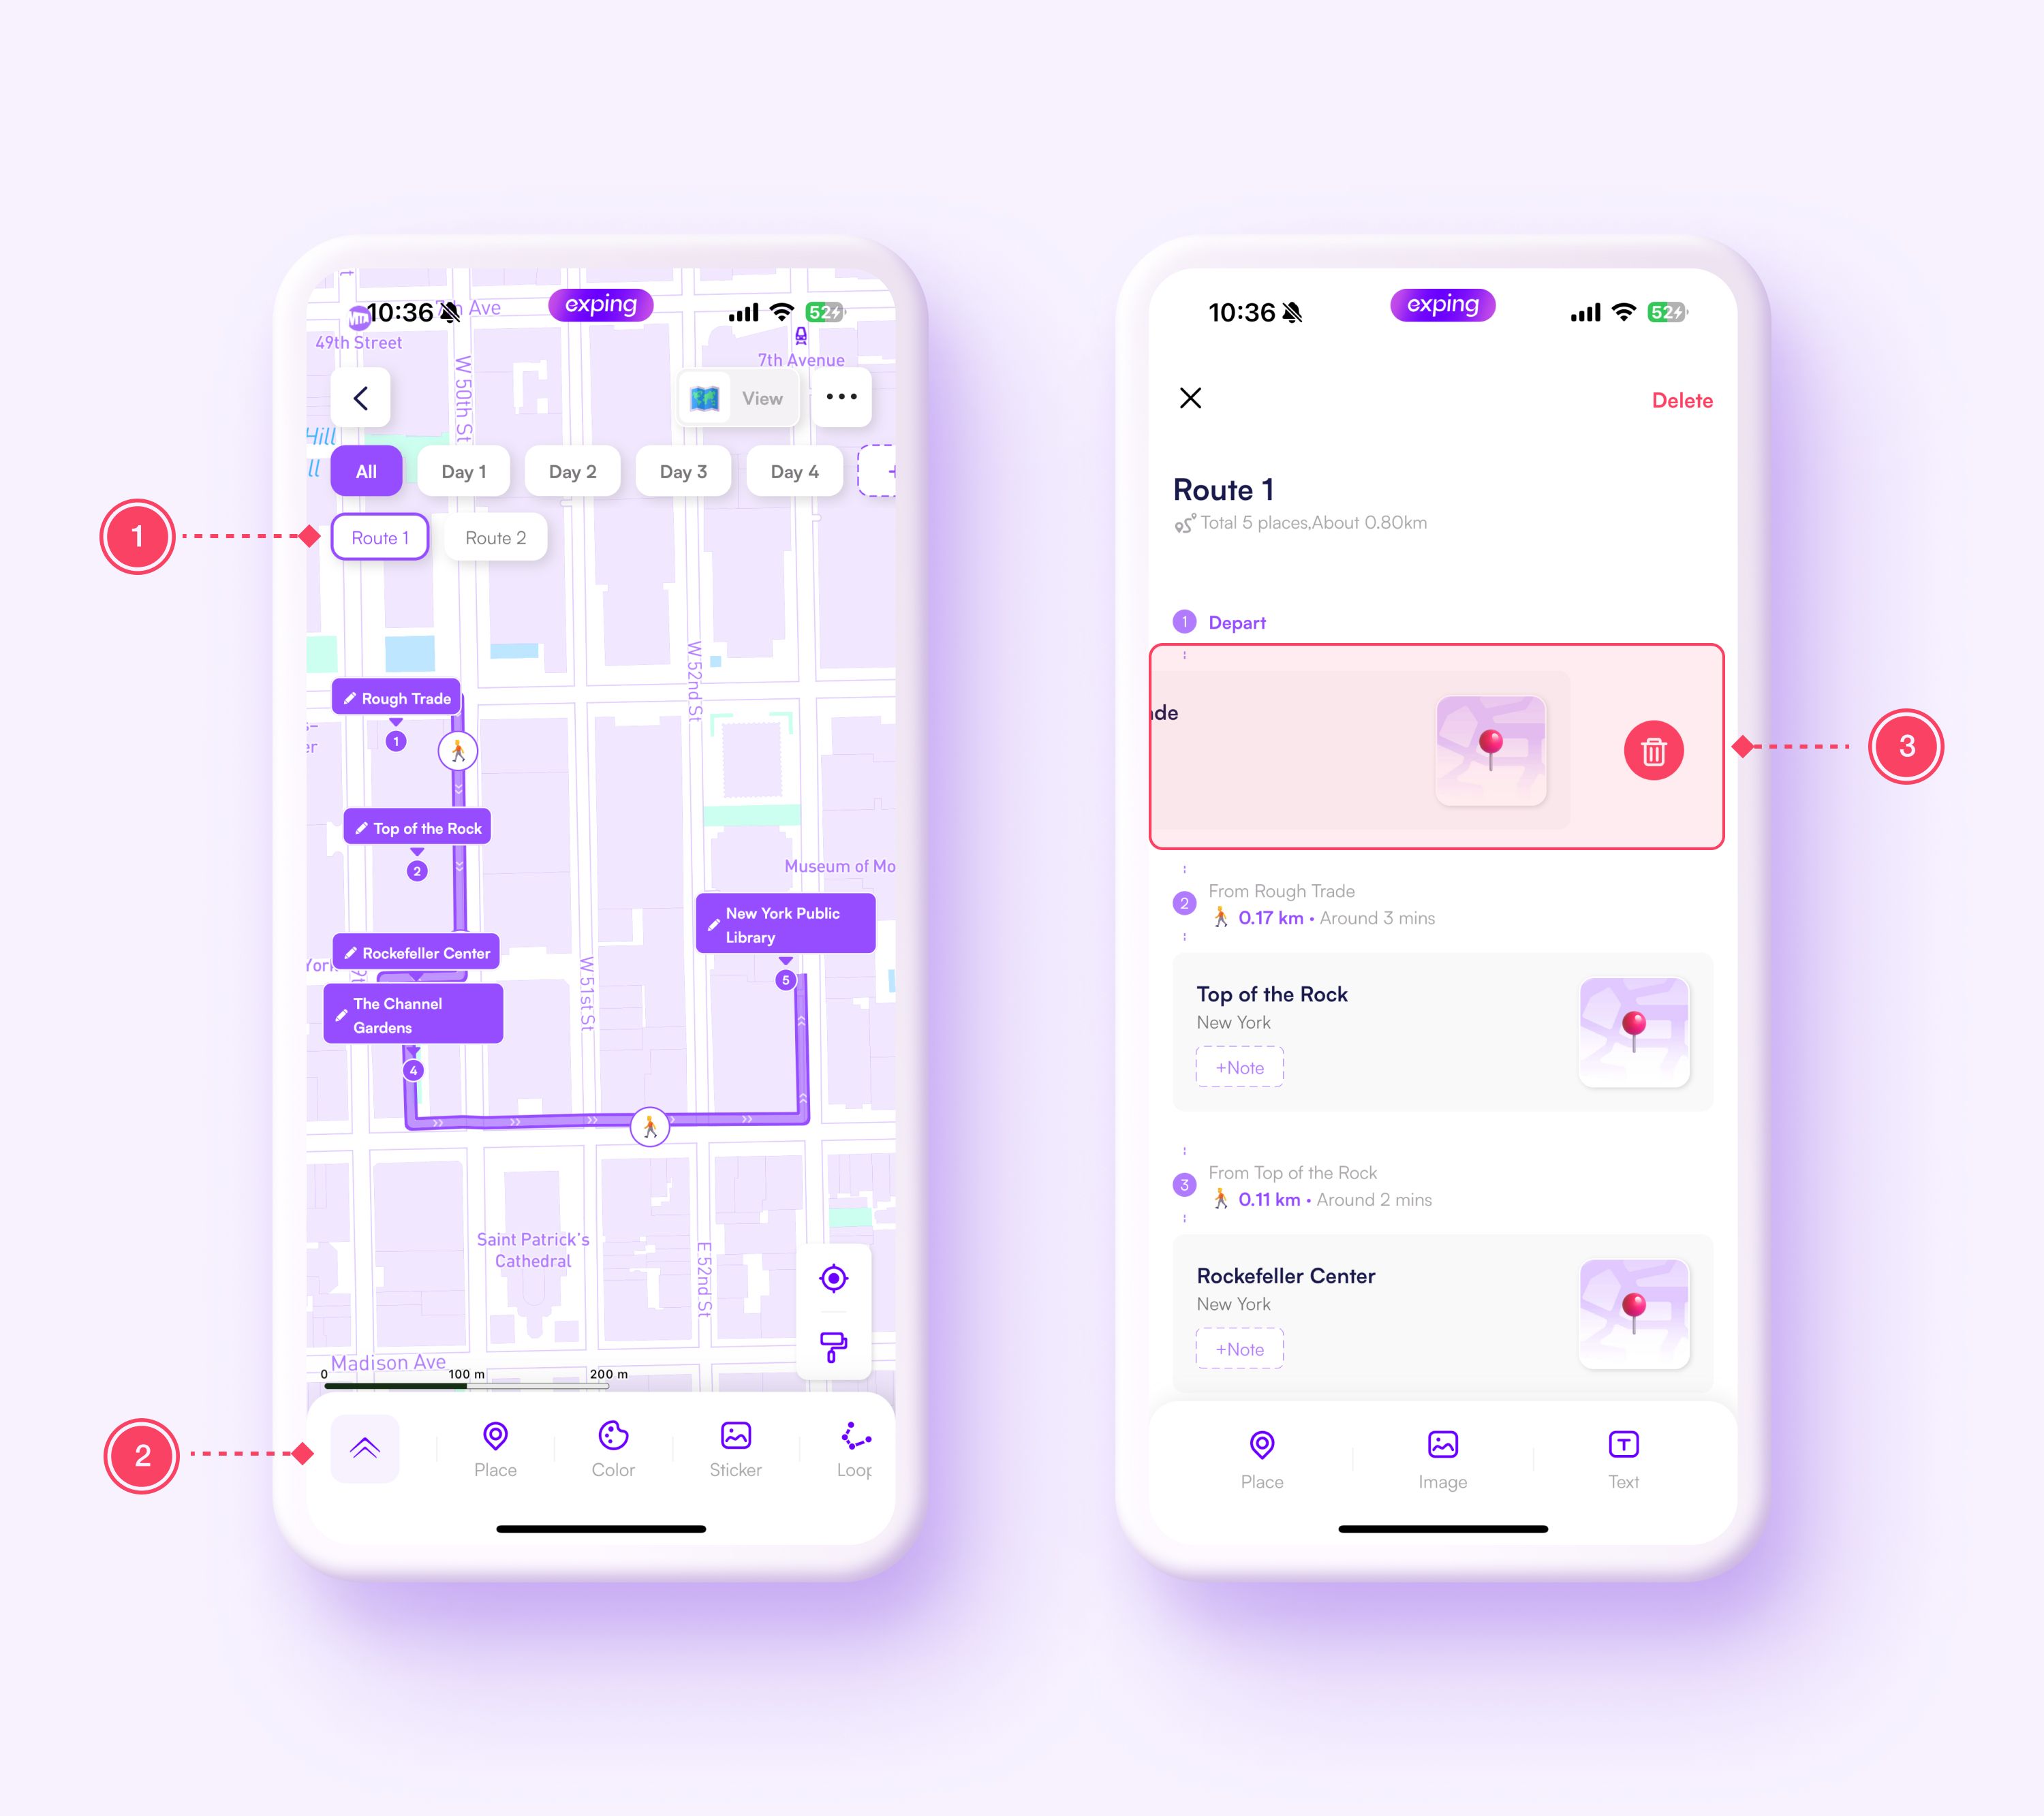
How to Delete Route Places?
For routes with too many locations, consider using methods two and three. Method one is best suited for routes with fewer locations.
Method 1
- On the map editing page, select the desired route
- Long-press the place to delete
- Tap "Delete" at the bottom left

Method 2
- On the map editing page, tap "All”
- Open map curation page
- Locate the corresponding route card
- Delete place directly on the card
Method 3
- On the map editing page, select the desired route
- Open map curation page
- Swipe left on the place card you want to remove
How to Delete a Route?
For map with too many routes and locations, consider using methods two and three. Method one is best suited for map with fewer locations and routes.
Method 1
- On the map editing page, tap "All”
- Long-press the desired route
- Tap “Delete” at the bottom left

Method 2
Open the route curation page, tap "Delete" to remove the route
Method 3
Open the map curation page, swipe left on the route card to delete the route