Product
Complete Beginner Guide to Exping on Web Client
tl;dr Exping on web client is a personalized map creation platform that offers creators an intuitive and convenient tool for marking locations, planning routes, collaborating on edits, and sharing maps. After reading this beginner's guide, you will grasp the various operations of exping on web client and embark on your map creation journey.
Exping on web client is a personalized map creation platform that offers creators an intuitive and convenient tool for marking locations, planning routes, collaborating on edits, and sharing maps. Each feature, including grouping, routing, importing, and adding illustrations, has been meticulously designed. Combined with a sleek interface and smooth operation, exping ensures a high-quality user experience.
After reading this beginner's guide, you will grasp the various operations of exping on web client and embark on your map creation journey. Whether you want to record your own travel experiences or plan explorations to new destinations, exping is an indispensable tool for you.
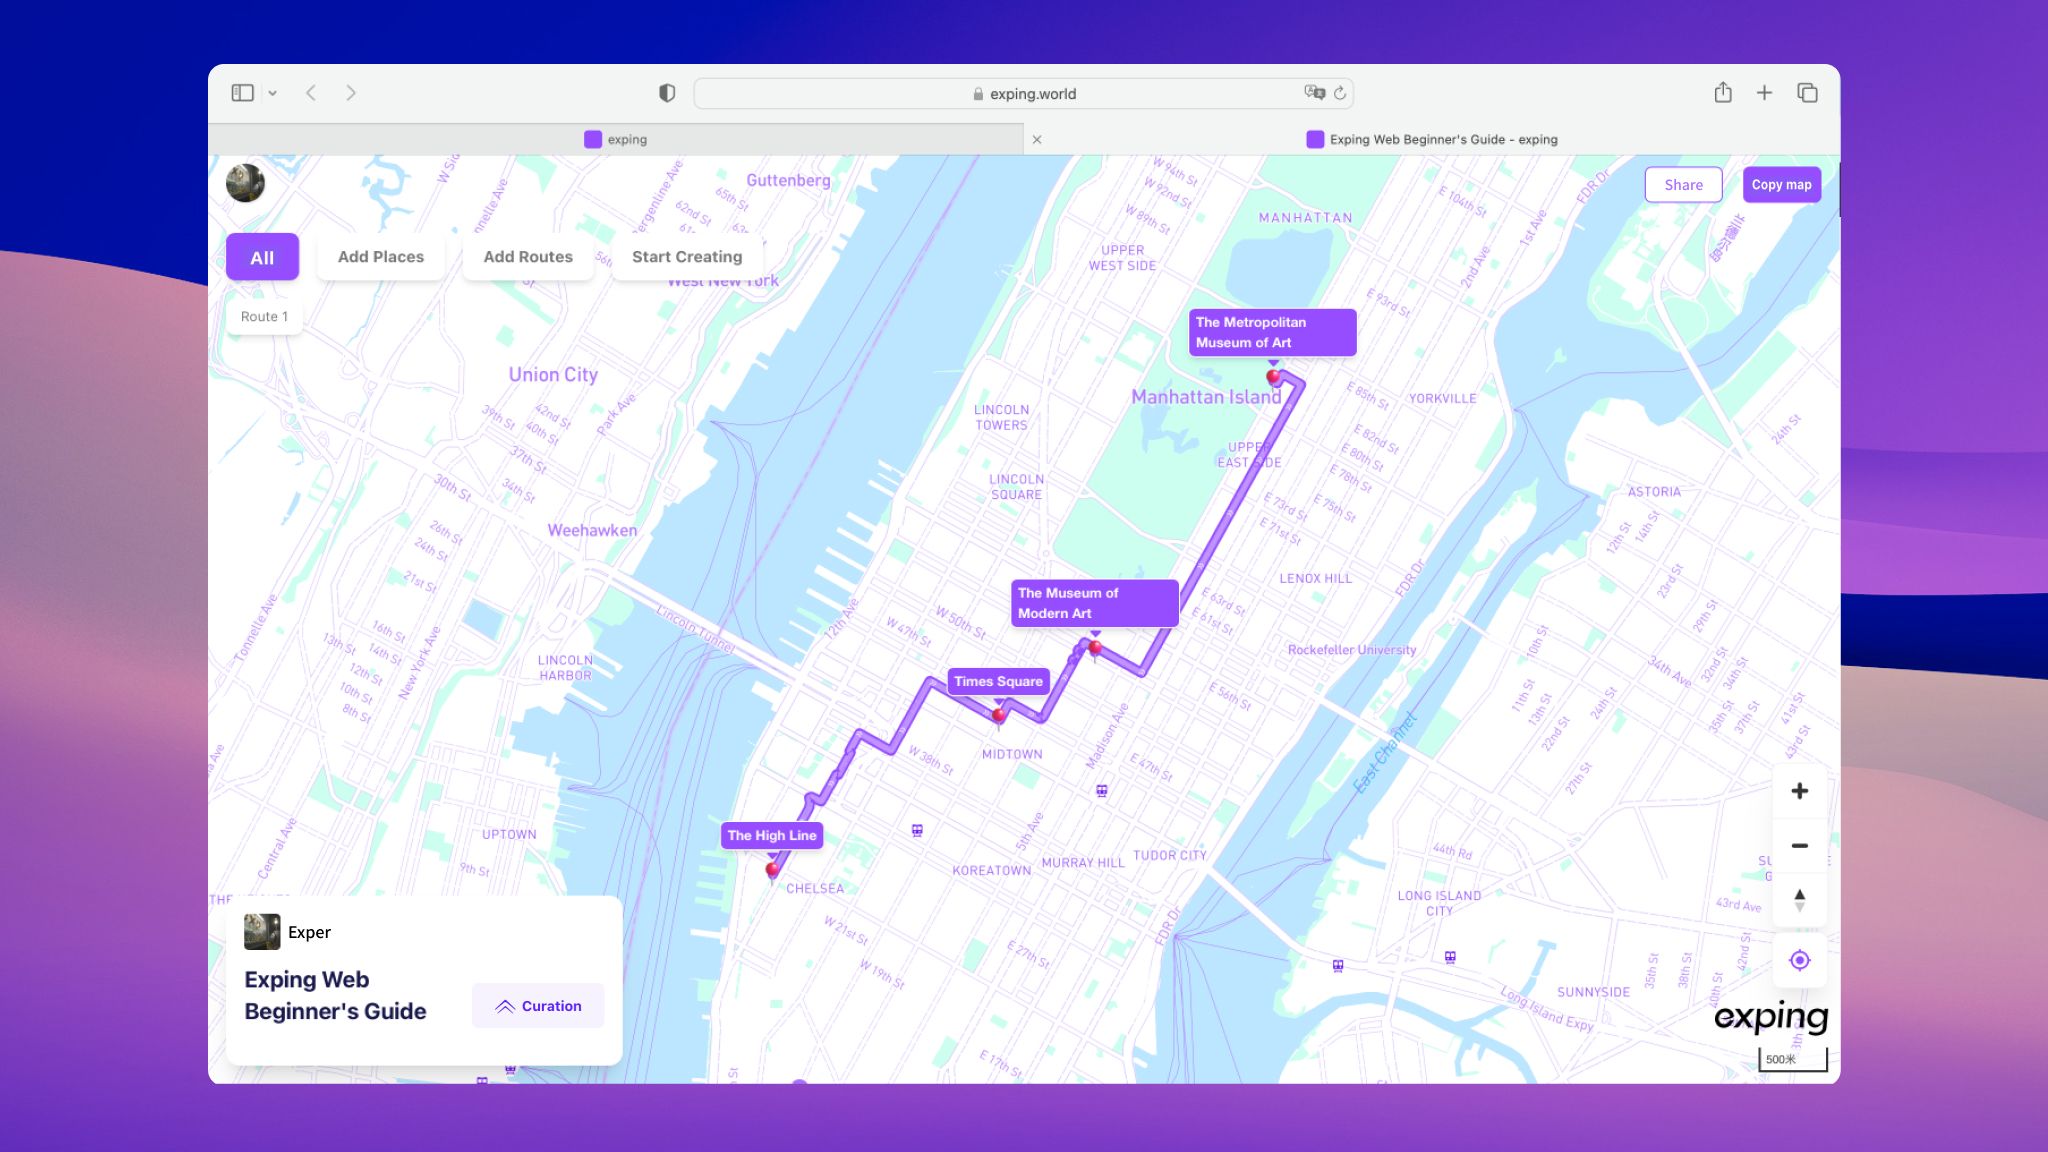
Let's dive in and start by creating a new map on exping on web client and entering the map editing page.
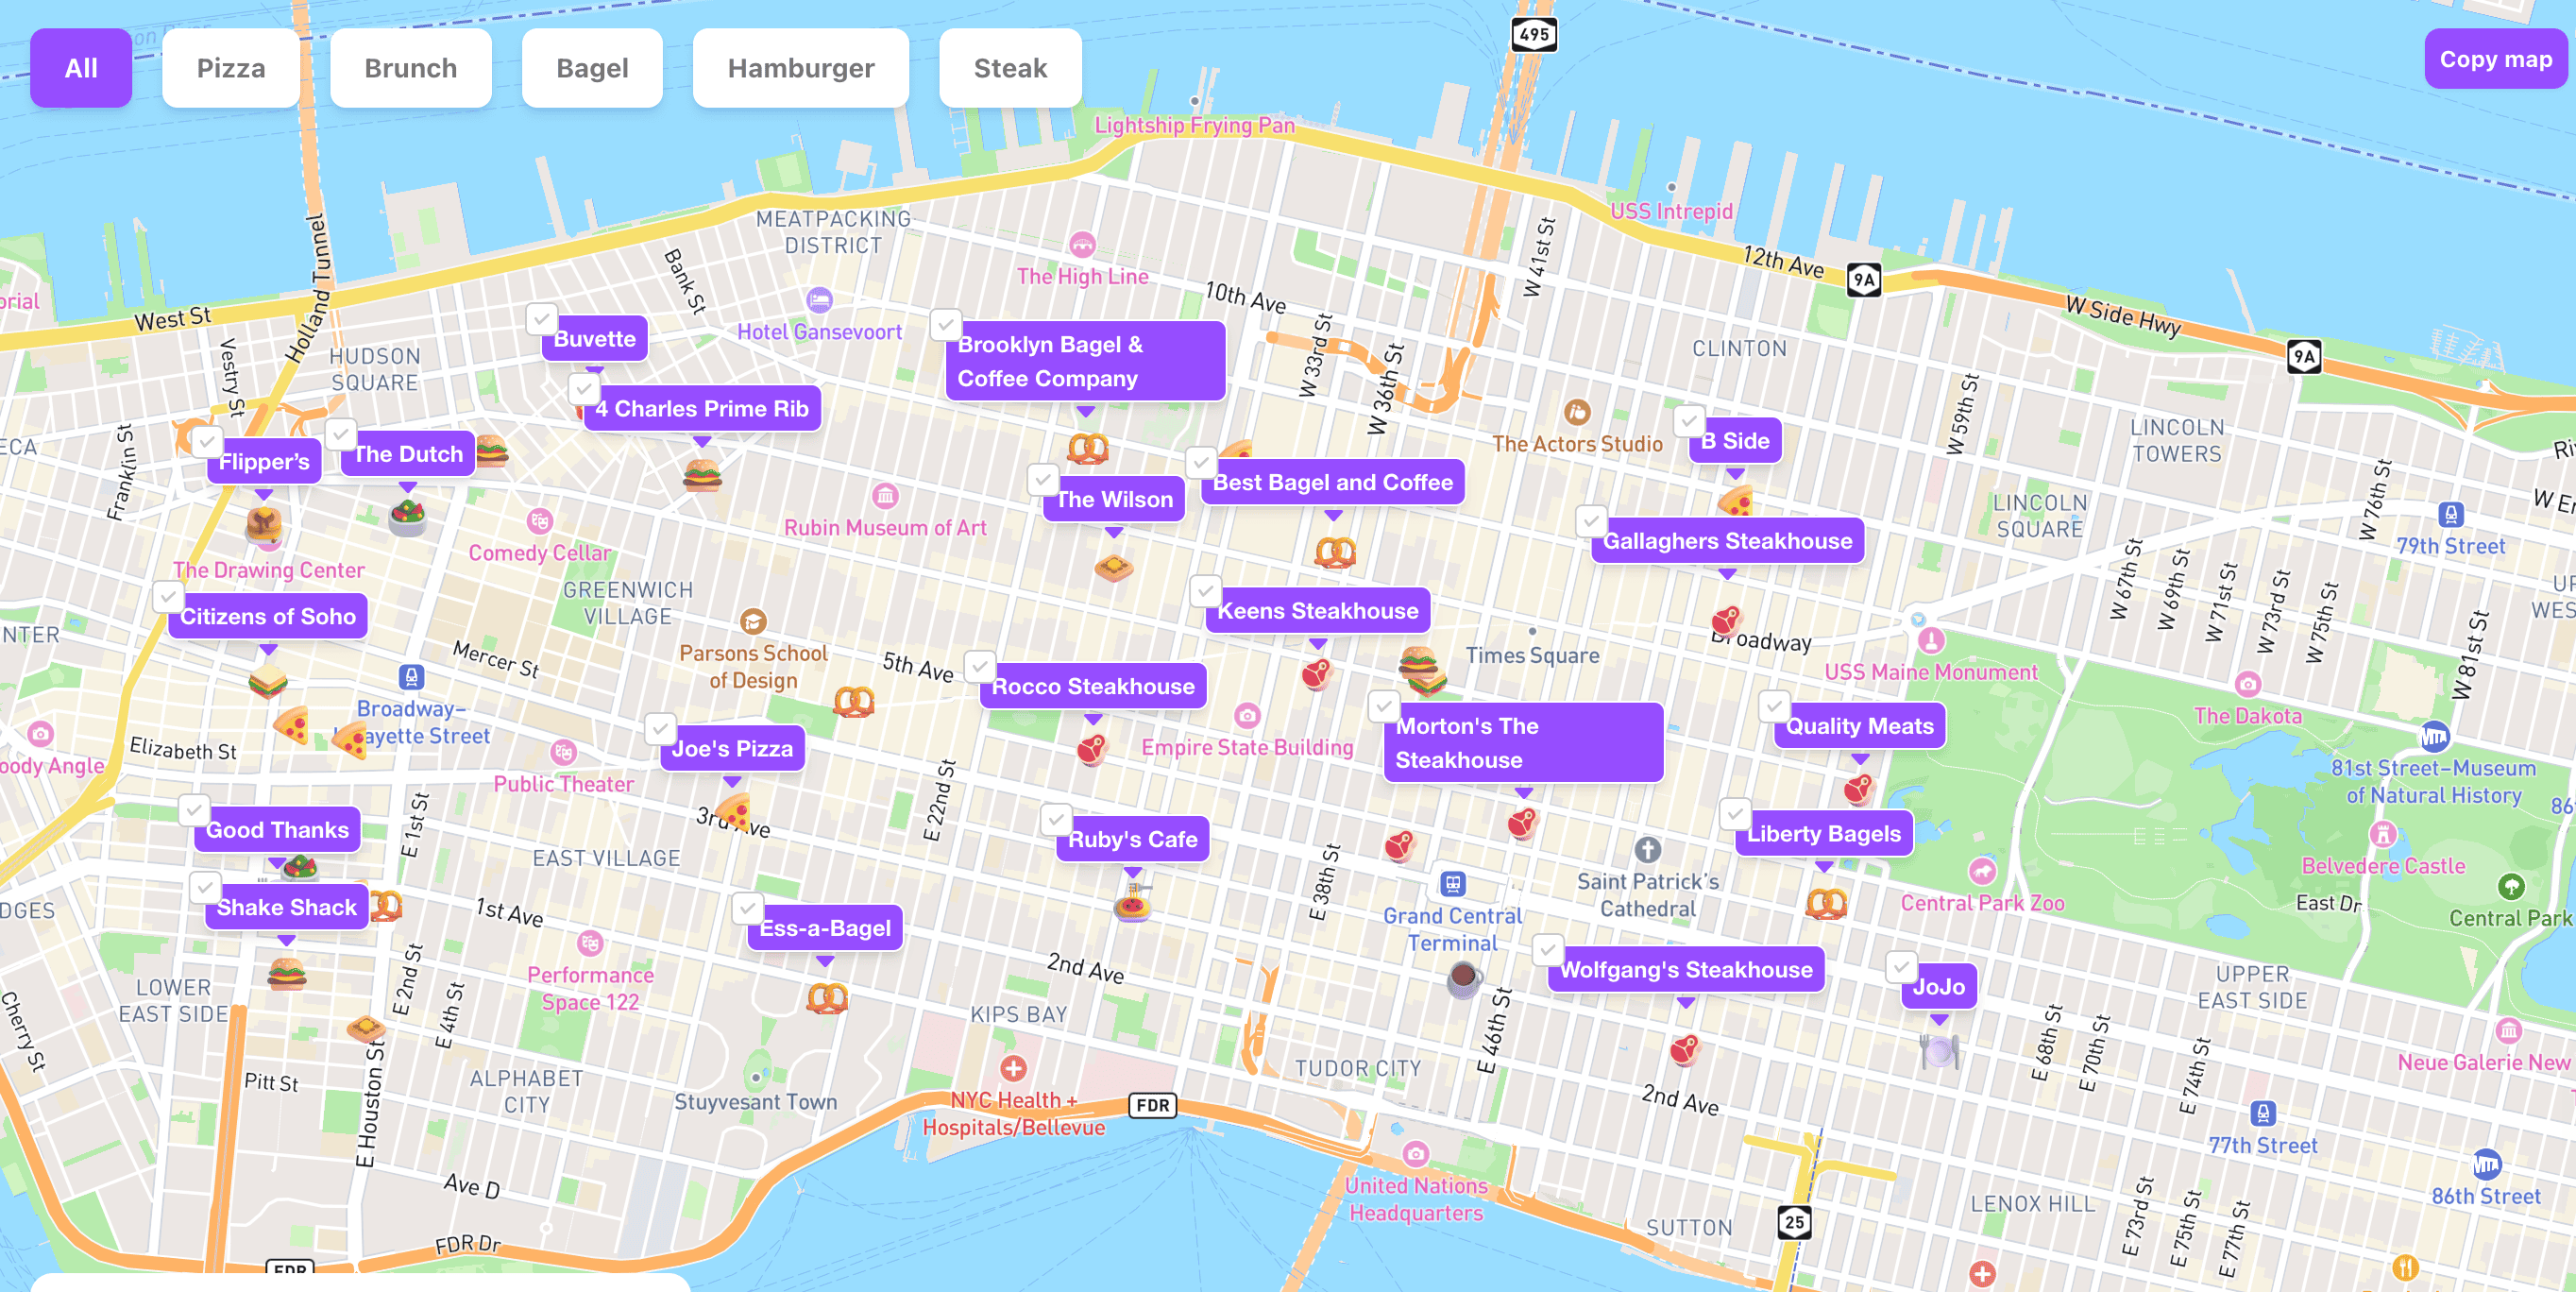
Add Places (POI)
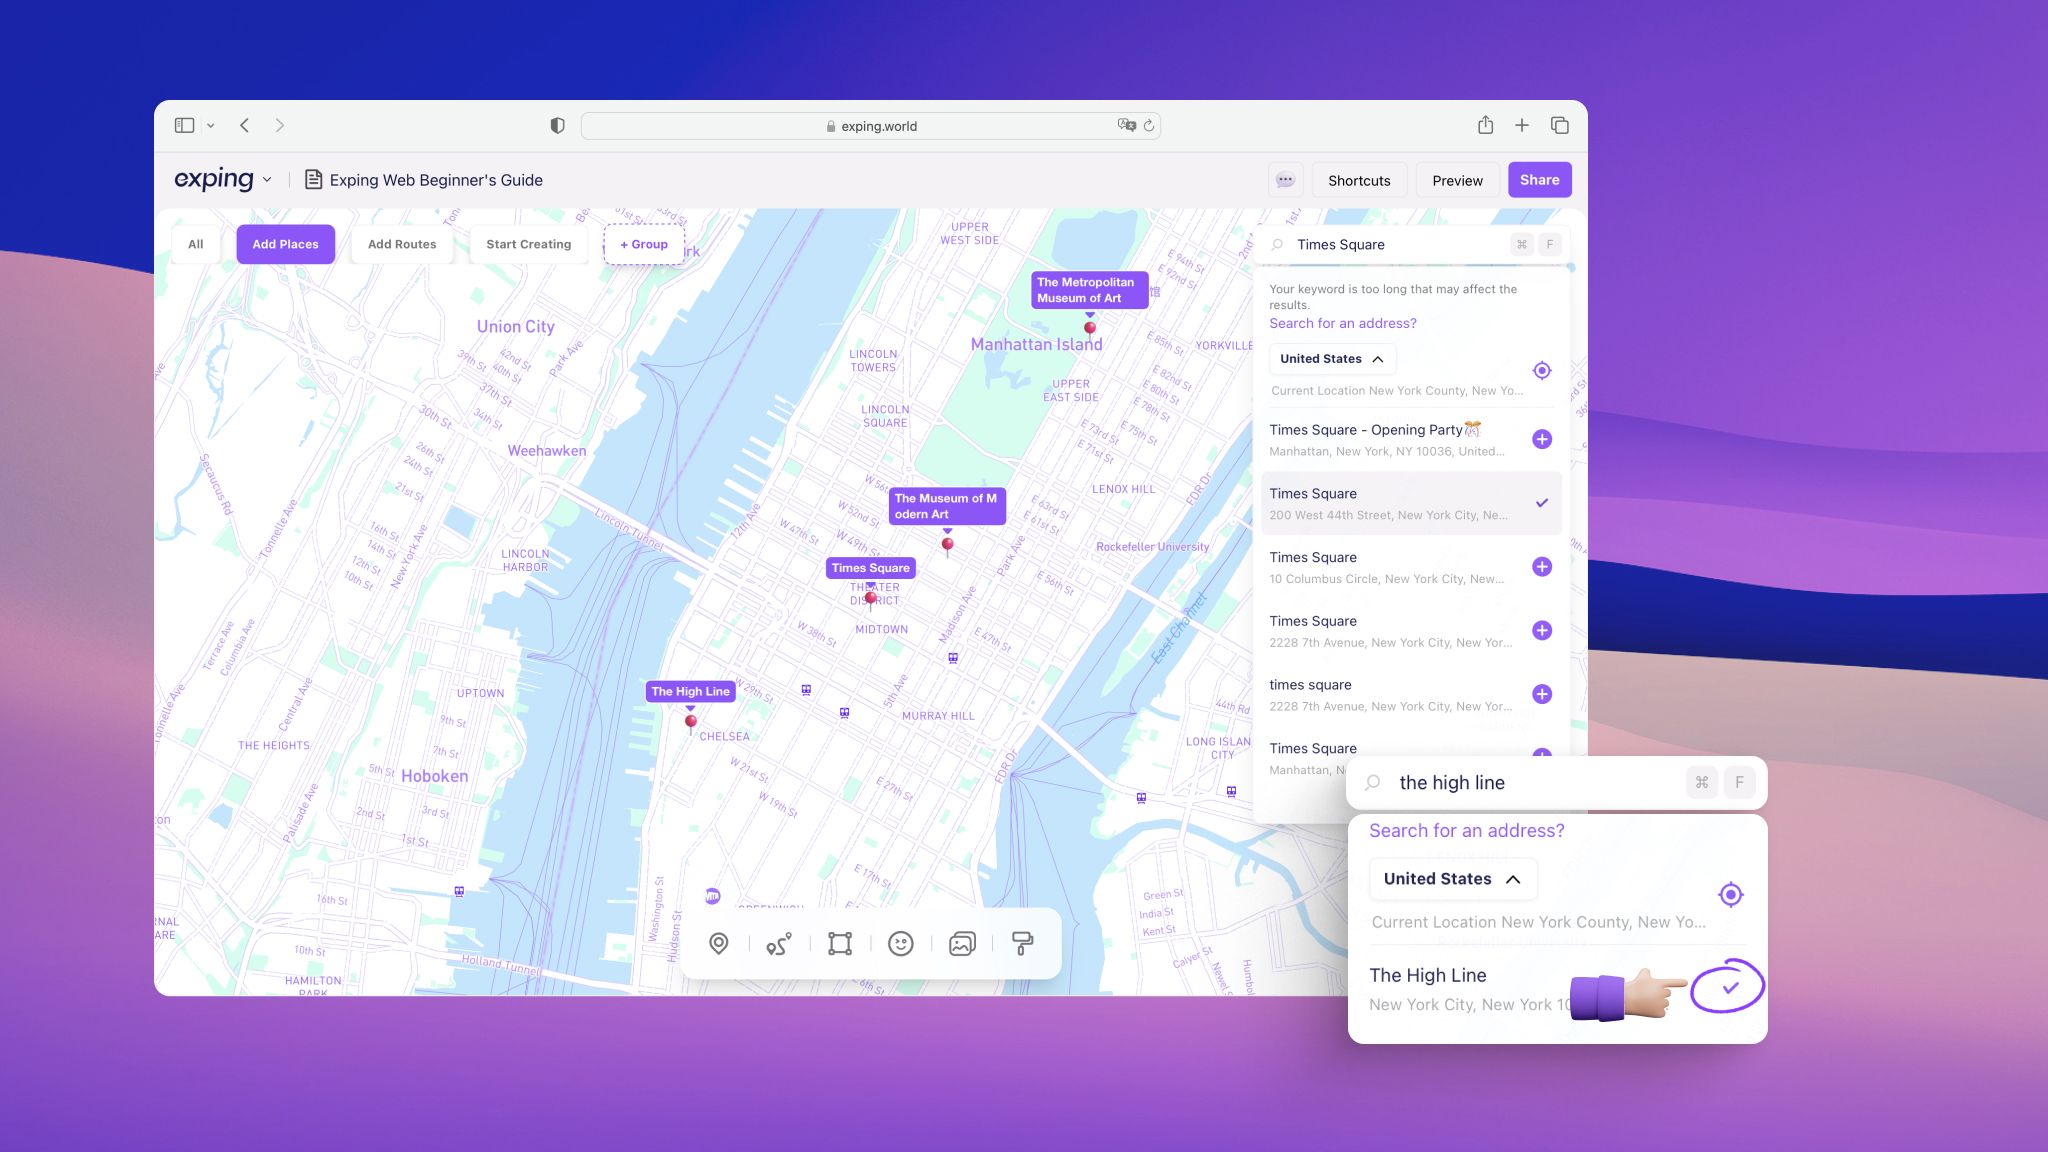
Search for Places
Enter the name or detailed address of the place in the search box at the top right corner. Once found, click the "+" icon next to it to add it to your map.
💡 Import Locations
In addition to searching and adding, you can also add multiple locations using the Import function. After clicking on "Import" in the top right corner of the exping Creation page, you can copy and paste the link from Google Maps ‘Saved List’ or Apple Maps ‘Guides’ into the box to import locations.
After checking (or unchecking) the locations you want to import, then click "Add to Map”, and finally select the map where you want to import the locations.
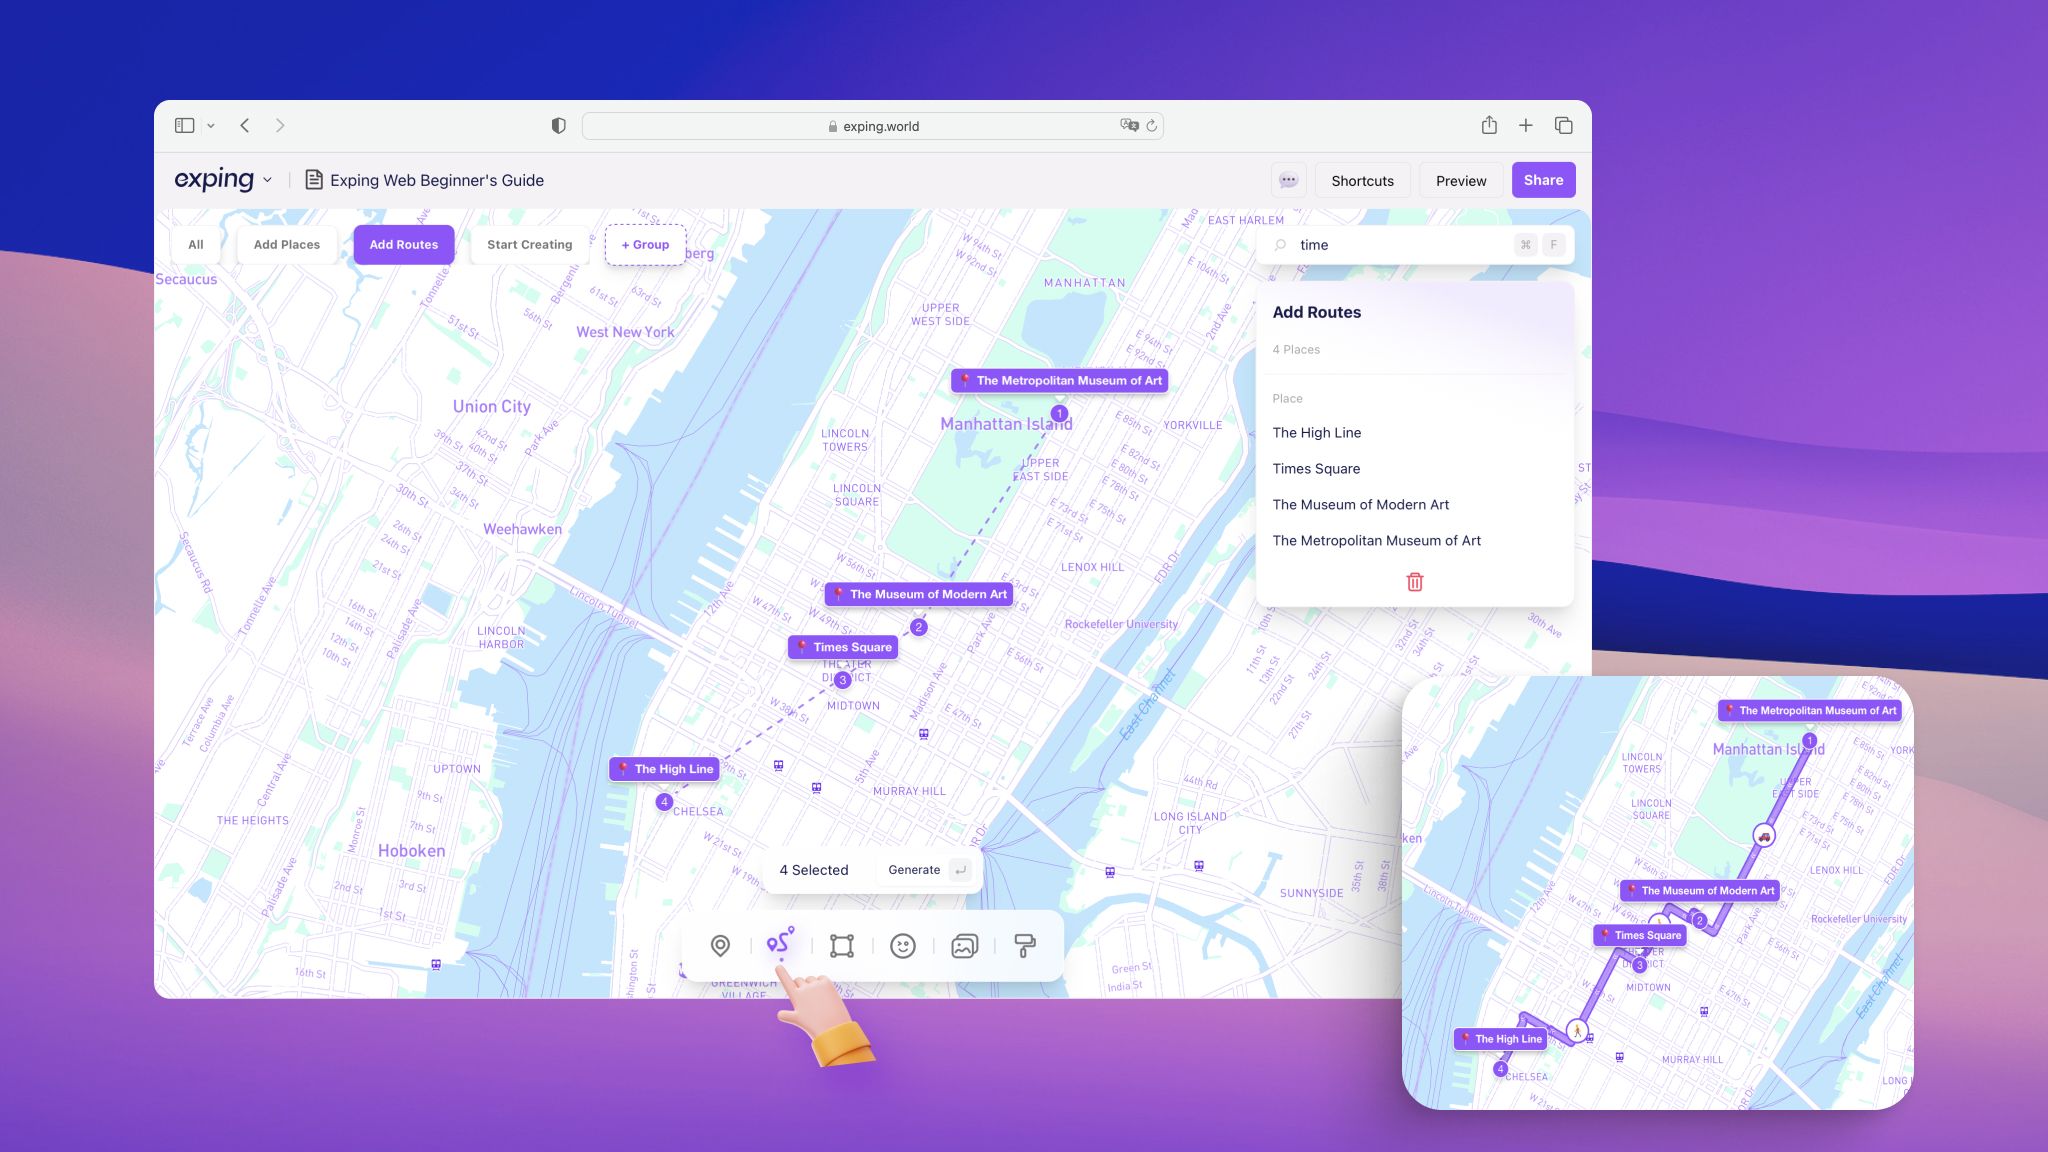
Add Routes
Click the "Route" icon on the bottom toolbar, and sequentially click on the places on the map that you want to generate a route. Complete by pressing the "Enter" key.
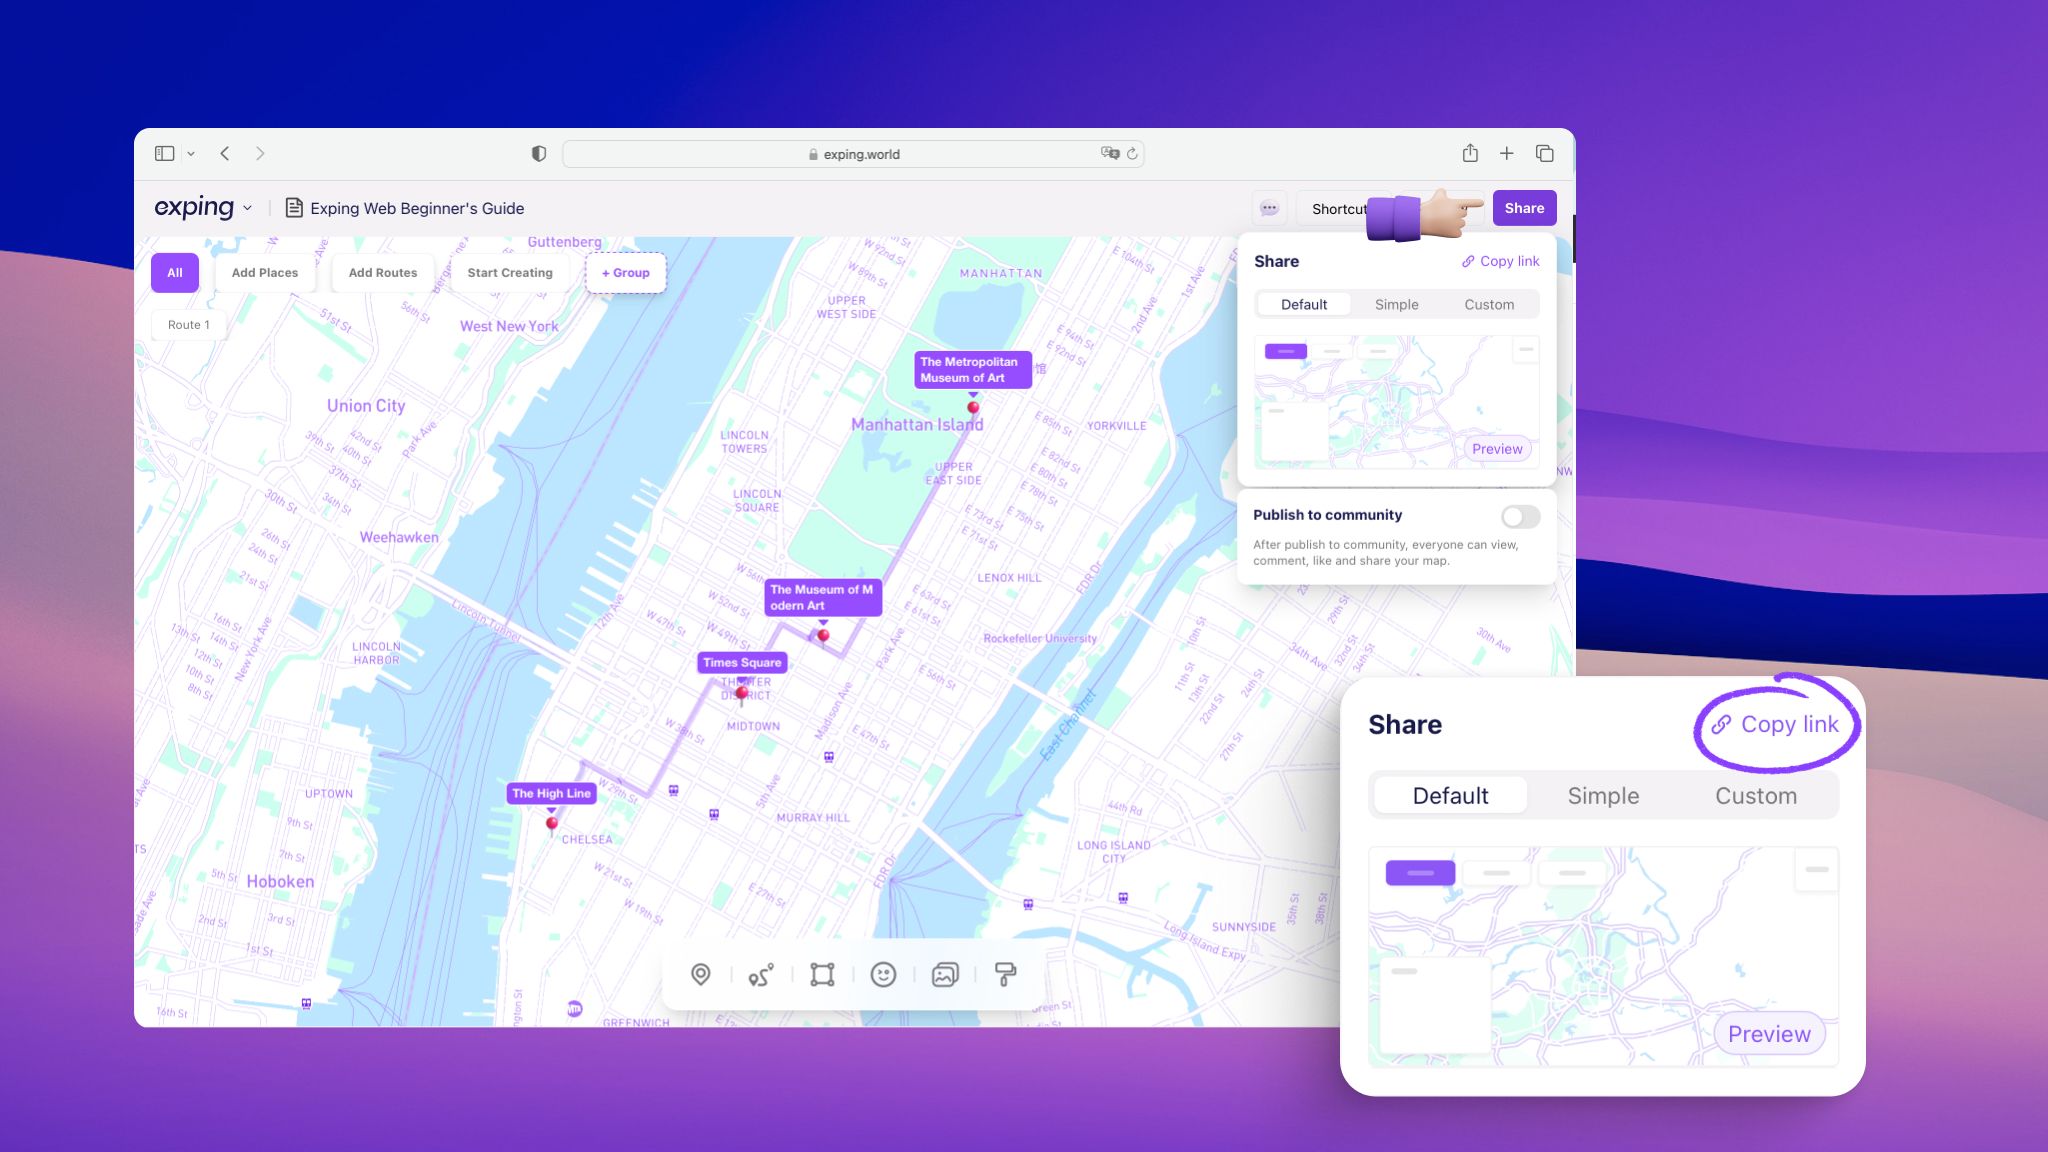
Share Map
Click the "Share" icon in the top right corner of the map, then click "Copy Link" to share your map with your family and friends.
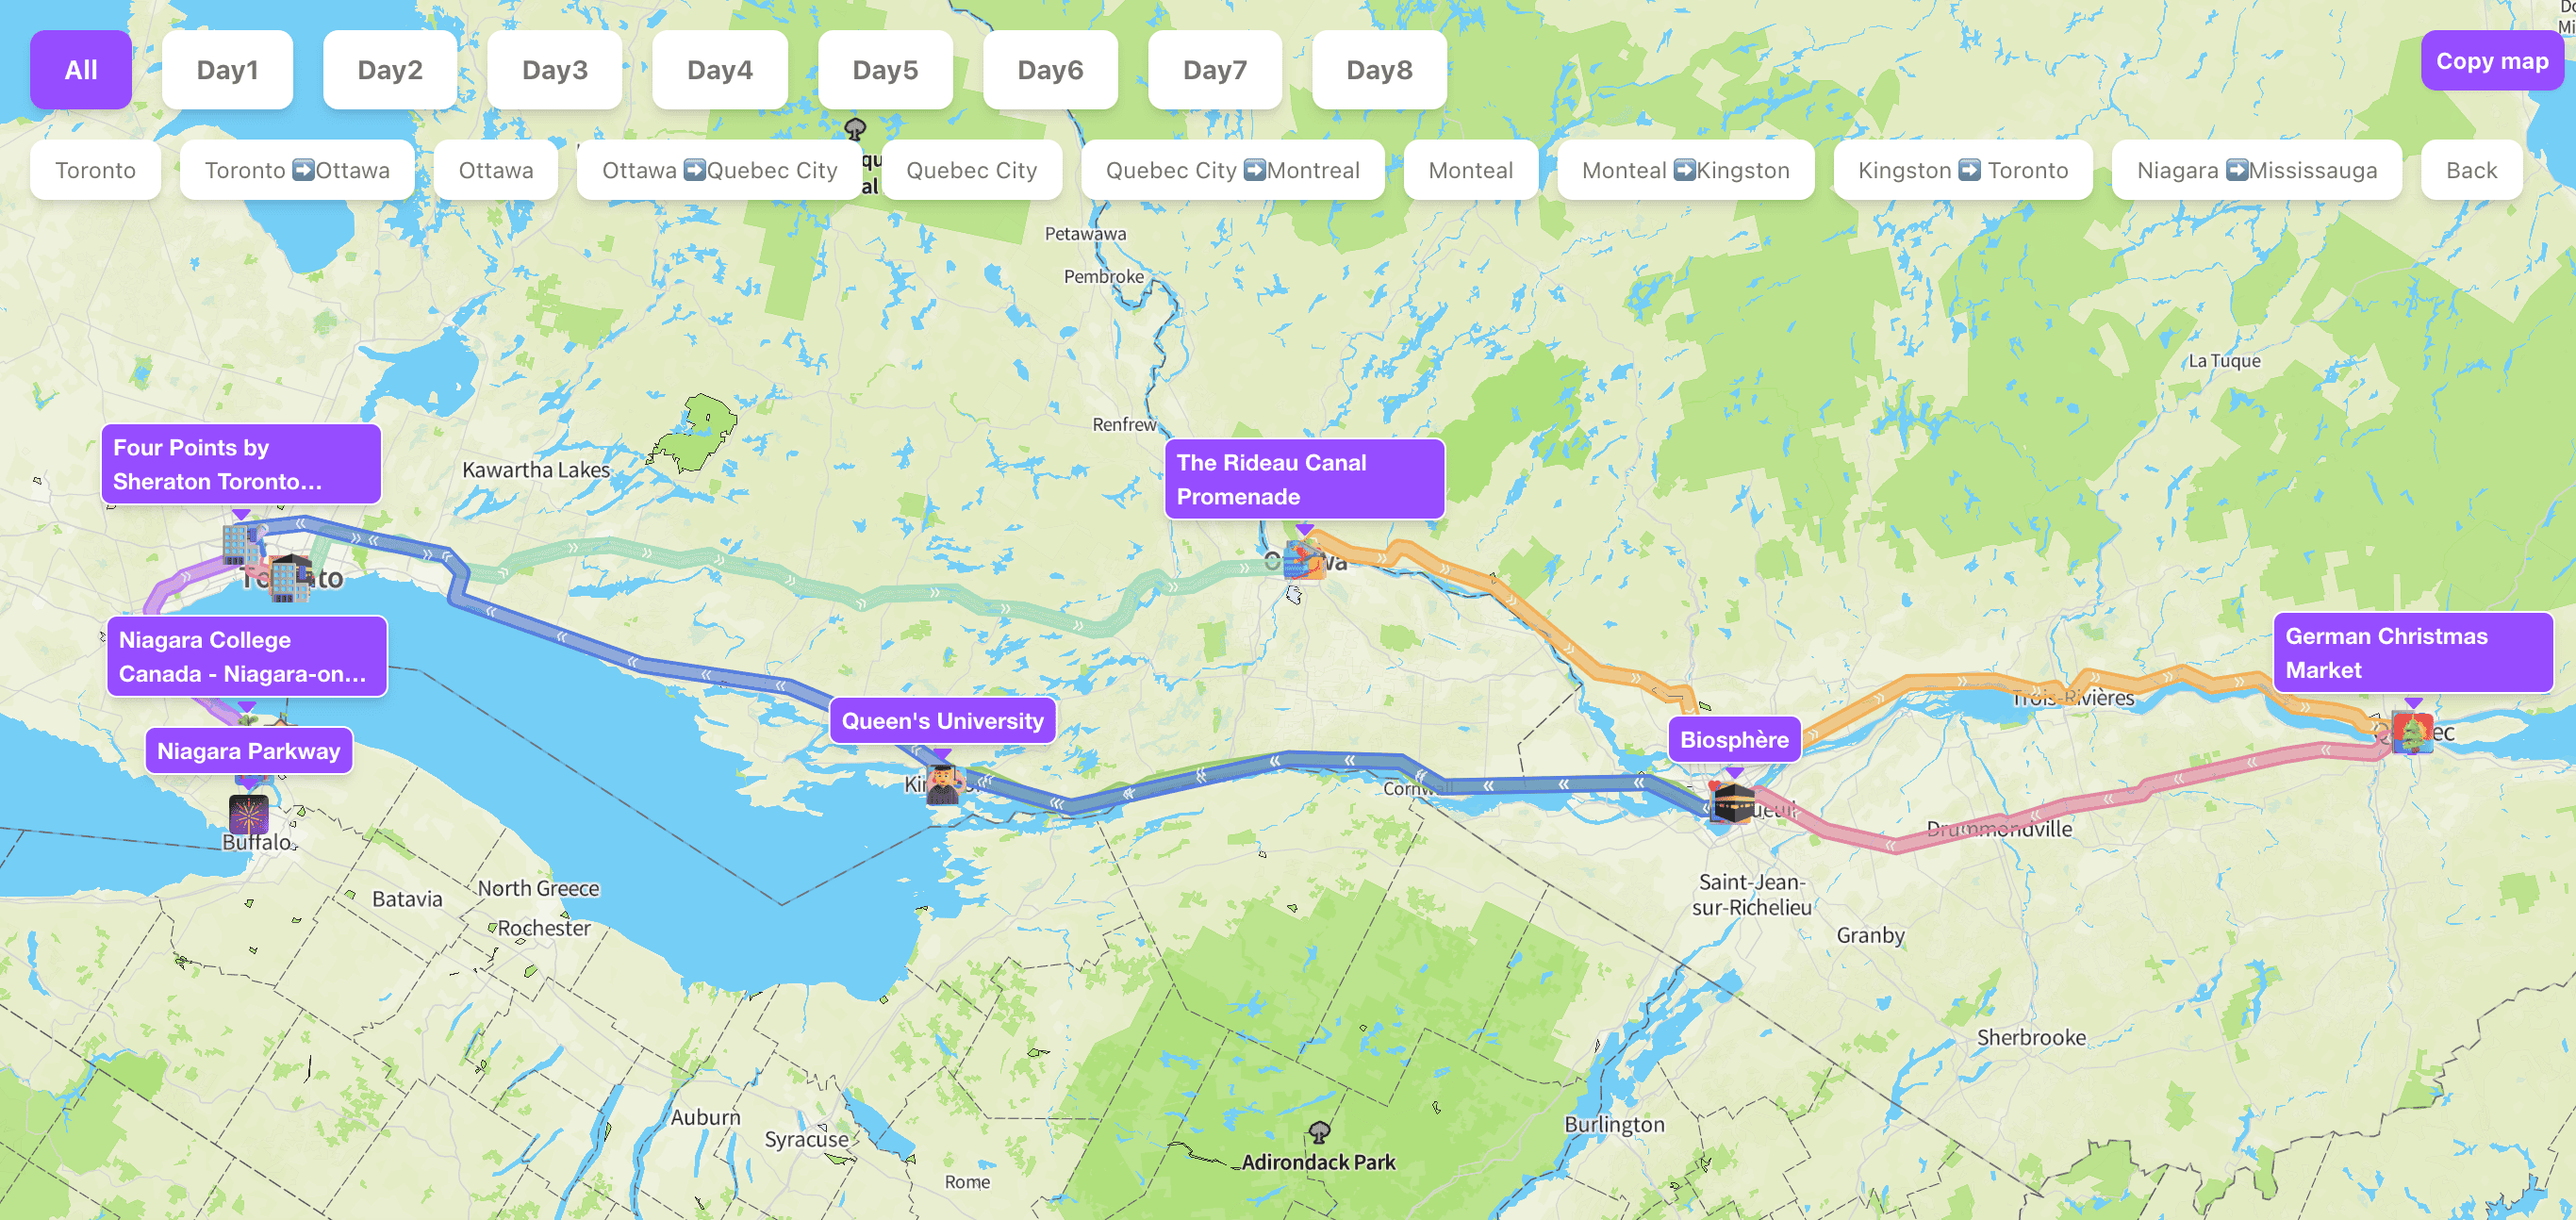
More Features
-
Group: Create different types of groups such as travel days, themes, regions, etc.
-
Add Places Directly: Click the "Pin" icon in the bottom toolbar, then place the icon at your desired location on the map to add a new place. You can click multiple times on the map to batch mark locations.
-
Custom Icons: Select an emoji or upload an image as the new icon for a place by clicking on its default icon.
-
Notes: Use the notes function in the location details page to edit the name of the place.
-
Stickers: Place official stickers or upload photos anywhere on the map.
-
Map Styles: Switch between various styles of map backgrounds.
-
Multi-user Collaboration: Invite friends to collaboratively edit the map in real time.
-
Switch Transportation Modes: Click the transportation icon in the route to switch between different modes of transport, and calculate the distance and travel time promptly.
-
……
Now, you are familiar with the primary features and usage of exping on web client. Try duplicating this template map and start creating your first map!
Click to open the "Map Template" and then click the "Copy Map" icon in the top right corner to navigate to exping. Now, it's your turn to begin your own journey of map creation!
More Featured Map
👉 La La Land Filming Locations
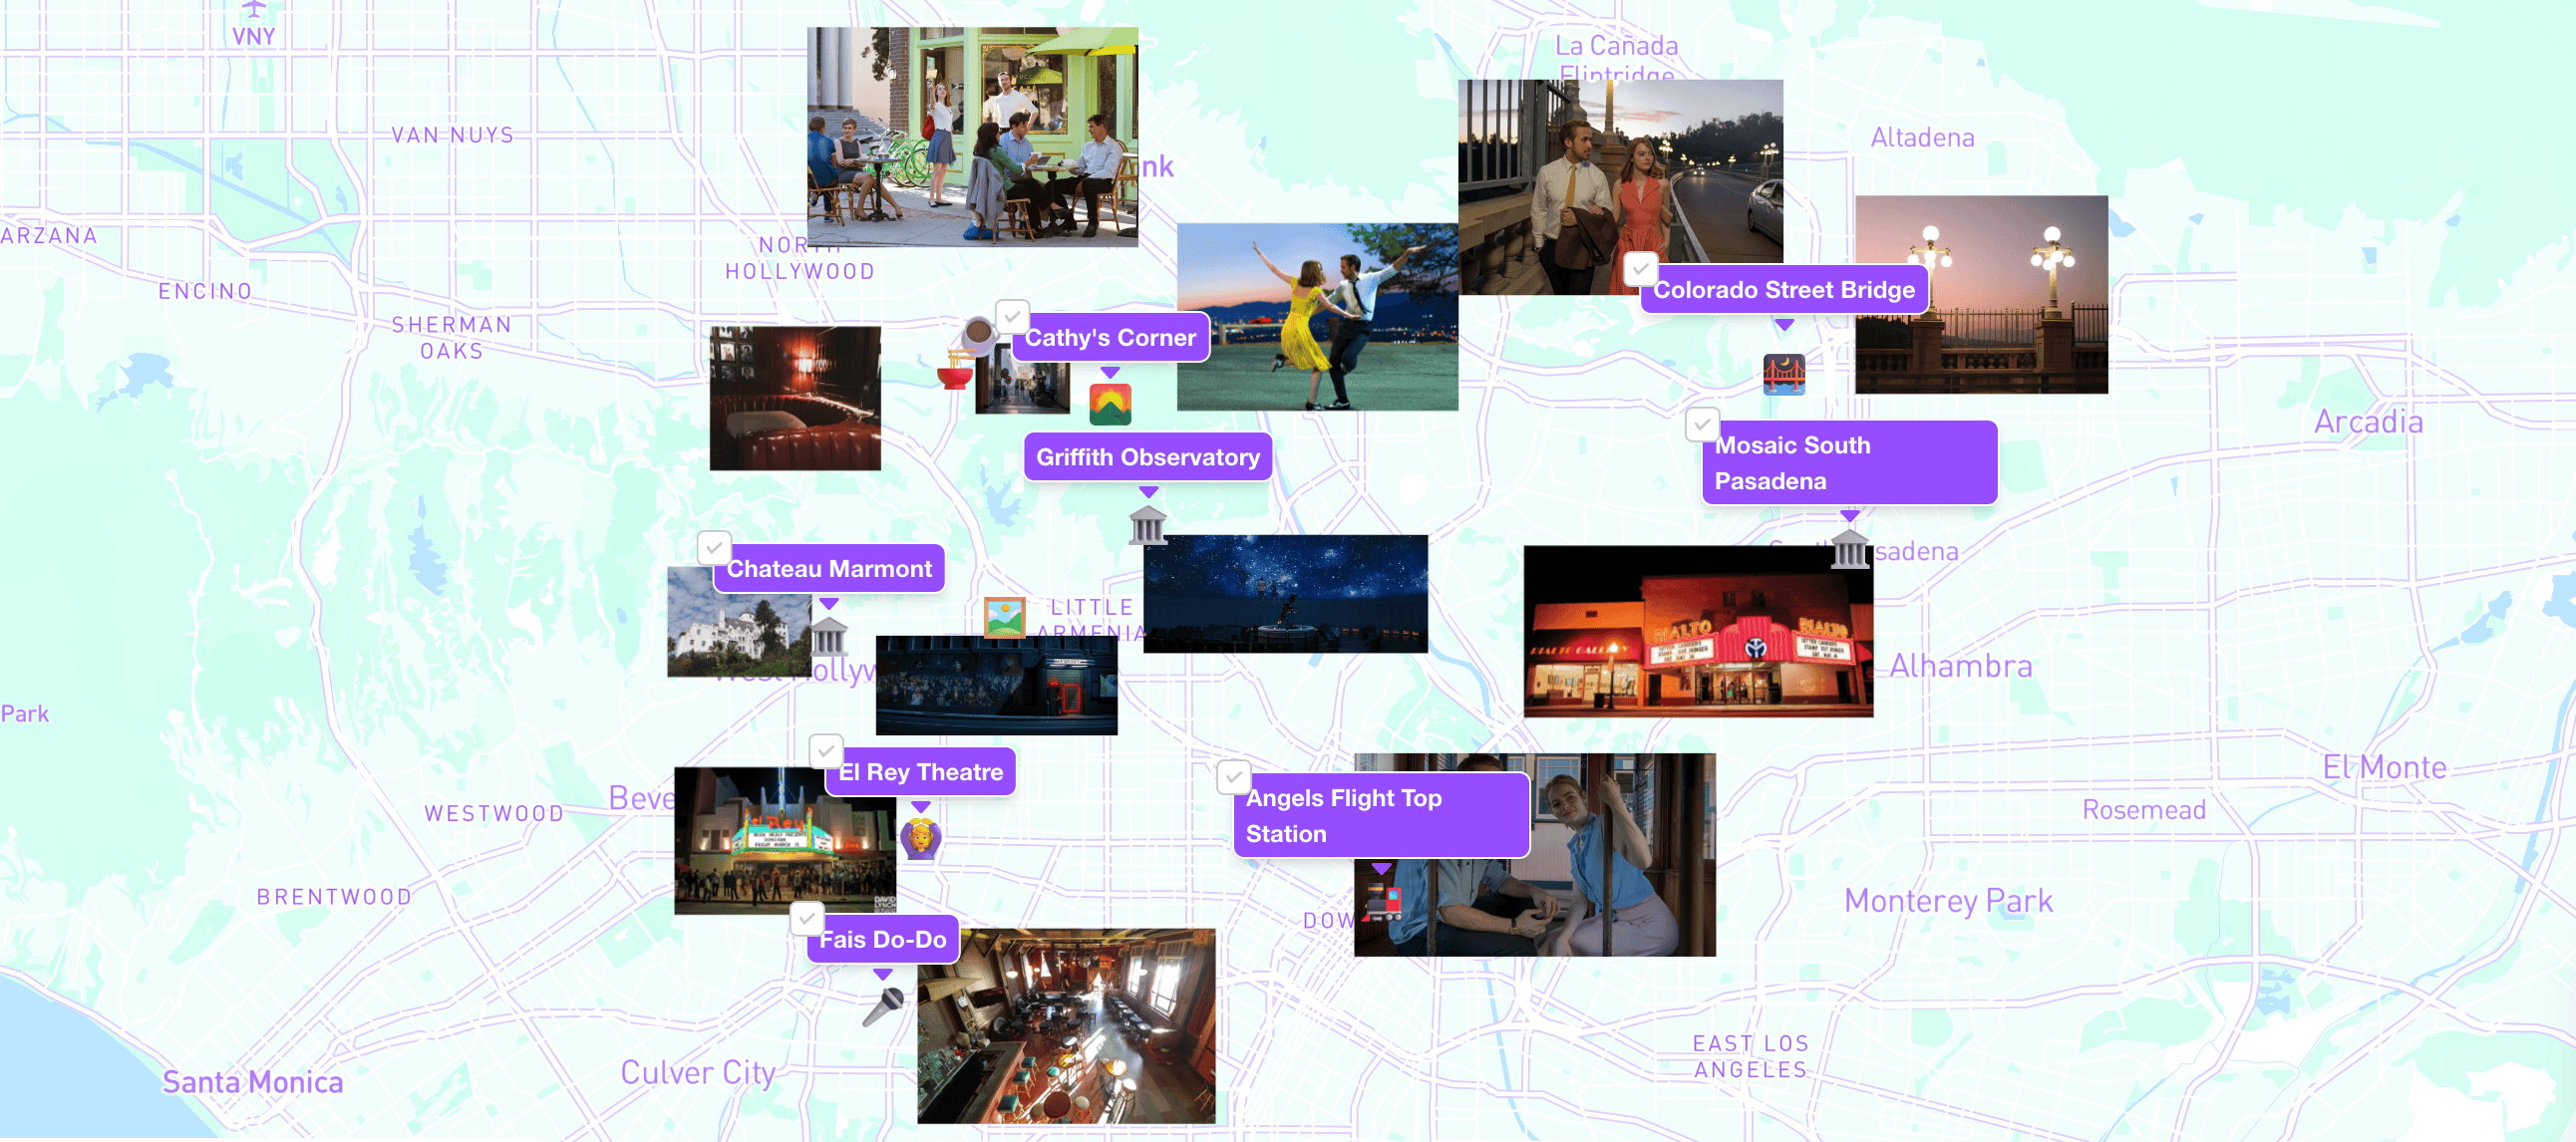
All of the map cases above can be copied and edited! Let's get started!
Share