Product
Revealing New Landscapes with Area Mapping
tl;dr
Web 0.6 introduces a new feature - Area.
In the past, map creation was primarily limited to marking locations and routes. Creators often only able to express their ideas through points and lines. However, the introduction of the Area feature grants creators greater creative freedom. Creators can now draw various shapes and sizes of areas on the map in a more intuitive and flexible manner.
Area Feature
-
Freely draw closed areas of any shape
-
Instant calculation of area size
-
Support for displaying area names and size information on the map
-
Customization of area colors and styles
-
Web browsing of maps supports displaying area-related content
How to Mark an Area?
-
Go to the map editing page on exping web, click the "Area" icon at the bottom
-
Click to mark the first point (starting point)
-
Move the mouse to generate a dynamic straight line from the starting point, then click to mark the second point and connect it to the starting point
-
Continue moving the mouse to preview the area shape among the starting point, second point, and mouse position, allowing you to clearly see the shape of the area to be outlined
-
Repeat the process to mark multiple points, then choose a method to complete the area:
- Press the "Enter" to connect the last added point to the starting point, forming a closed area
- Double-click on a position on the map to add a new point and connect it to the starting point, forming a closed area
- Click on the starting point to form a closed area
-
To cancel the ongoing area marking, you can press "Esc" or click on the area again to cancel

How to Edit an Area?
Click on the selected area to continue editing.
Moving Area
When an area is selected, you can hold down the left mouse button and drag the area to a new position.
Adjusting Shape
While in the selected state, you can hold down the left mouse button and drag the points at the edges of the area to adjust its shape.
Adding Points
After double-clicking to select the area, a small point will appear in the middle of each edge. Select and click on the point to add a new point. By holding and moving the point, the area will reshape accordingly.
Deleting a Point
Press"Delete" to delete a point. After deleting a point, the shape of the area will adjust accordingly.

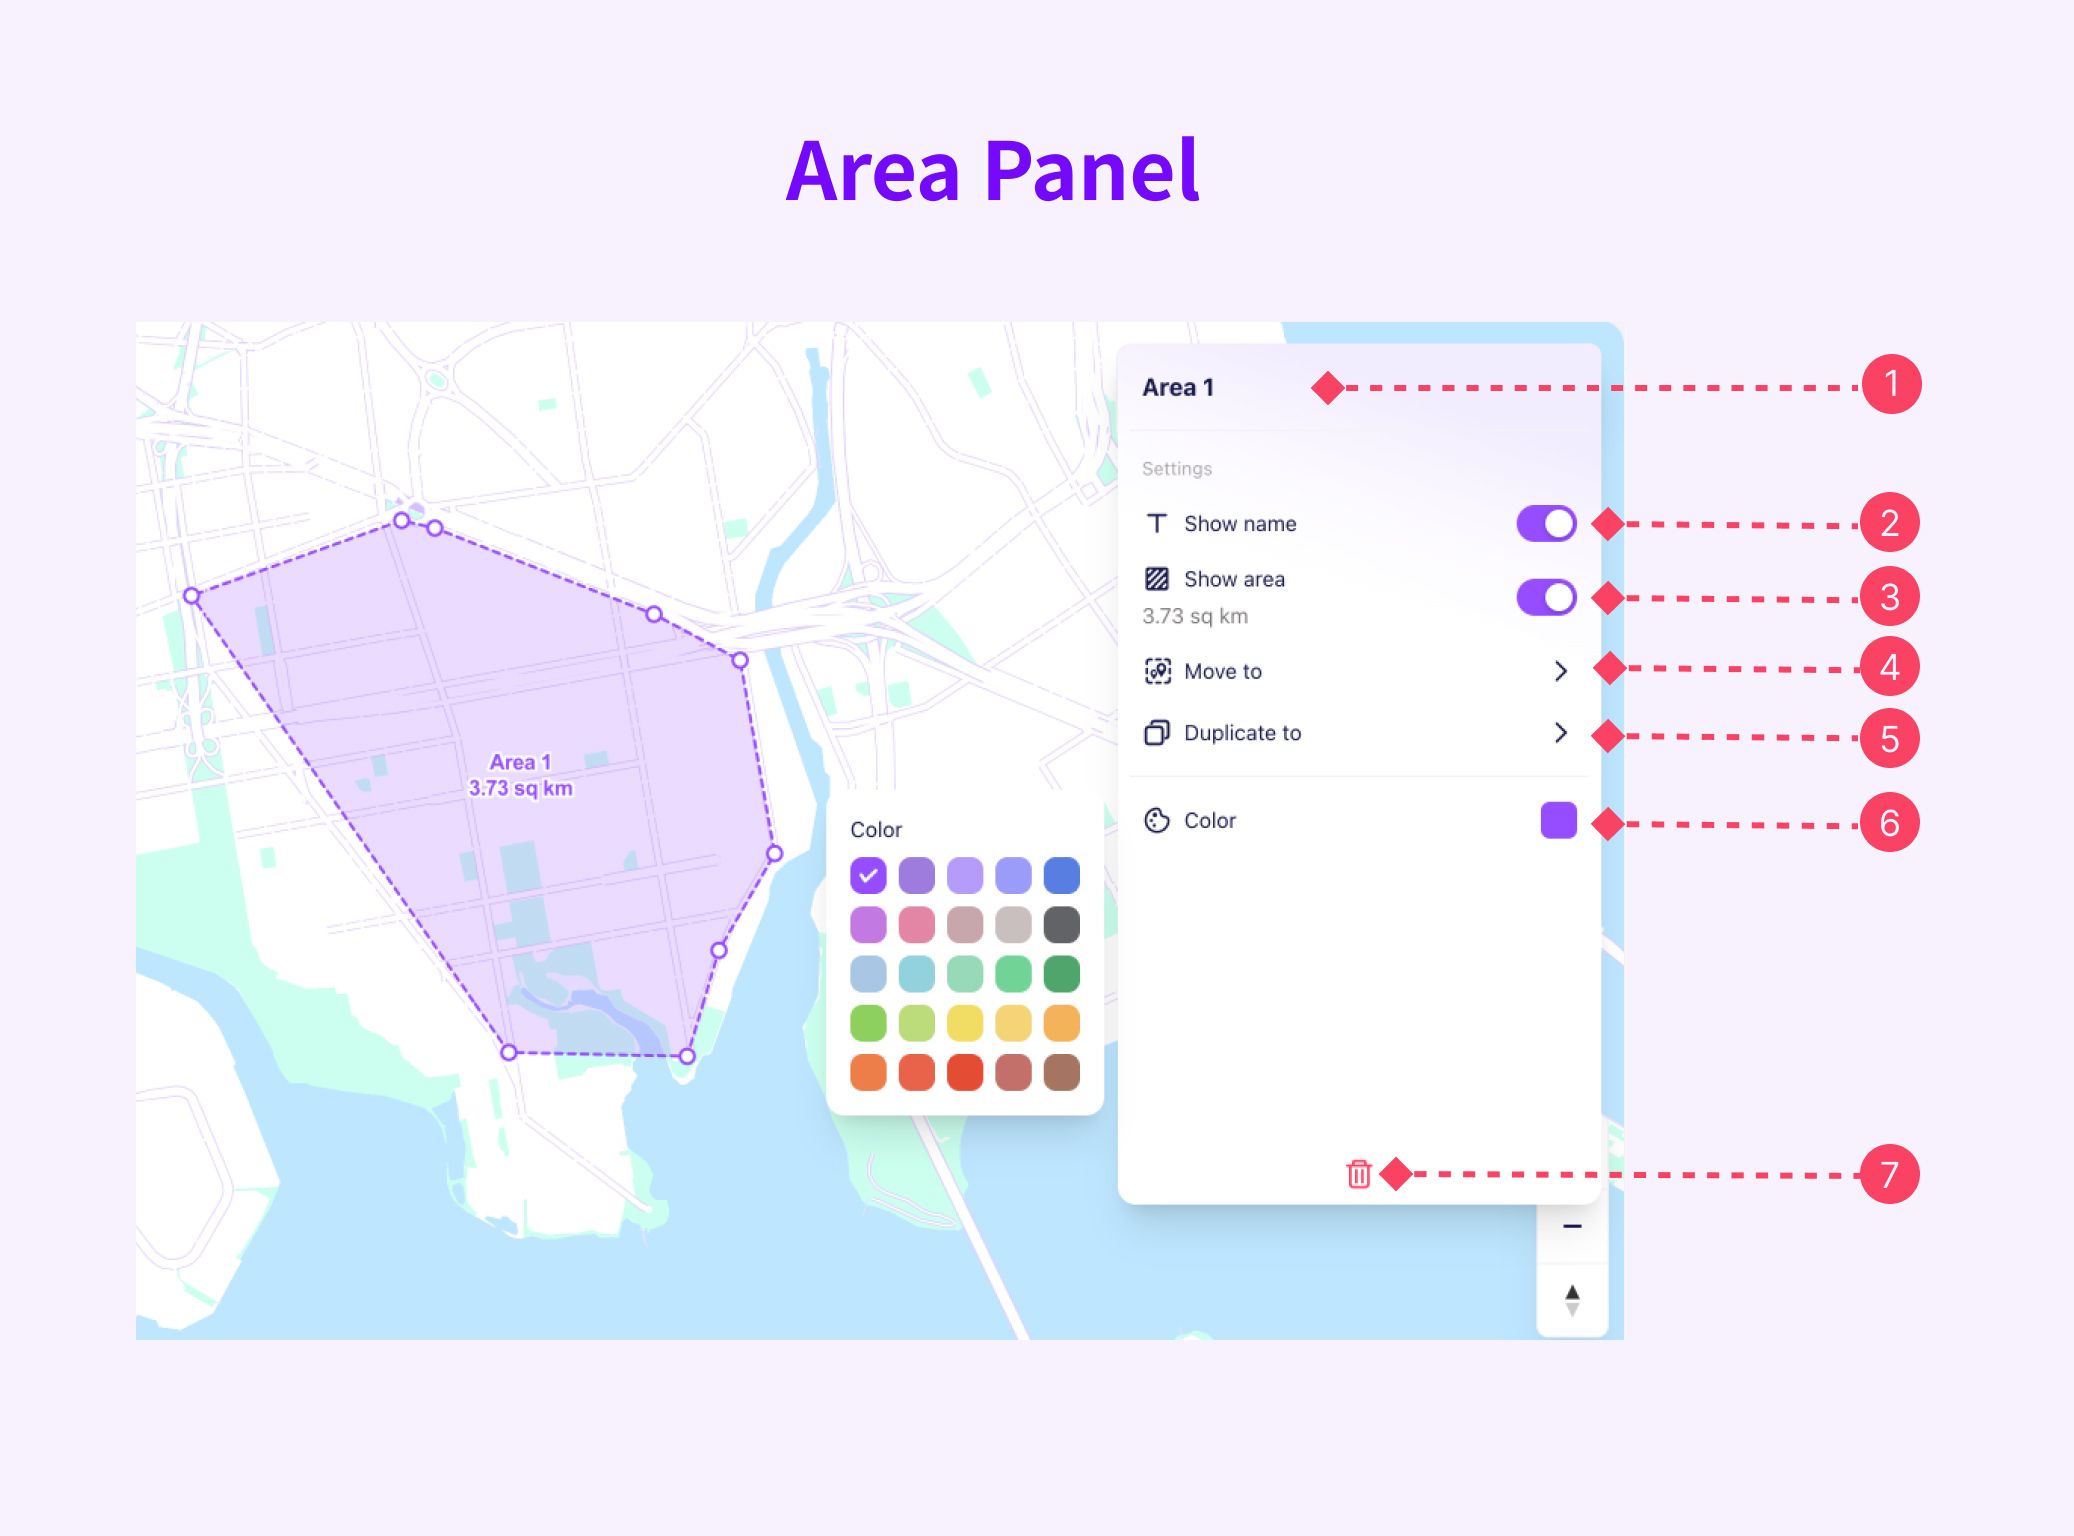
Area Panel
-
Enter or modify area name
-
Click to display the area name on the map
-
Click to display area size information on the map
-
Move the area to selected Group
-
Copy the area to selected Group
-
Switch area color
-
Delete the area
Use Cases of Area Feature
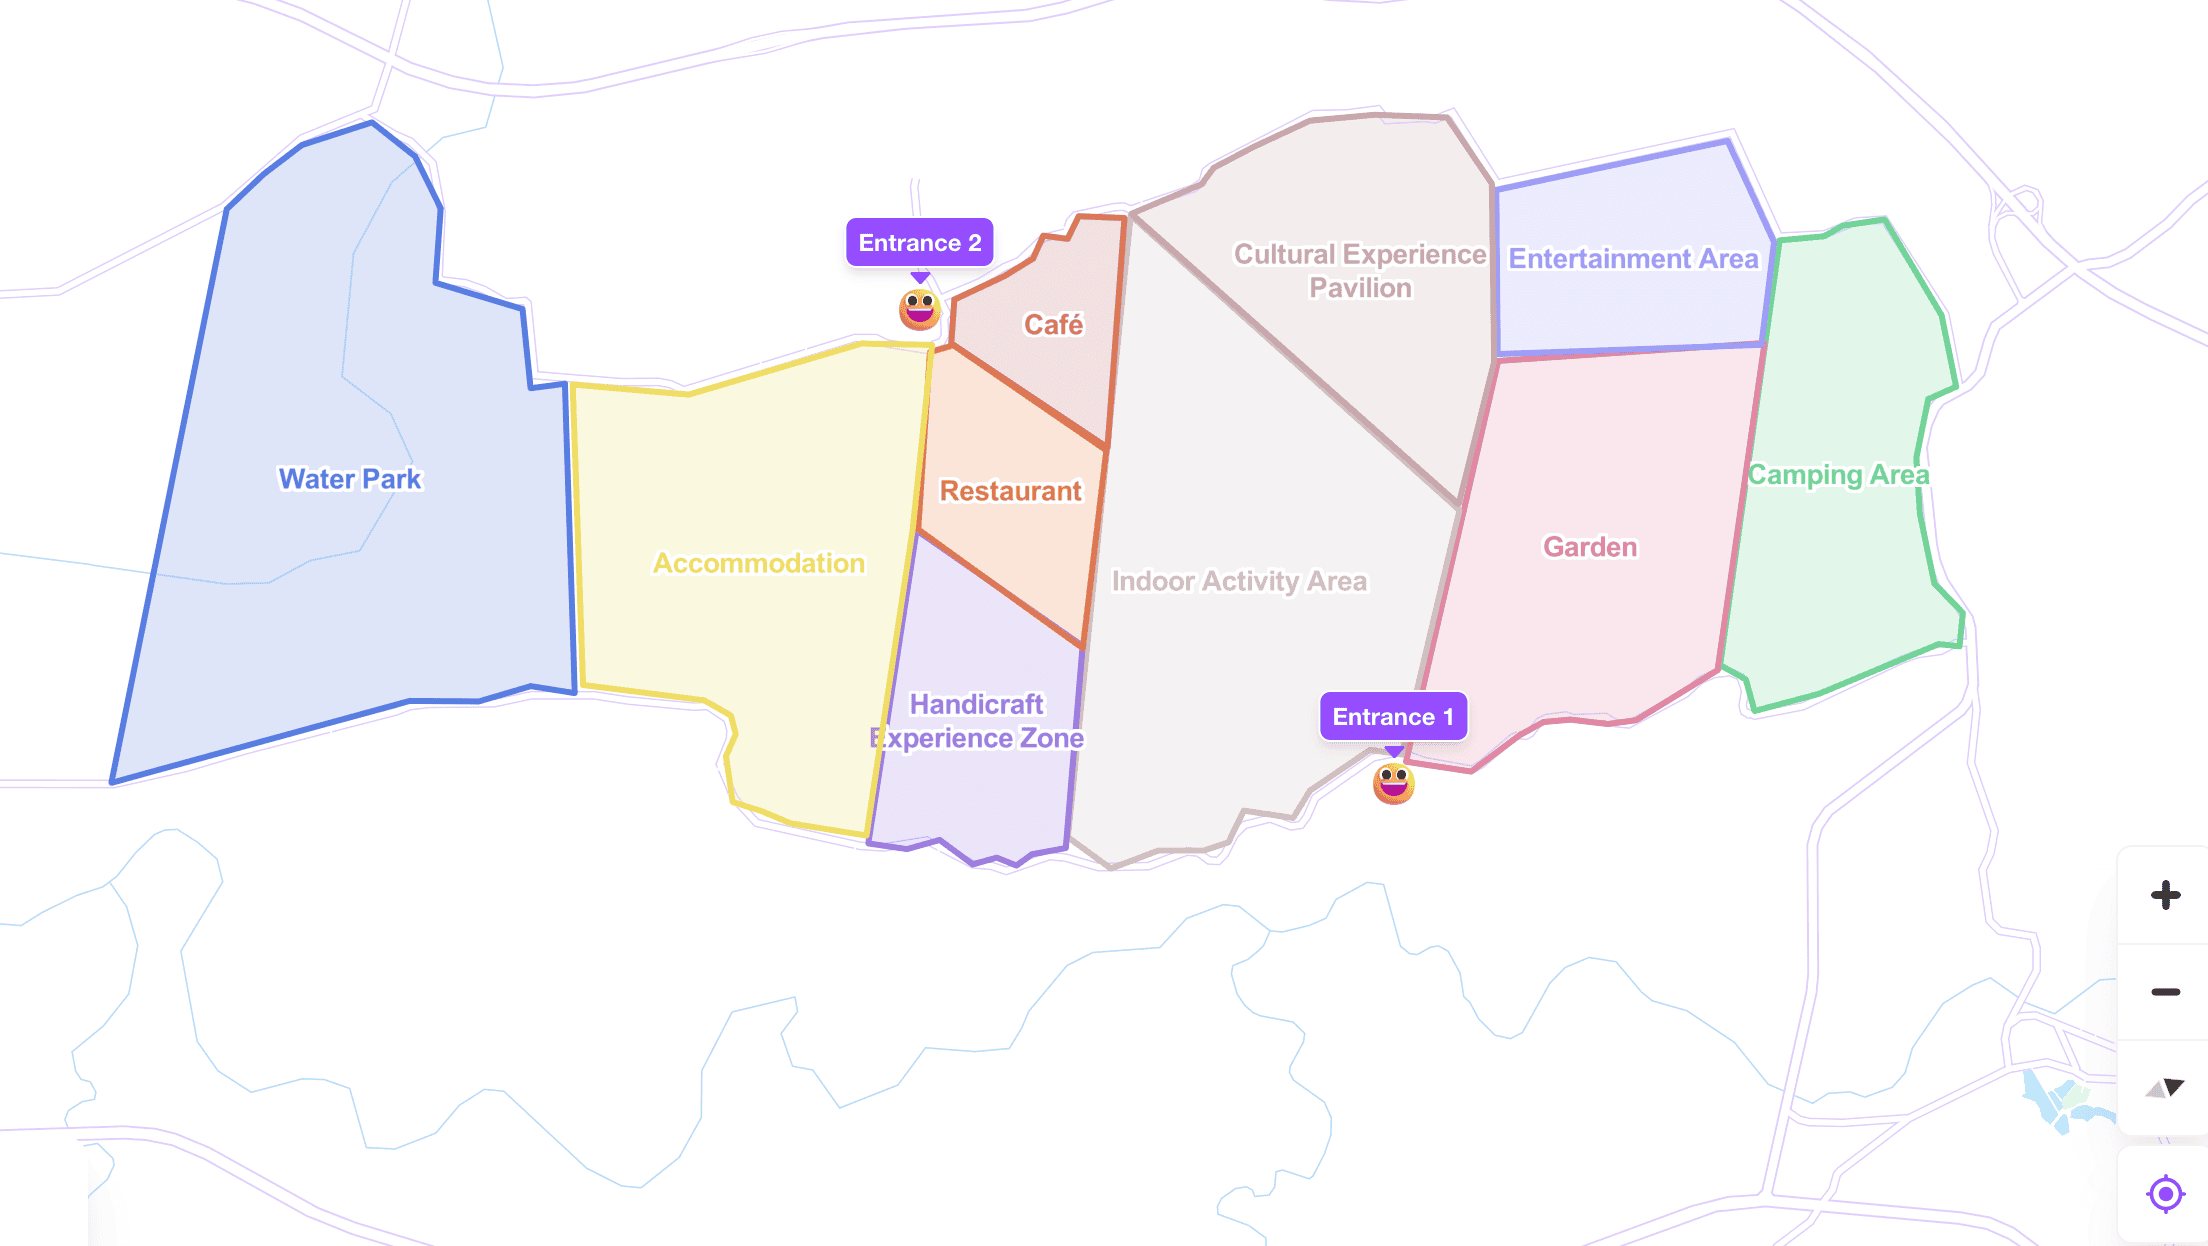
Resort Guide Map
The area function delineates various zones within the resort, providing visitors with a clearer and more intuitive understanding of the recreational areas, enhancing their overall experience.
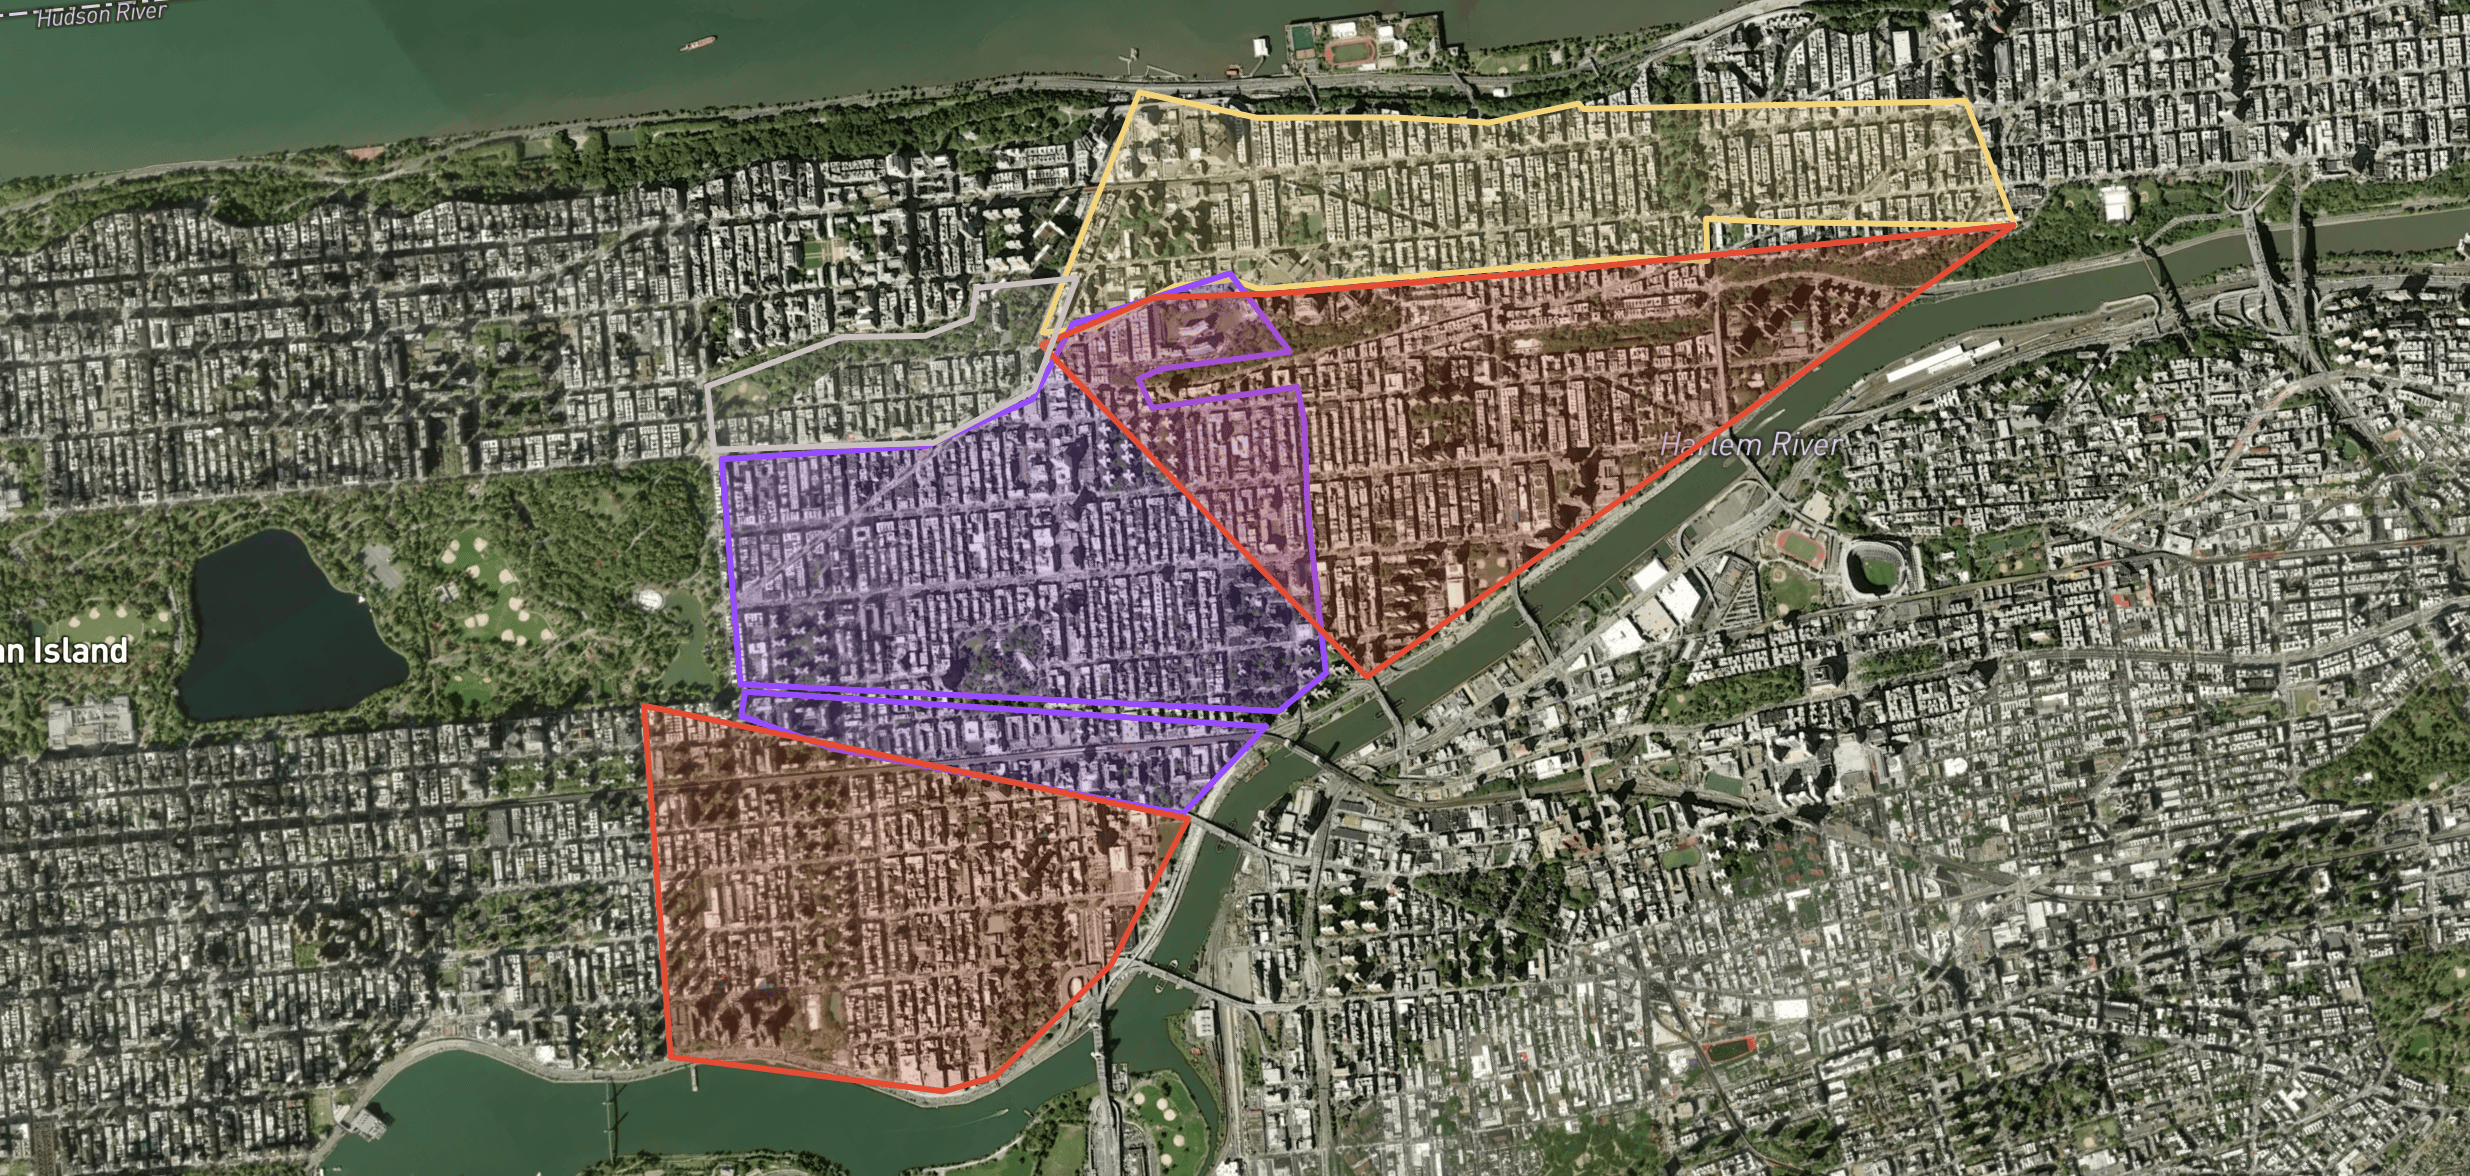
Risk Map
Differentiating crime rates with varying shades of color on the map aids in planning safe travel routes, steering clear of high-risk areas.
Property Map
Display the specific locations and surrounding environments of properties, making it easier for people to choose suitable accommodation options.

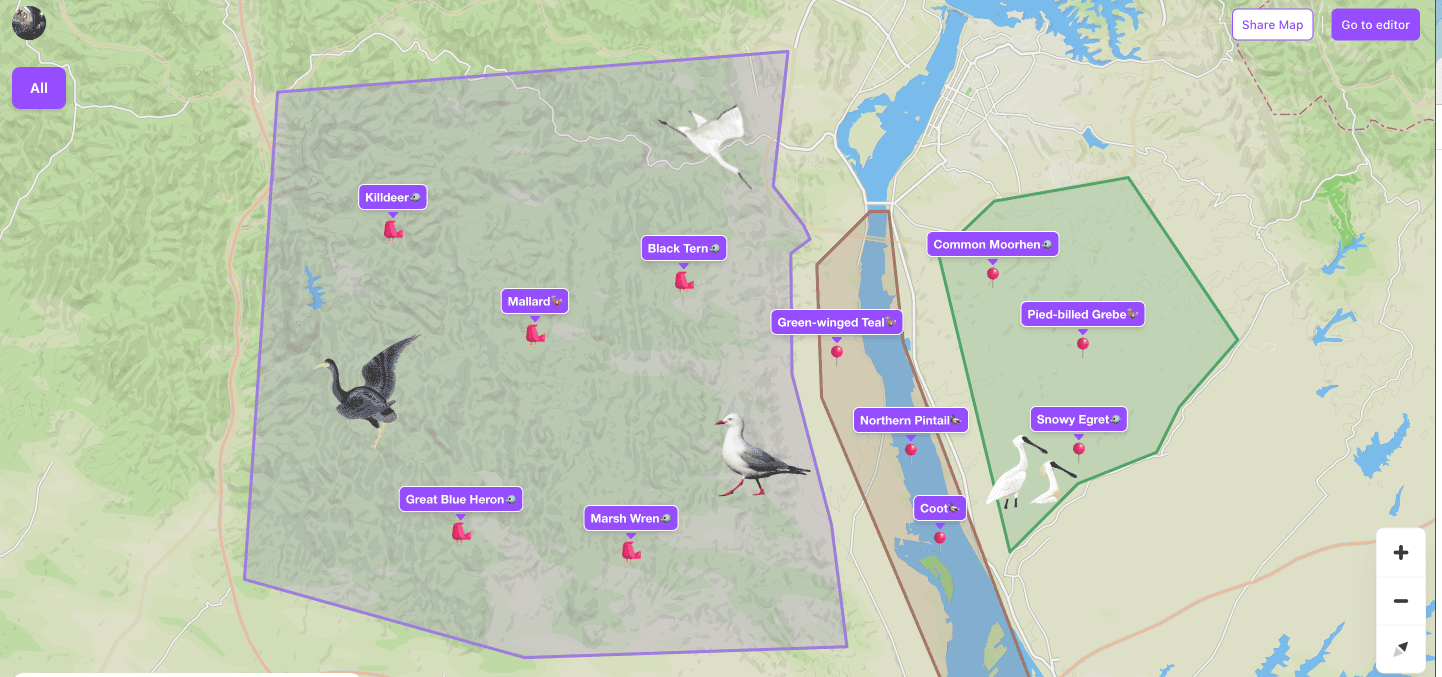
Birdwatching Map
Marking birdwatching areas on the map enables enthusiasts to easily locate spots suited to their birdwatching preferences, fostering a richer and more enjoyable birdwatching experience. Additionally, inviting friends to contribute more birdwatching areas enhances the map collaboratively, creating a diverse and engaging birdwatching map.
Alongside the launch of Area feature, exping Web now offers map sharing styles and supports route color switching and map styles, allowing for more personalized and visually appealing maps. Furthermore, creators can select multiple locations, batch them into groups, and add new routes efficiently, streamlining map creation processes.
Let's explore 👉exping.world now!
Share